7 VERIFICATION AND CALIBRATION AquaLab
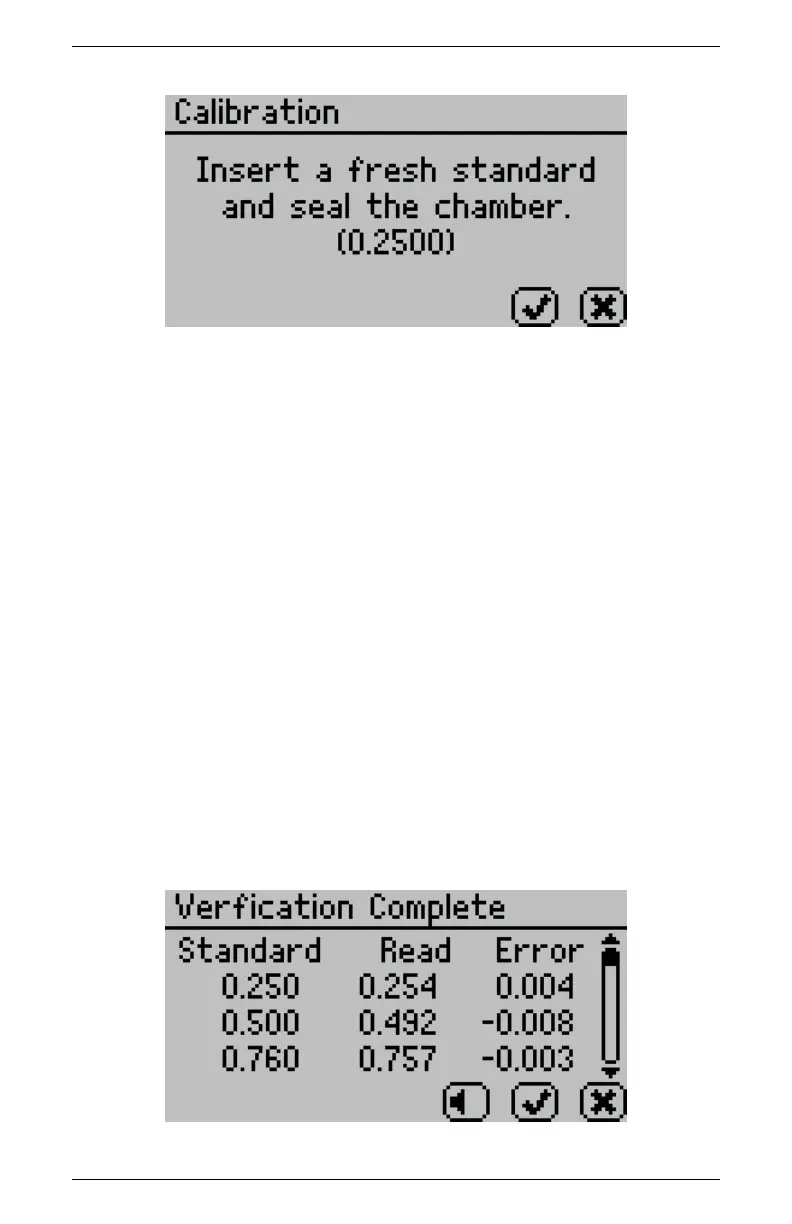
6. Empty the whole vial of 0.25 a
w
standard solution into a sample
cup. Ensure the rim and outside of the cup are clean. Place
the sample cup in the AquaLab sample chamber.
7. Carefully close the lid and move the lever to the Read position.
Press the Check icon button to begin testing.
8. After your AquaLab has finished measuring the verification
standard, a new screen appears requesting that a 0.50 a
w
stan-
dard be placed in the chamber. Repeat steps 6 through 7 for
0.50, 0.76, and 0.92 a
w
standards.
Note: If you decide at this point not to continue with the multi-
point calibration program, just return the lever to the Open po-
sition or press the cancel button and return to the previous
screen.
9. When measurements are complete on all four standards, a ver-
ification complete window appears showing the testing results
for each standard.
44

 Loading...