70
TZ068
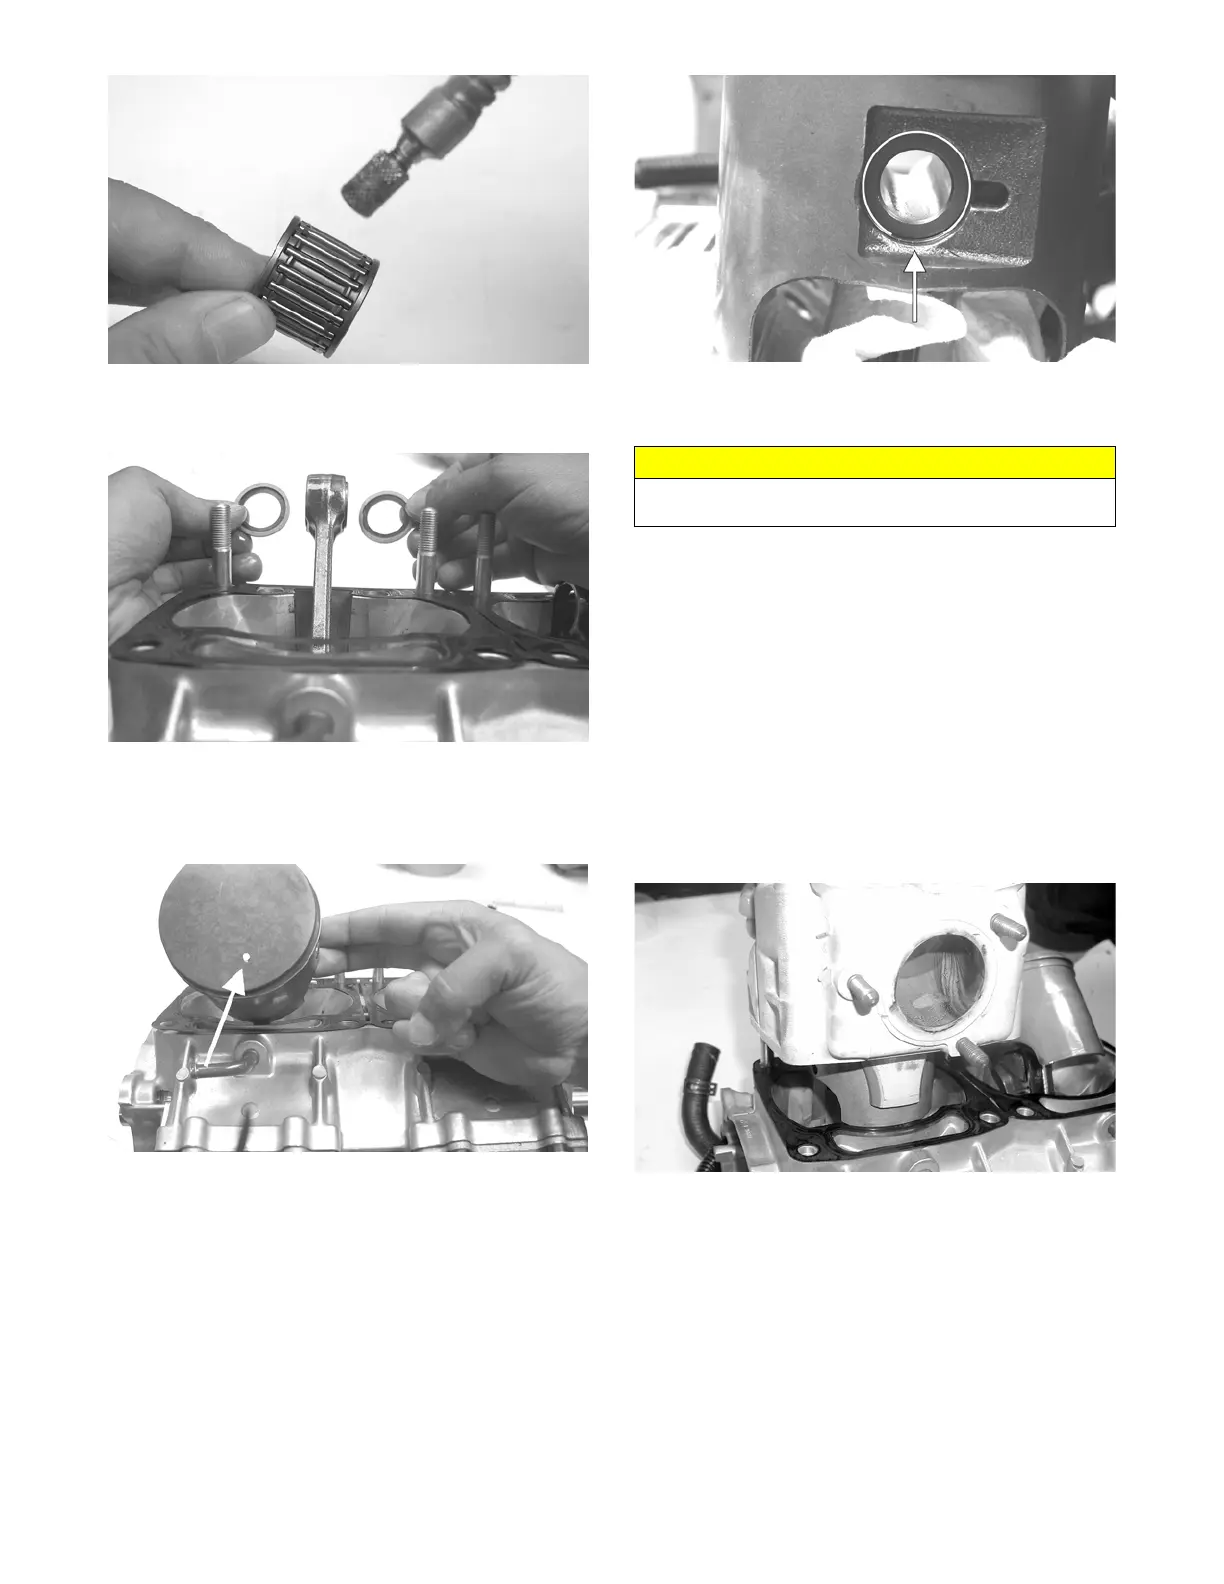
NOTE: The shoulder side of the washer must seat to
the needle bearing.
FC075
27. Place each piston over the connecting rod so the indi-
cator dot on each piston will point toward the
intake/exhaust ports; then secure with an oiled piston
pin.
FC079A
28. Install the new circlips so the open end is directed
either up or down.
CM195B
NOTE: Install the circlip to the inside of the piston
before installing the connecting rod.
29. Rotate each piston ring until the ring ends are prop-
erly positioned on either side of the ring keeper; then
apply oil to the piston assemblies and cylinder bores.
Remove the rubber bands or hoses from the connect-
ing rods.
30. In turn on each cylinder, place a piston holder (or
suitable substitute) beneath the piston skirt and
square the piston in respect to the crankcase; then
using a ring compressor or fingers, compress the
rings and slide the cylinder over the piston. Remove
the piston holder and seat the cylinder firmly onto
the crankcase.
NOTE: The cylinders should slide on easily. DO
NOT force the cylinders on.
FC076
31. Secure each cylinder by installing the eight nuts. DO
NOT TIGHTEN AT THIS TIME.
32. Install the oil-injection hoses and secure with the
clamps; then place the lower check-valve assembly
into position and secure with the gaskets and union
cap screw. Tighten to 48 in.-lb.
33. Secure the cylinders (from step 31) by tightening the
cylinder base nuts to 44 ft-lb in three steps using the
pattern shown.
CAUTION
Make sure the circlips are firmly seated before continu-
ing with assembly.