89
XM017
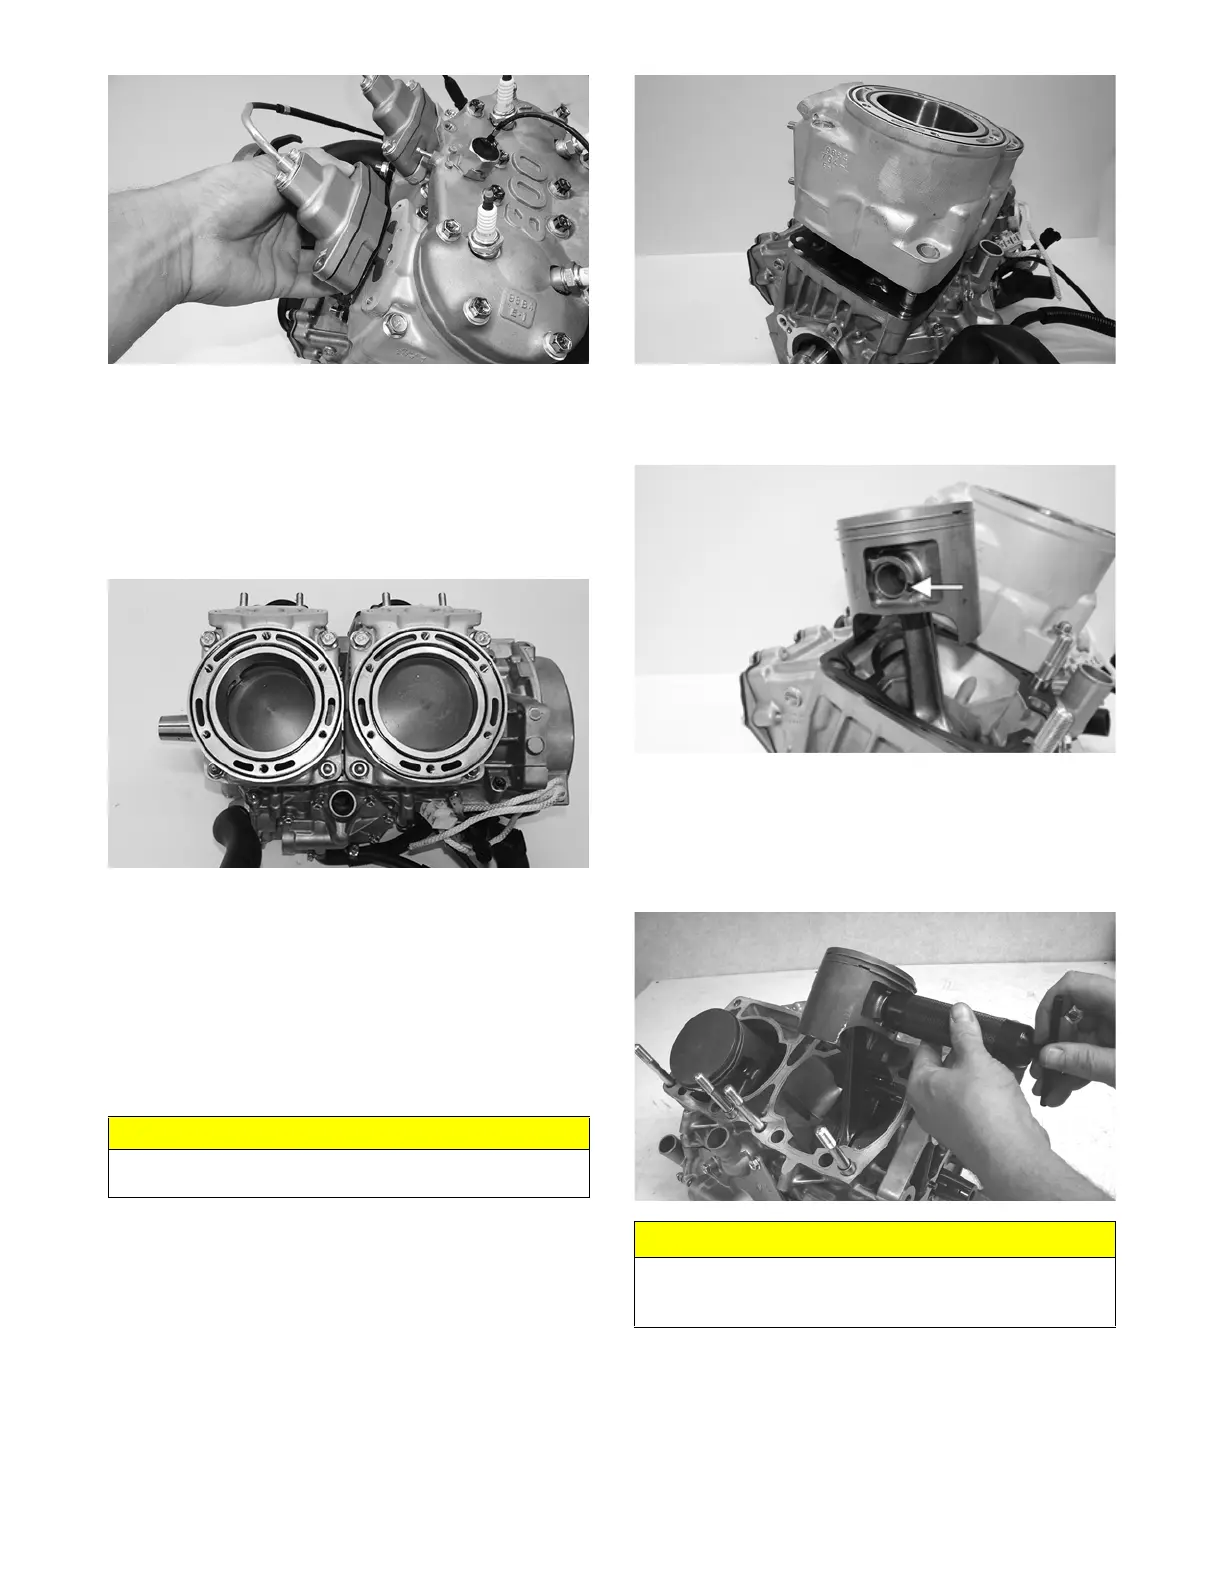
9. Remove the spark plugs.
NOTE: At this point, remove the knock sensor and
lock plate from the cylinder head by bending the lock
plate tabs down and unthreading the sensor.
10. Remove the cap screws with O-rings securing the
cylinder head; then separate from the cylinders.
Account for the O-rings.
XM022
NOTE: When removing the cylinders, place the
engine on its intake flanges on a drain tray to allow
residual coolant to drain from the cylinder/crankcase
water jacket.
11. Remove the four nuts and four cap screws securing
the cylinders to the crankcase; then using a soft ham-
mer, gently tap the cylinders and remove from the
crankcase by lifting them straight up off their studs.
Account for gasket(s) and alignment pins.
XM018
12. Remove the PTO-side piston-pin circlip from the
PTO-side piston; then remove the MAG-side pis-
ton-pin circlip from the MAG-side piston.
XM020A
13. Using Piston Pin Puller and medium Extractor Nut,
remove the piston pins from both pistons.
NOTE: For proper assembly, keep all MAG-side
components and all PTO-side components separated.
Assemble them on their proper sides.
CM150
14. Lift the pistons clear of the connecting rods and
remove the small-end connecting-rod bearings
(account for two washers); then remove the piston
rings. Keep each piston with its rings; keep each pis-
ton pin and bearing together as a set.
CAUTION
When removing a cylinder, be sure to support the piston
to prevent damage to the crankcase and piston.
CAUTION
DO NOT use any type of punch to drive the piston pin
free of the piston; damage may result. Use a piston-pin
puller only.
 Loading...