EN – 17
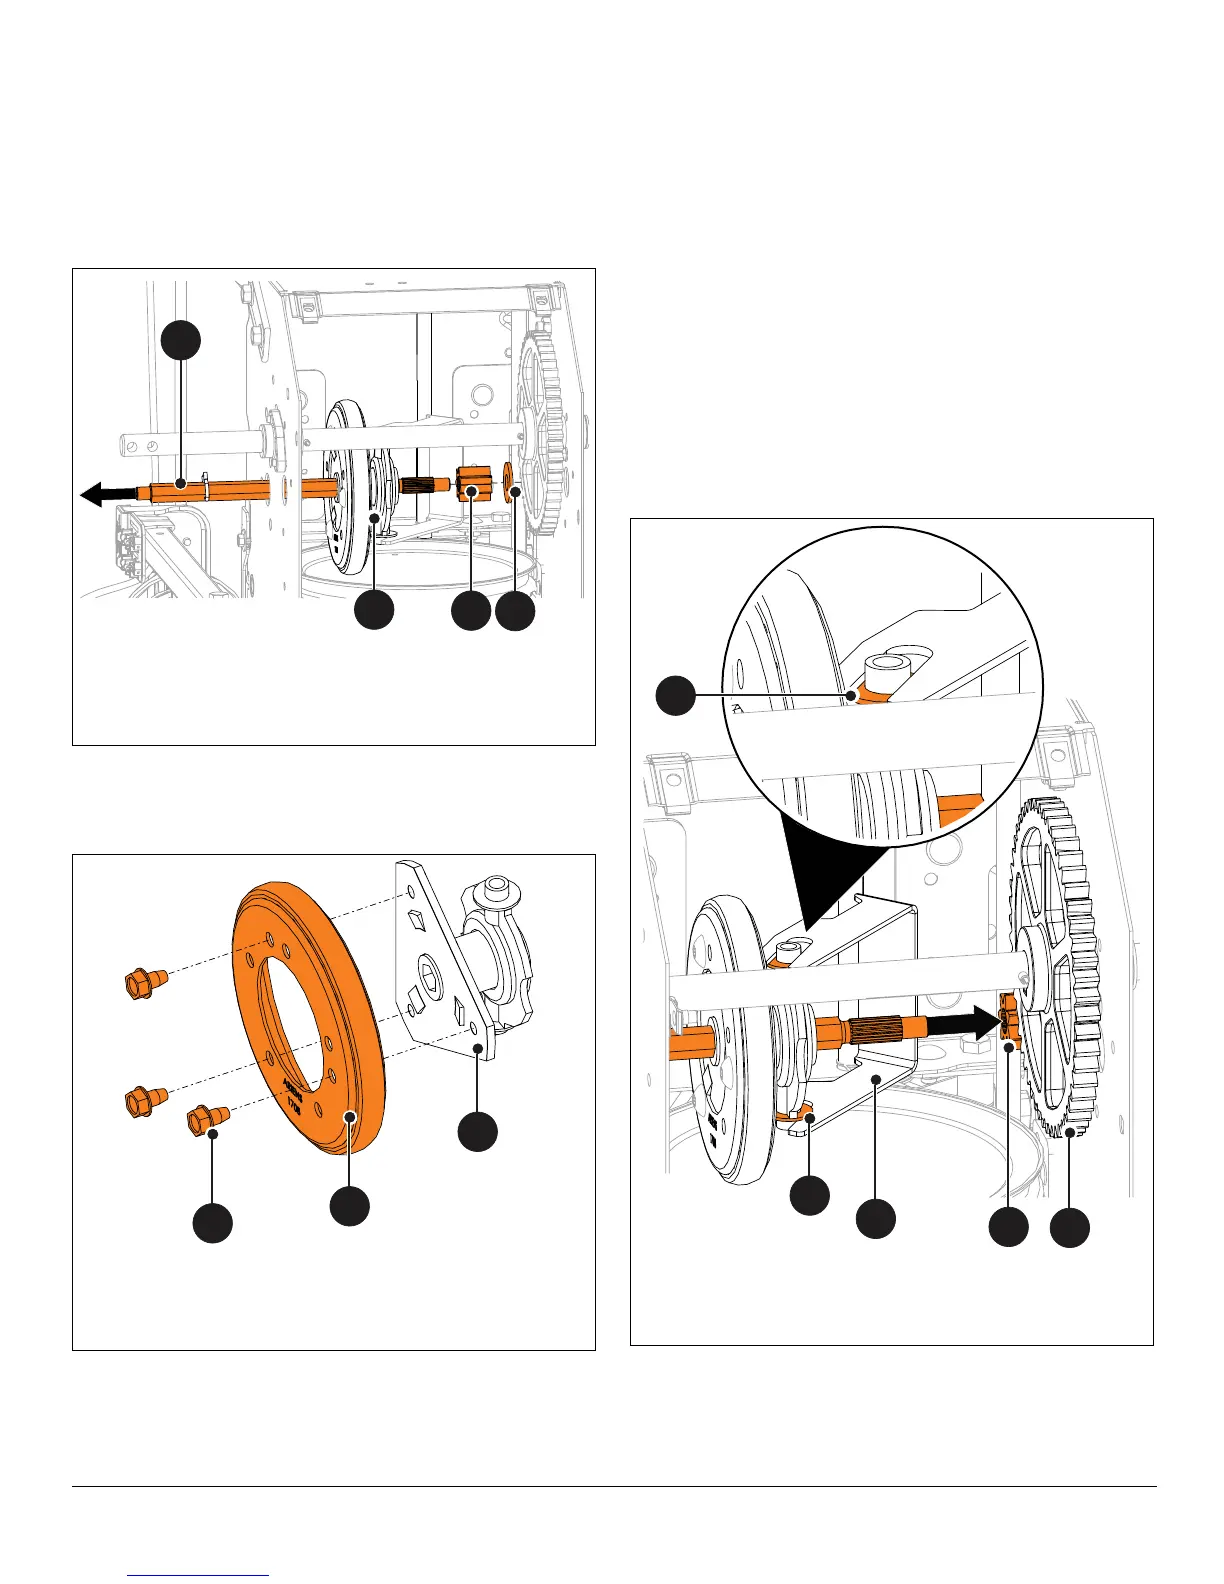
See Figure 24.
8. Move hex shaft left and remove pinion gear and flat
steel washer from hex shaft.
9. Continue moving hex shaft left and remove friction
disc.
NOTICE: For ease of removal on track models, position
friction disc assembly as far left as possible.
See Figure 25.
10. Remove hardware securing friction disc to drive
carrier and remove friction disc.
Install Friction Disc
1. Install friction disc to drive carrier with cup side
positioned toward drive carrier. See Figure 25.
2. Secure friction disc to drive carrier with three tapping
screws. Torque to 7 – 8 N•m (5 – 6 lb-ft).
See Figure 26.
3. Reinstall friction disc assembly into shift fork. Make
sure washers on assembly are positioned against shift
fork as shown.
NOTICE: Move shift fork left for easy access.
4. Reinstall hex shaft through frame and friction disc
assembly.
5. Reinstall pinion gear and flat steel washer onto hex
shaft.
6. Align pinion gear with spur gear and insert hex shaft
into frame and bearing flange.
7. Reinstall left bearing flange and secure with three
tapping screws.
8. Reinstall spring clip into hex shaft.
Figure 24
1. Friction Disc Assembly
2. Hex Shaft
3. Pinion Gear
4. Flat Steel Washer
1
2
3
4
Figure 25
1. Friction Disc
2. Drive Carrier
3. Tapping Screw
1
2
3
Figure 26
1. Shift Fork
2. Flat Steel Washer
3. Pinion Gear
4. Spur Gear
1
2
34
2
 Loading...