Installation manual for CD72/95/15003 Page 9
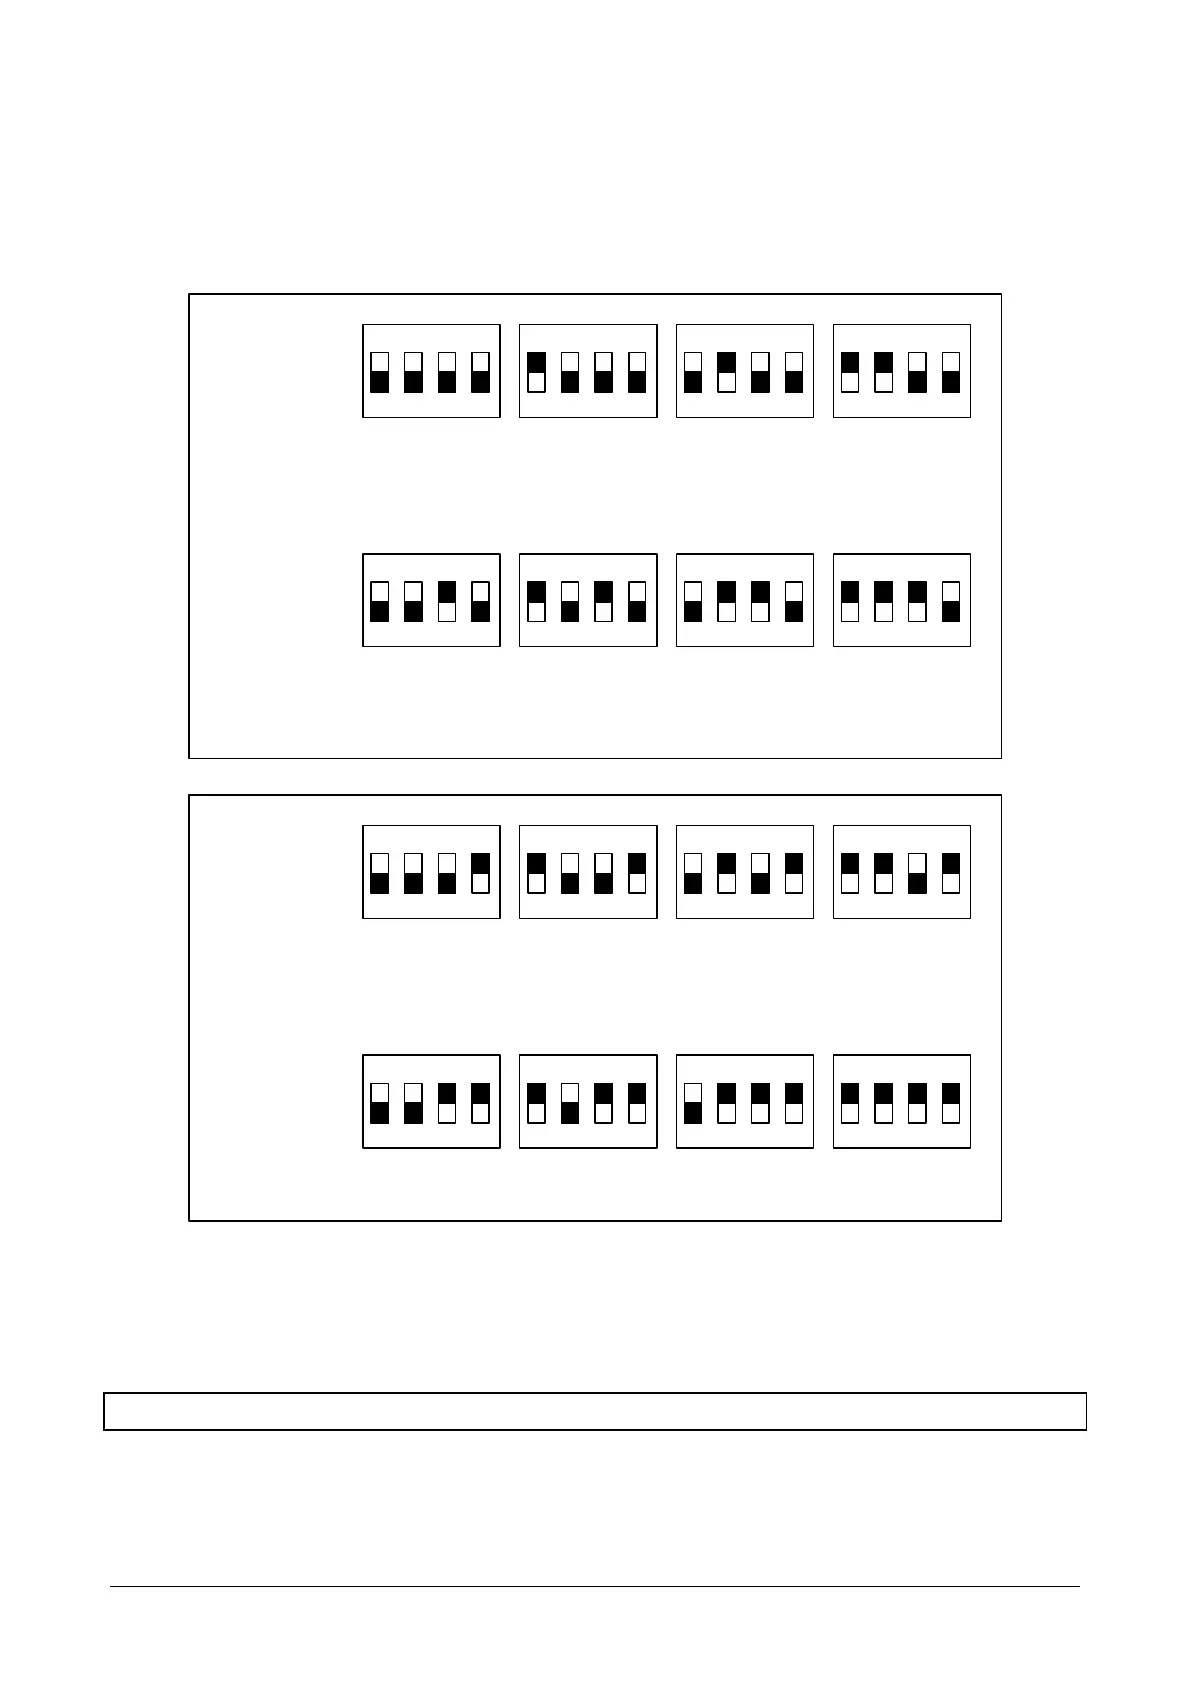
2. Set the DIP switches of all the remote keypads and expanders.
Remote 1 must be a keypad.
CD7203, remotes 2 to 4 must be keypads and remotes 5 and 6 expanders.
CD9503/15003, remotes 2 to 8 can be keypads or expanders but remotes 9 to 16 must be
expanders.
Keypad 1
Keypad 1
(all off)
Remote 2
Keypad 2
Remote 3
Keypad 3
Remote 4
Keypad 4
CD95/150
CD72
Remote 5
Expander 1
Remote 6
Expander 2
Remote 7
Remote 8
CD95/150
CD72
Expander 9
Expander 10
Expander 11
Expander 12
CD95/150
only
Expander 13
Expander 14
Expander 15
Expander 16
CD95/150
only
Figure 3. Overview of the dipswitches on remotes
3. Close the tamper switches on the remote keypads, expanders and the control panel. Also close all
zones which can cause a direct alarm. If this is not done, the system will be triggered as soon as it is
switched on.
4. Remove link LK1 or JP1 from the PCB so that it returns to default settings.