10
SECTION
B
Step 2
Shake the Assure Prism Control Solution bottle well before each test.
Step 3
Removethecapandsqueezethebottletodiscardtherst1or2drops.
Apply one drop of control solution to the top of the control solution cap.
Step 4
After the symbol appears on the display, apply the solution to the narrow
edgeoftheteststripuntilthemeterbeeps.Makesuretheconrmation
windowllscompletely.
NOTE
• The meter will switch off if the control solution sample is not applied
within 2 minutes of the
symbol appearing on the screen. If the
meter turns off, remove the strip, reinsert, and start from step 2.
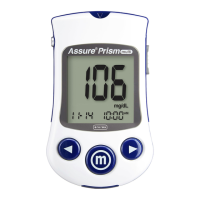
Step 5
A test result will appear after the meter counts down from 5 to 1.
After your control solution result appears on the display, press for
3secondsuntil“check”appearsonthedisplay.
When“check”isdisplayed,theresultisstoredinthemeter’smemory
but it is not included in the averages.
Compare the result displayed on the meter to the range
printed on the test strip vial or on the individually wrapped
test strip box. If the result falls within the specied range,
you are ready to use the meter and test strips to test
with blood.
Step 6
Remove the used test strip from the meter’s test strip port.
The meter will turn off automatically. Used test strips should
be safely discarded in disposable containers.
NOTE
• Assure Prism Control Solution can
be purchased from your local supplier
or pharmacy. If they do not stock it,
contact ARKRAY Customer Service at
800.818.8877, 24 hours a day, 7 days a
week, USA and Canada.
CAUTION
• The ranges printed on the test strip vial
or on the individually wrapped test strip
box are for the Assure Prism Control
Solutions only. They do not have any
connection to blood glucose level.
Control Solution Range
Control 1:
Control 2:
 Loading...