2. Activating Flashing Yellow - When Unit1 and/or Unit2 are Red (LED Indicator ❸❹ Red) 5 second long
press Go Button ❻ or ❼ to activate the respective unit to flashing yellow.
3. Deactivating Flashing Yellow – when Unit1 and/or Unit2 is in Flashing Yellow, quick press Stop Button
❺ to deactivate Flashing Yellow, and return the units to red. Units can now be operated as usual (e.g
changing to green or reactivating either units to Flashing Yellow).
Note:
o If a unit is green or has a critical fault, neither unit can be activated to flashing amber.
o If one unit is flashing amber and one unit is red, the red unit can be activated to flashing amber.
o If one unit is flashing amber and one unit is red, the red unit cannot be changed to green.
o All flashing amber cannot be changed to green, must be changed to red before changing to green.
o If a critical fault occurs during flashing yellow, the unit will automatically change to red.
Pairing the eSTOP™ Handheld Remote Controller (HRC) to lantern units
The eSTOP™ HRC can be paired to any eSTOP™ lantern units. Once a lantern unit is paired to a HRC it is stored
in memory, they will be automatically synced when powered up and ready for operation. By default, a HRC is
paired to 1 lantern unit only. Repairing is not required unless the HRC is pairing to a different lantern unit,
pairing 2 lantern unit to 1 HRC, or lanterns has been mixed up and not knowing which lantern is paired.
It is recommended to begin pairing by un-pairing all lantern units from the HRC, this will reduce confusion
about which lantern unit if already paired previously. Follow the steps below to begin the process.
Power on the HRC and the Lantern units, these must be in test mode for pairing (status blue on button ❿)
Un-pairing eSTOP™ units
Un-pairing is required if the HRC is already paired to an unknown lantern and unable to sync. To do
this the HRC must be in test mode (status light is blue), the USB port must be disconnected from the
eSTOP™ unit. Press and hold Unit1 “Go” button ❻ for 5 seconds until you hear a beep sound.
The HRC will flash a red light on the Status Indicator, then Fault1 indicator will be blank, this indicates
no lantern unit is paired to unit1 on HRC.
Repeat this un-pairing process (using Unit2 “Go” button) to un-paired Unit2 (left side of the HRC) if a
second lantern is paired to Unit2 side. After un-pairing, Fault1 and Fault2 indicator will be blank, where
no LED is on.
Pairing eSTOP™ HRC Unit1 (Left side of the HRC)
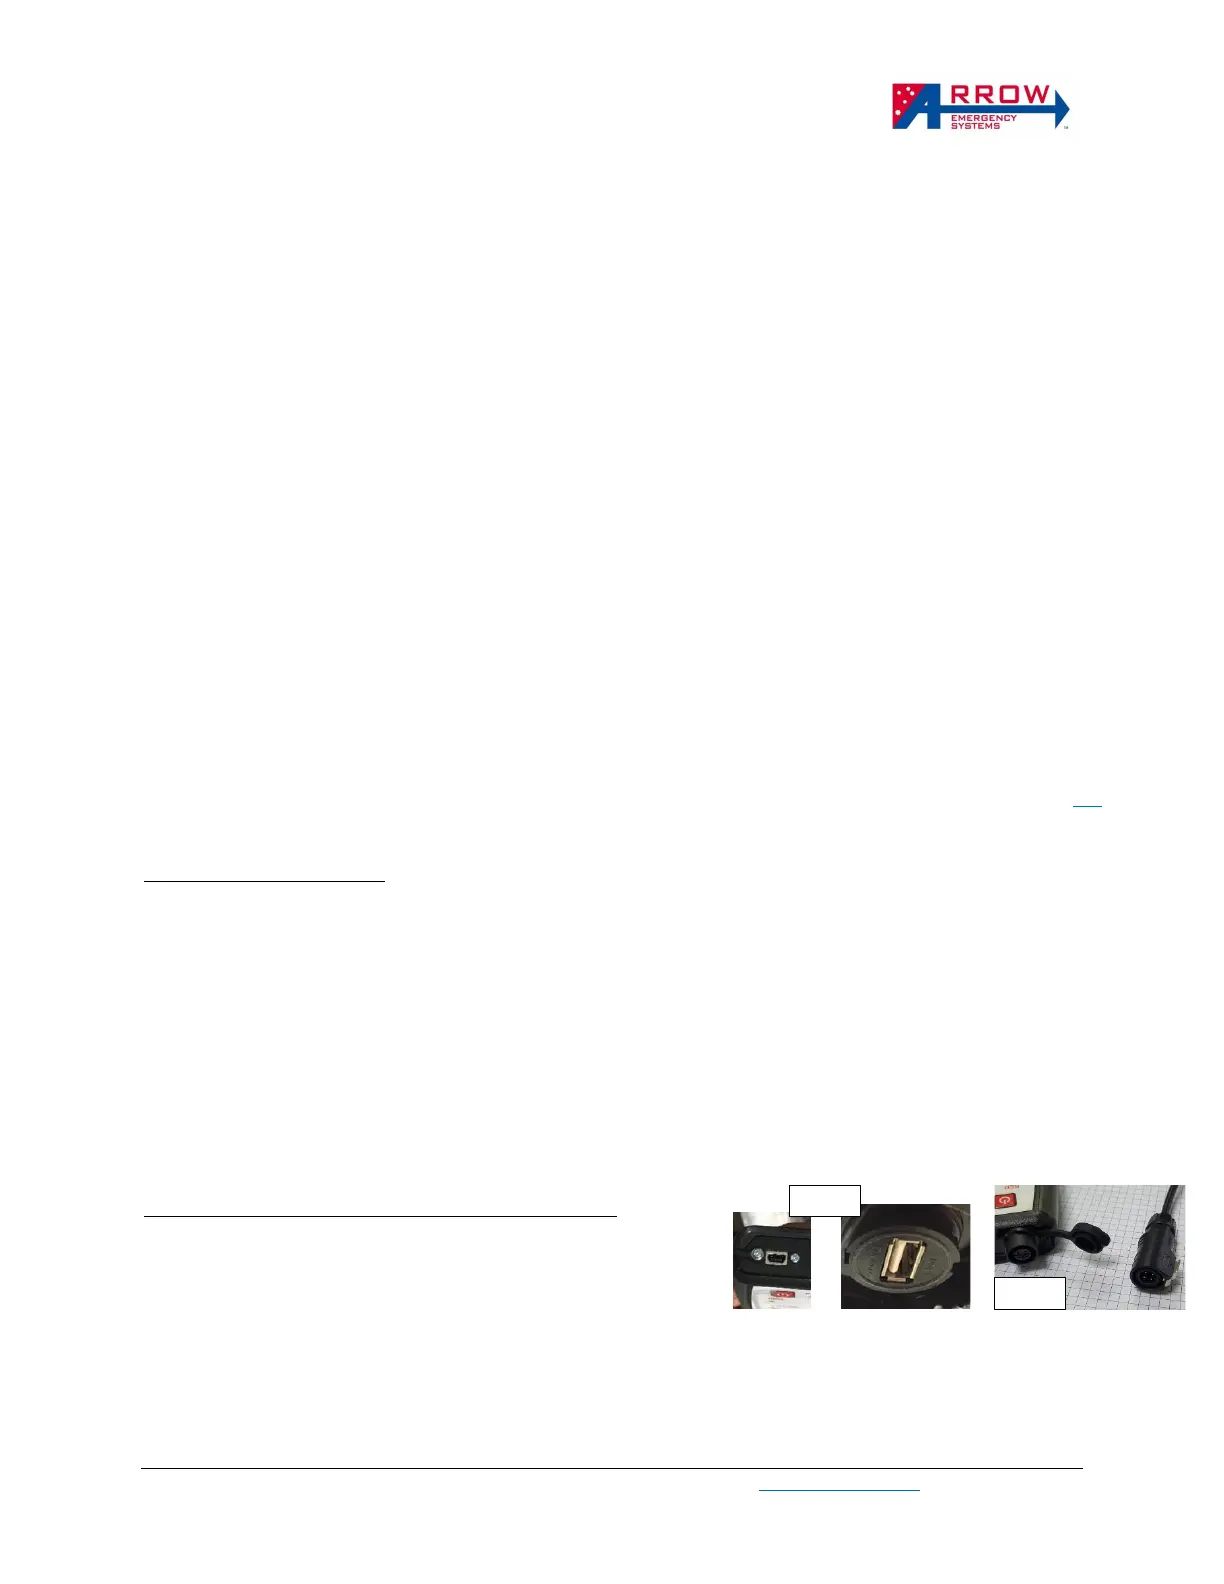
1. When in test mode attach the USB cable from the top of the
HRC unit to the USB connector on the base of the eSTOP™
lantern unit, show on the image.
2. Press and hold Unit1 GO button ❻ for at least 5 seconds until you hear a beep sound. This single beep
indicates pairing has initiated and the button can be released.
When the pairing process is complete the HRC will sound either a fast double beep as well as a green flashing
light on the Status Indicator or a long single beep with a red light on the Status Indicator.
• A fast double beep and green light indicates successful pairing. Fault1 indicator will go blue once it is