Do you have a question about the ASA Electronics AZ800 and is the answer not in the manual?
Provides an overview of the user manual's purpose and importance for safe operation.
Defines the correct and authorized usage of the telescope system.
Details prohibited actions and uses that deviate from the intended operation.
Outlines the terms and conditions regarding warranty and manufacturer liability.
Provides distributor information and details about CE marking.
Identifies the intended readers and users of this manual.
Presents essential, overarching safety guidelines for all users.
Explains the meaning of various signs and symbols used for safety information.
Details specific hazards associated with the machine and required safety behaviors.
Lists the responsibilities and duties of personnel operating the machine.
Highlights potential hazards encountered during specific operational processes.
Describes the procedure for immediate system shutdown in emergency situations.
Details the motors, controllers, and feedback sensors for telescope movement.
Description of the optional mirror covers and their functionality.
Details the optional derotator device mounted on the fork.
Details the optional filter wheel accessory.
Describes the integrated computer unit for telescope operation.
Specifies the software used for controlling the telescope via the TCU.
Outlines power requirements, voltage, and consumption figures for the telescope.
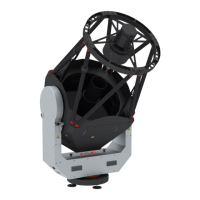
Provides the physical dimensions and total weight of the telescope assembly.
Details the telescope's optical characteristics like focal length and diameter.
Describes the optical focus positions for the available nasmyth focus ports.
Specifies the pointing and tracking accuracy and slewing speeds.
Defines the ambient operating temperature and humidity limits.
Instructions for safely opening shipping crates and removing telescope components.
Lists customer-provided items and site conditions necessary for installation.
Specifies the dimensions and preparation needed for the concrete foundation.
Details the process for drilling mounting holes on the foundation using a template.
Instructions for removing transport restraints and lifting the telescope's lower section.
Guidance on how to attach lifting belts and lift the telescope's upper assembly.
Procedure for mounting the upper telescope part onto the lower part and securing it.
Details on connecting the focuser cable for power and data transmission.
Instructions for mounting the stray light covers using screws.
Provides a general overview and diagram of the telescope's cable connections.
Describes the location and purpose of the telescope electronics cabinet.
Details the power supplies, remote switch, and network switch within the cabinet.
General overview of connector types and locations on the telescope.
Lists and describes the connectors found on fork side A.
Lists and describes the connectors found on fork side B.
Lists and describes the connectors located on the telescope's top side.
Lists and describes the connectors located on the telescope's bottom side.
Explains how to route cables for external equipment through the telescope.
Procedure for adjusting the tertiary mirror's height and offset using lasers.
Steps to center the tertiary mirror using laser alignment and adjustment screws.
Adjusting the tertiary mirror rotation to align laser points between focus ports.
Illustrates the effect of tertiary mirror tilt on the laser point position on the secondary mirror.
Procedure for tilting the tertiary mirror axle to correct laser point alignment.
Steps to tilt the secondary mirror so the laser points back to its origin.
Method for aligning the primary mirror using star observation and adjustments.
Instructions for powering the telescope system on and off using the remote power switch.
Guidance on accessing the telescope's control software.
Lists the necessary materials and tools for cleaning the telescope mirrors.
| Brand | ASA Electronics |
|---|---|
| Model | AZ800 |
| Category | Telescope |
| Language | English |