February 2012 20 80-0180-262 Rev. D
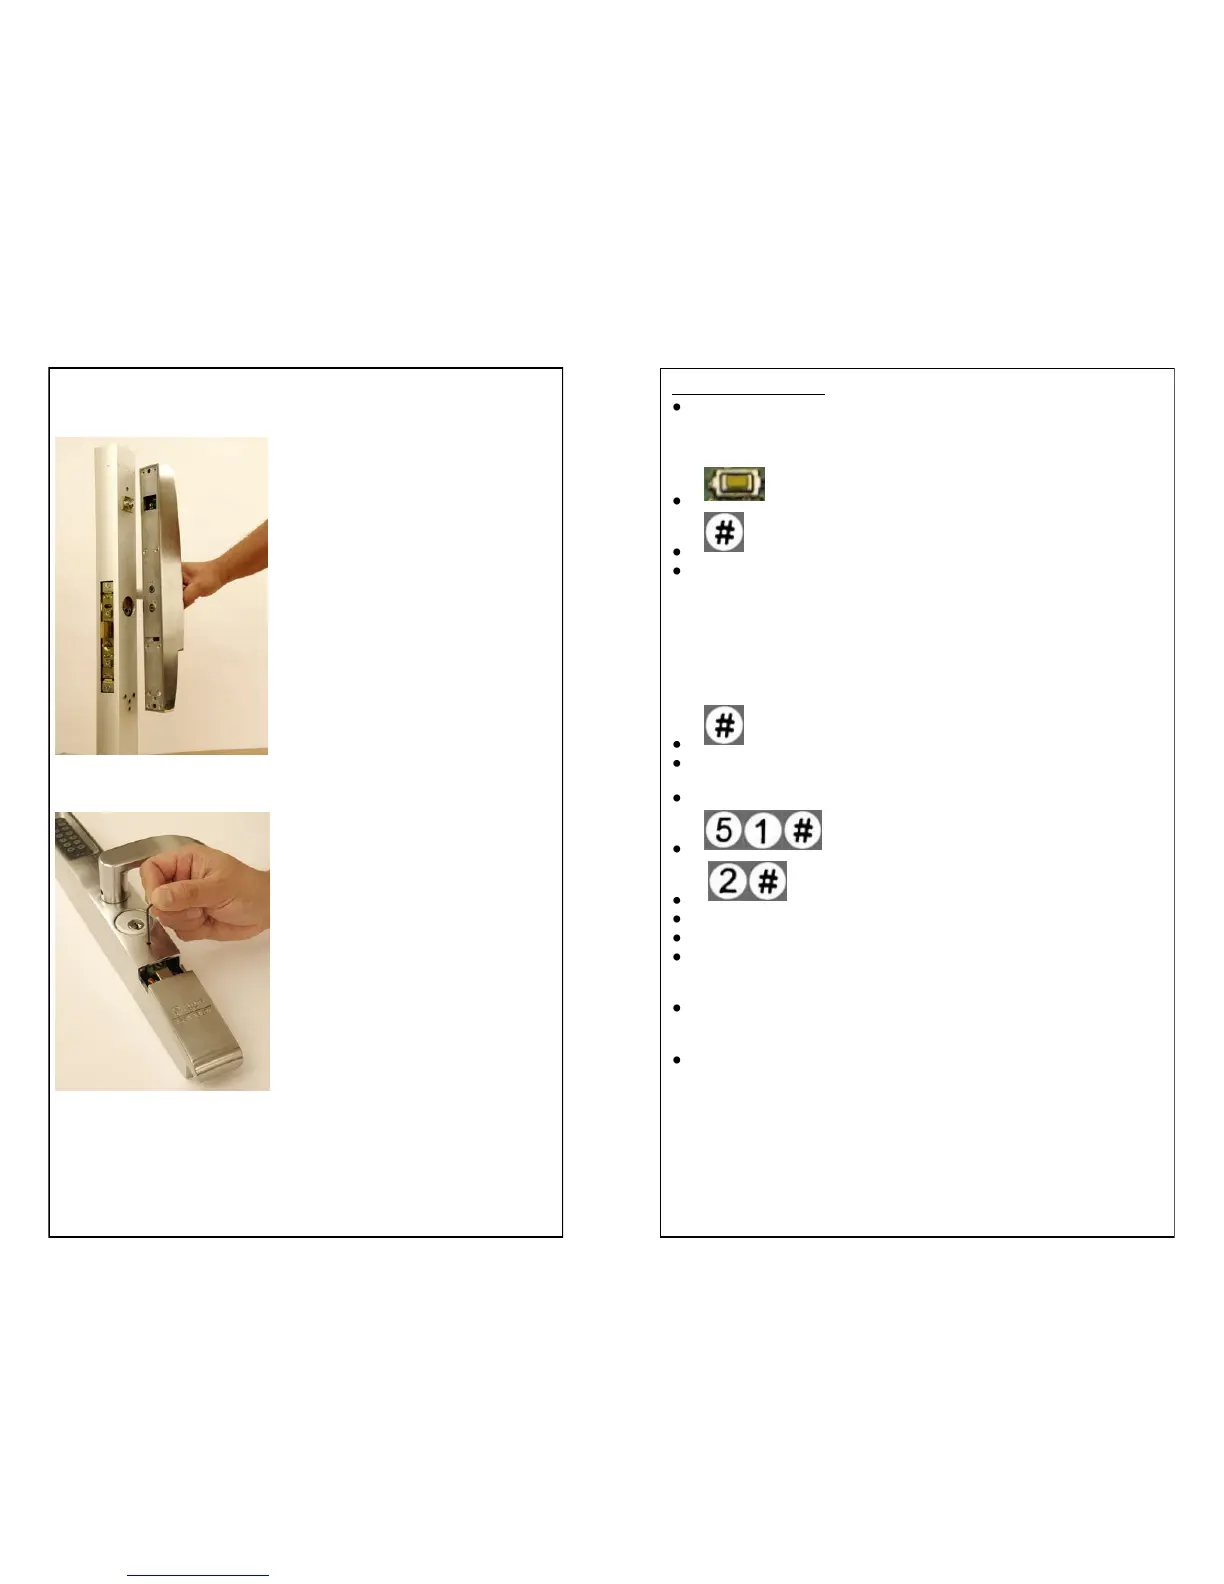
Place eForce
®
150 back on mounting bracket
and guide spindle into cam plug. (Fig 8).
Make sure that back surface of trim is flush
with door stile surface then secure with two
(2) #10-32 x 5/8 screw thru the inside bottom
of trim.
Reinstall the battery holder into the housing
and slide the battery cover into position and
tighten screw with allen key. (Fig 9)
Remove allen key. Turn key into the neutral
position and remove key from the cylinder.
Enter a known user code to ensure the
eForce
®
150 is functioning correctly.
Refer to Trouble Shooting section if eForce
®
150 does not function properly.
(Fig 8)
(Fig 9)
80-0180-262 Rev. D 9 February 2012
MASTER CODE RESET
Depress and hold the reset button located on the backside of the eForce
150 on the printed circuit board (Note: eForce 150 must be removed from
the door to reset).
Depress and hold Reset Button and # Key
Release both when yellow LED blinks.
A green and red flash with tone will indicate a successful reset.
(Note: at this point the Master and Emergency Codes have been replaced with
the factory default codes (1234 & 4321), all other codes will remain intact. In
order to accomplish any additional programming of features and codes, the
Master and Emergency Codes must be changed from the defaults.)
STEP 2: EMERGENCY CODE (Location 2)
Depress and hold # key (approximately 5 seconds).
Release when yellow LED blinks. (Yellow LED will blink continuously
during programming)
Enter New Master Code # (Green flash with 2 short tones)
Enter 51 # (Green flash with 2 short tones)
Enter 2 # (Green flash with 2 short tones)
Enter desired Code # (4-7 digits) (Green flash with 2 short tones)
Re-Enter Code # (Green flash with 2 short tones)
Green flash with 2 short tones will repeat to indicate successful code pro-
gramming.
Press # within 2 seconds to stay in programming mode, then enter
51# to continue steps 3 through 7.
(Note: Emergency Code defaults to a 10 sec. unlock time [PCC 46#].)