Copyright © 2015, Sargent Manufacturing Company, an ASSA ABLOY Group company. All rights reserved.
Reproductions in whole or in part without express written permission of Sargent Manufacturing Company is prohibited.
05/15/15
Harmony Series H1 Mortise Lock
A7877F • 800-810-WIRE (9473) • www.sargentlock.com
12
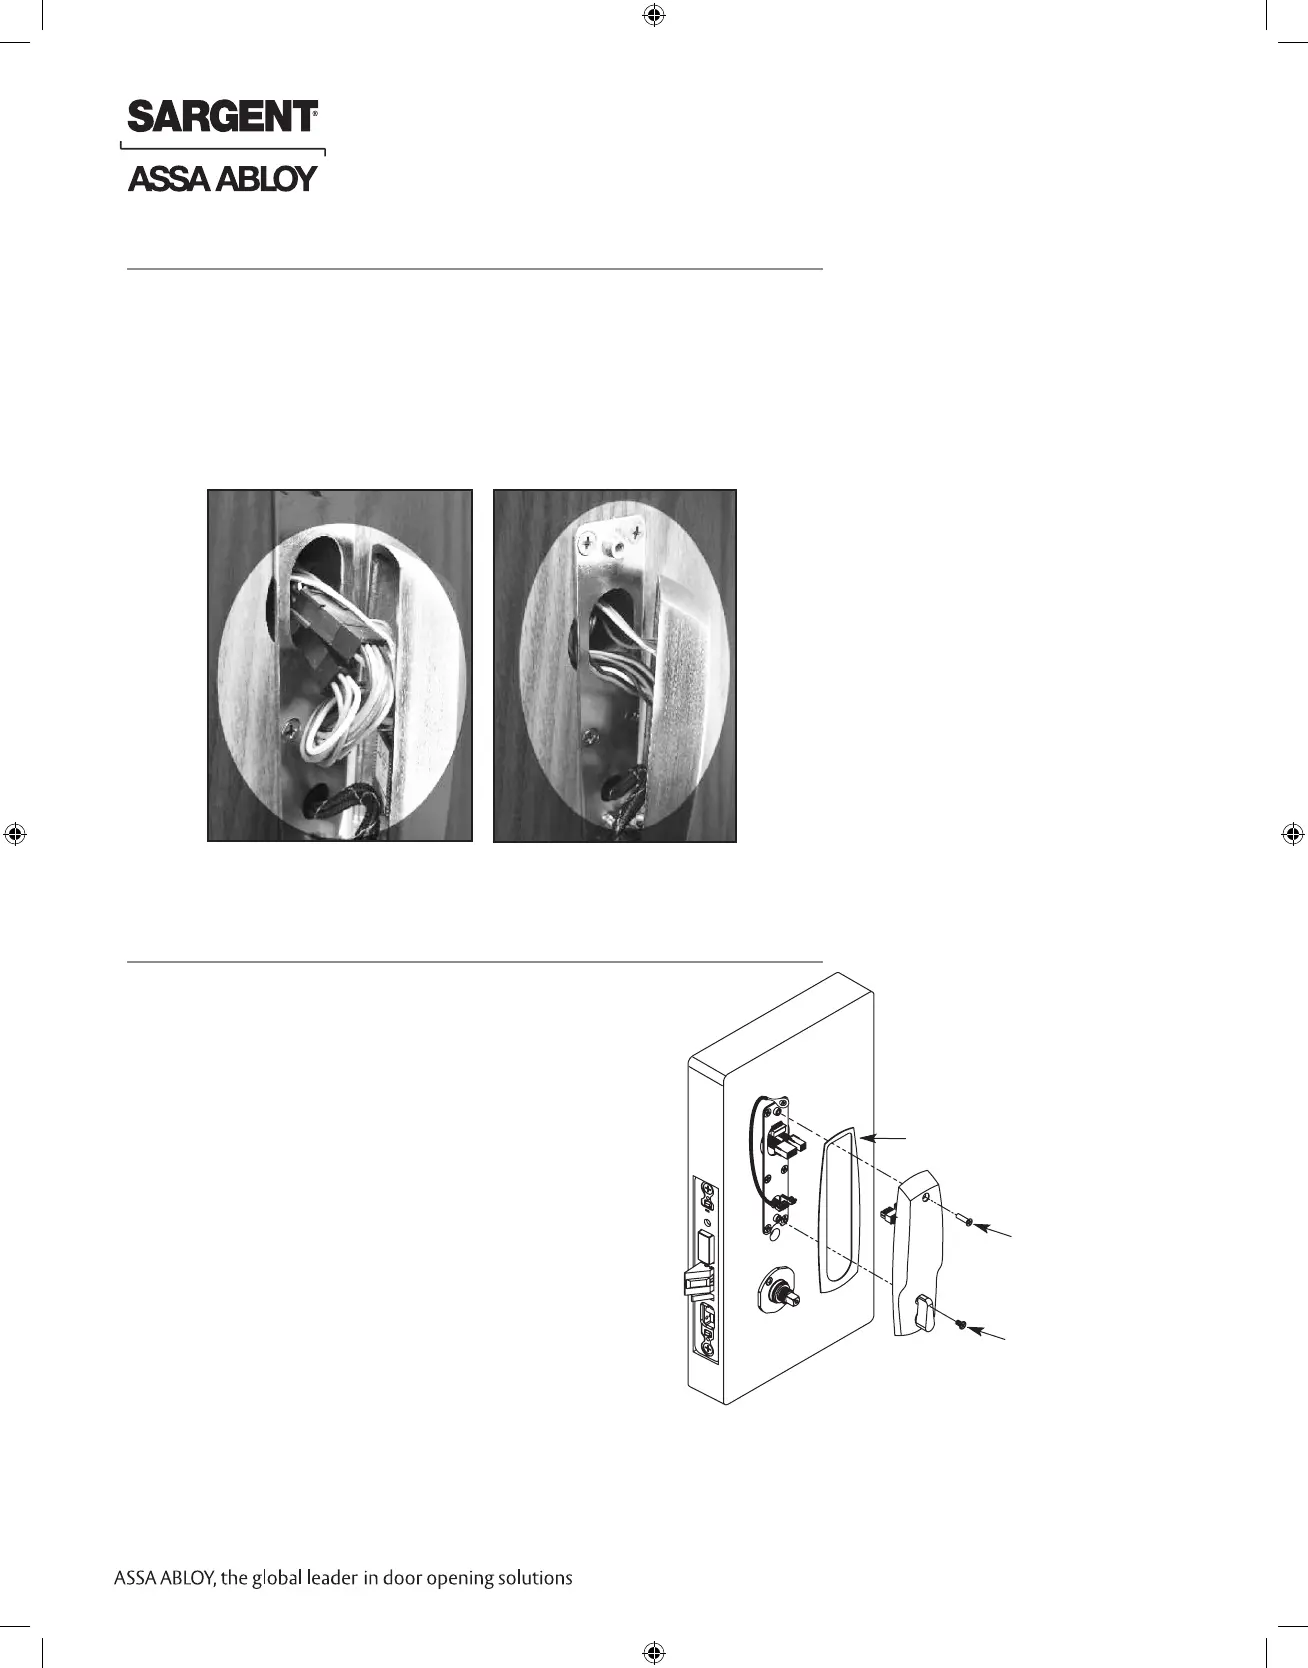
Please follow these steps prior to installing inside escutcheon assembly to prevent
any damage caused by pinching wires:
1. Insert the ElectroLynx connectors (8 and 4-pin) and establish their position
inside the door prep (Fig.11A).
2. Neatly fold the wires onto themselves and into the remaining space to prevent
pinching of wires when mounting escutcheon (Fig. 11B).
Do not tuck extra mortise lock body wires back inside the lock body cylinder hole.
Fig. 11A
Fig. 11B
Outside of Door
1. Tighten the inside escutcheon securely to the mounting plate
with the Phillips flat head machine screws provided.
Use the 8-32 x 5/8” for the top of the escutcheon
and the 8-32 x 1/4” screws for the bottom of the
escutcheon located under the turn lever.
Remember the inside gasket must be used
when installing Harmony in an outdoor application.
2. Be sure the turn assembly is functional
and the deadbolt functions properly.
Required for exterior
door applications.
Fig. 12A
8-32 X 1/4” Phillips
Flat Head Undercut
Machine Screw
8-32 X 5/8” Phillips
Flat Head Undercut
Machine Screw
Inside of Door
11 Position Outside Wires
12 Install Inside Escutcheon Assembly
 Loading...