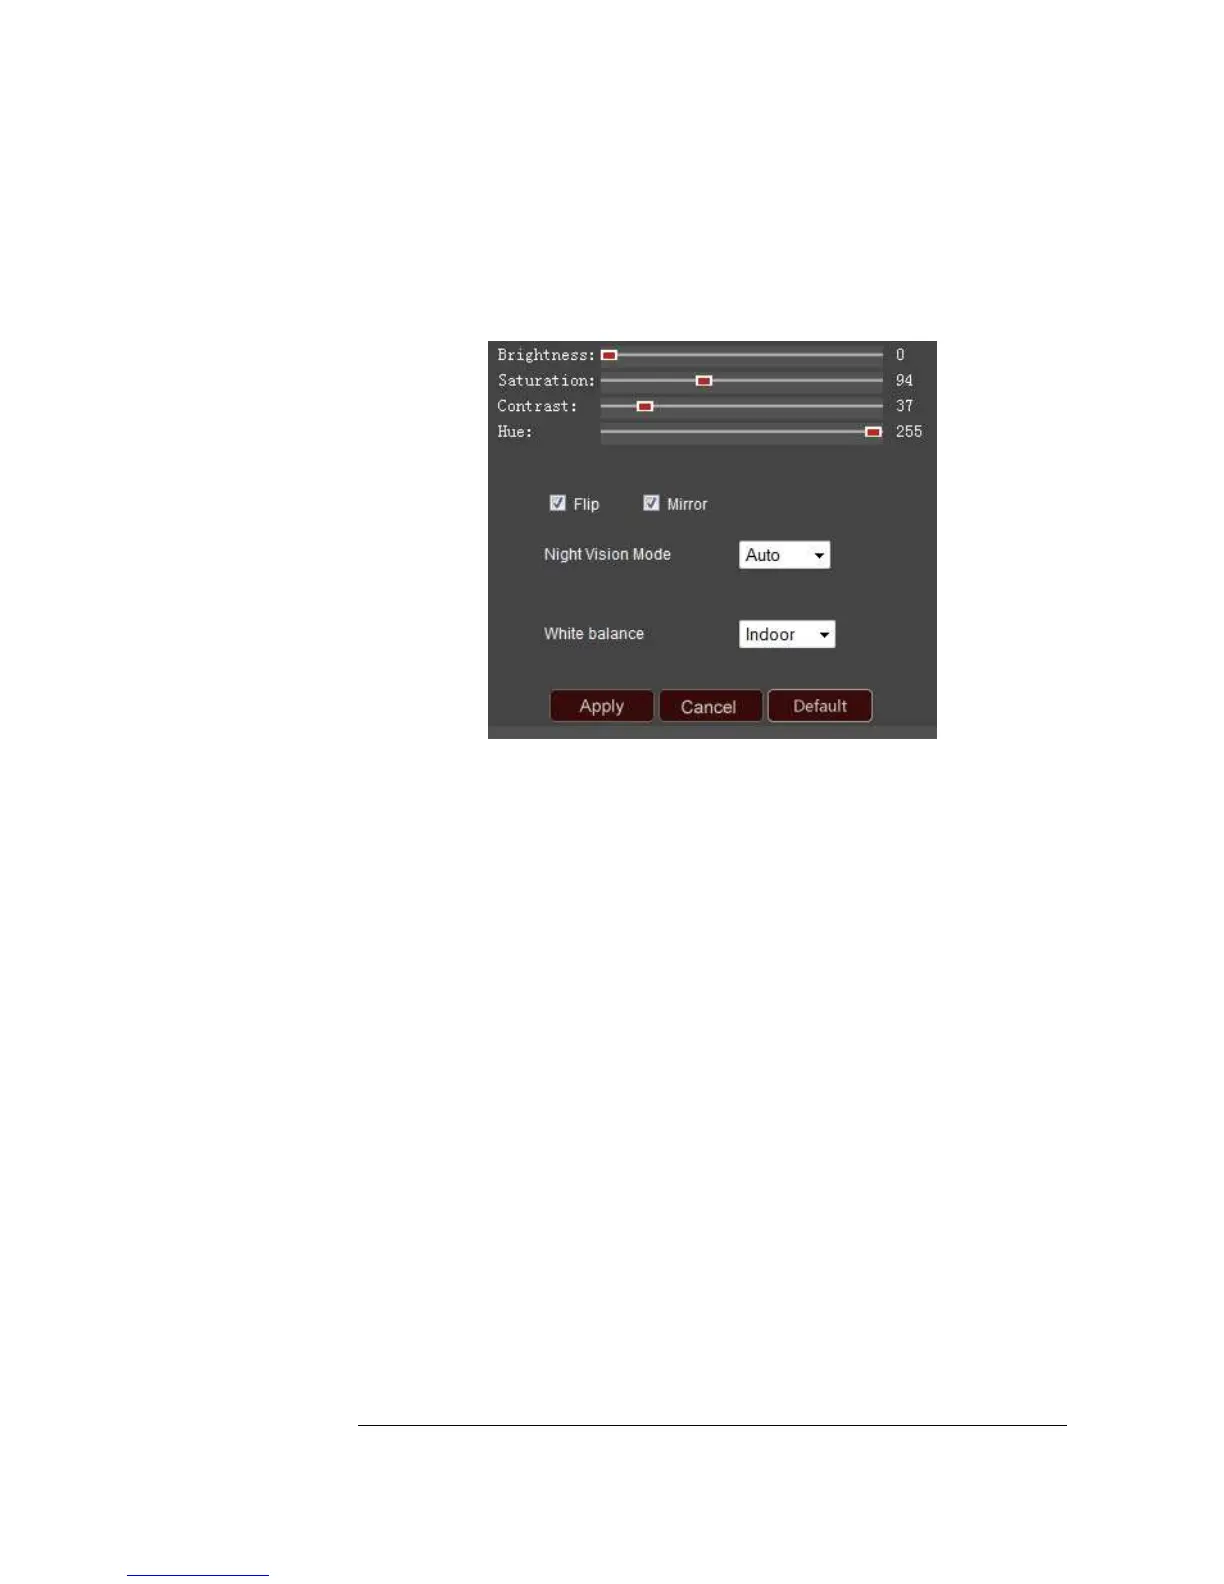
Image settings
Brightness | Saturation | Contrast | Hue: Adjust any of these settings to your liking.
Once you’ve found a setting that you like, select Apply to have the camera remember
those values.
Flip: Your camera is designed to allow ceiling mounting. Deselect this option and
select Apply to have the image flipped horizontally.
Mirror: The camera is intended to simulate as if you were there and provides that view
of the scene. If you want to see the Mirror image, simply deselect this box and select
Apply.
Night Vision Mode: This controls the Infrared lights on your camera. You can choose
to set this function on Auto, or Manual. If you choose to select the Manual mode, and
select On, then the infrared lights will be continuously on until you turn it off. Make
sure to click the “Apply” button after you make a change.
White Balance: This function helps to display colors correctly under different lighting
sources. For example, you can choose the Indoor or Outdoor selection when the
camera is placed indoors or outdoors. Or you can also choose the Auto options.
If,
instead, you choose manual configuration, two additional boxes will appear. “R gain”
refers to the amount of red color shown and “B gain” refers to the amount of blue
color shown in the image. Make sure to click on “Apply” after you make your changes.
Default: Click on the Default button to return your camera to its original settings.