LCD BEZEL
Disassembly Notice
Back
29
Screws QTY Spec Torque (kgf-cm)
2 M2.5*3.5L(4.5,0.5) (K)#1 2.50±0.2
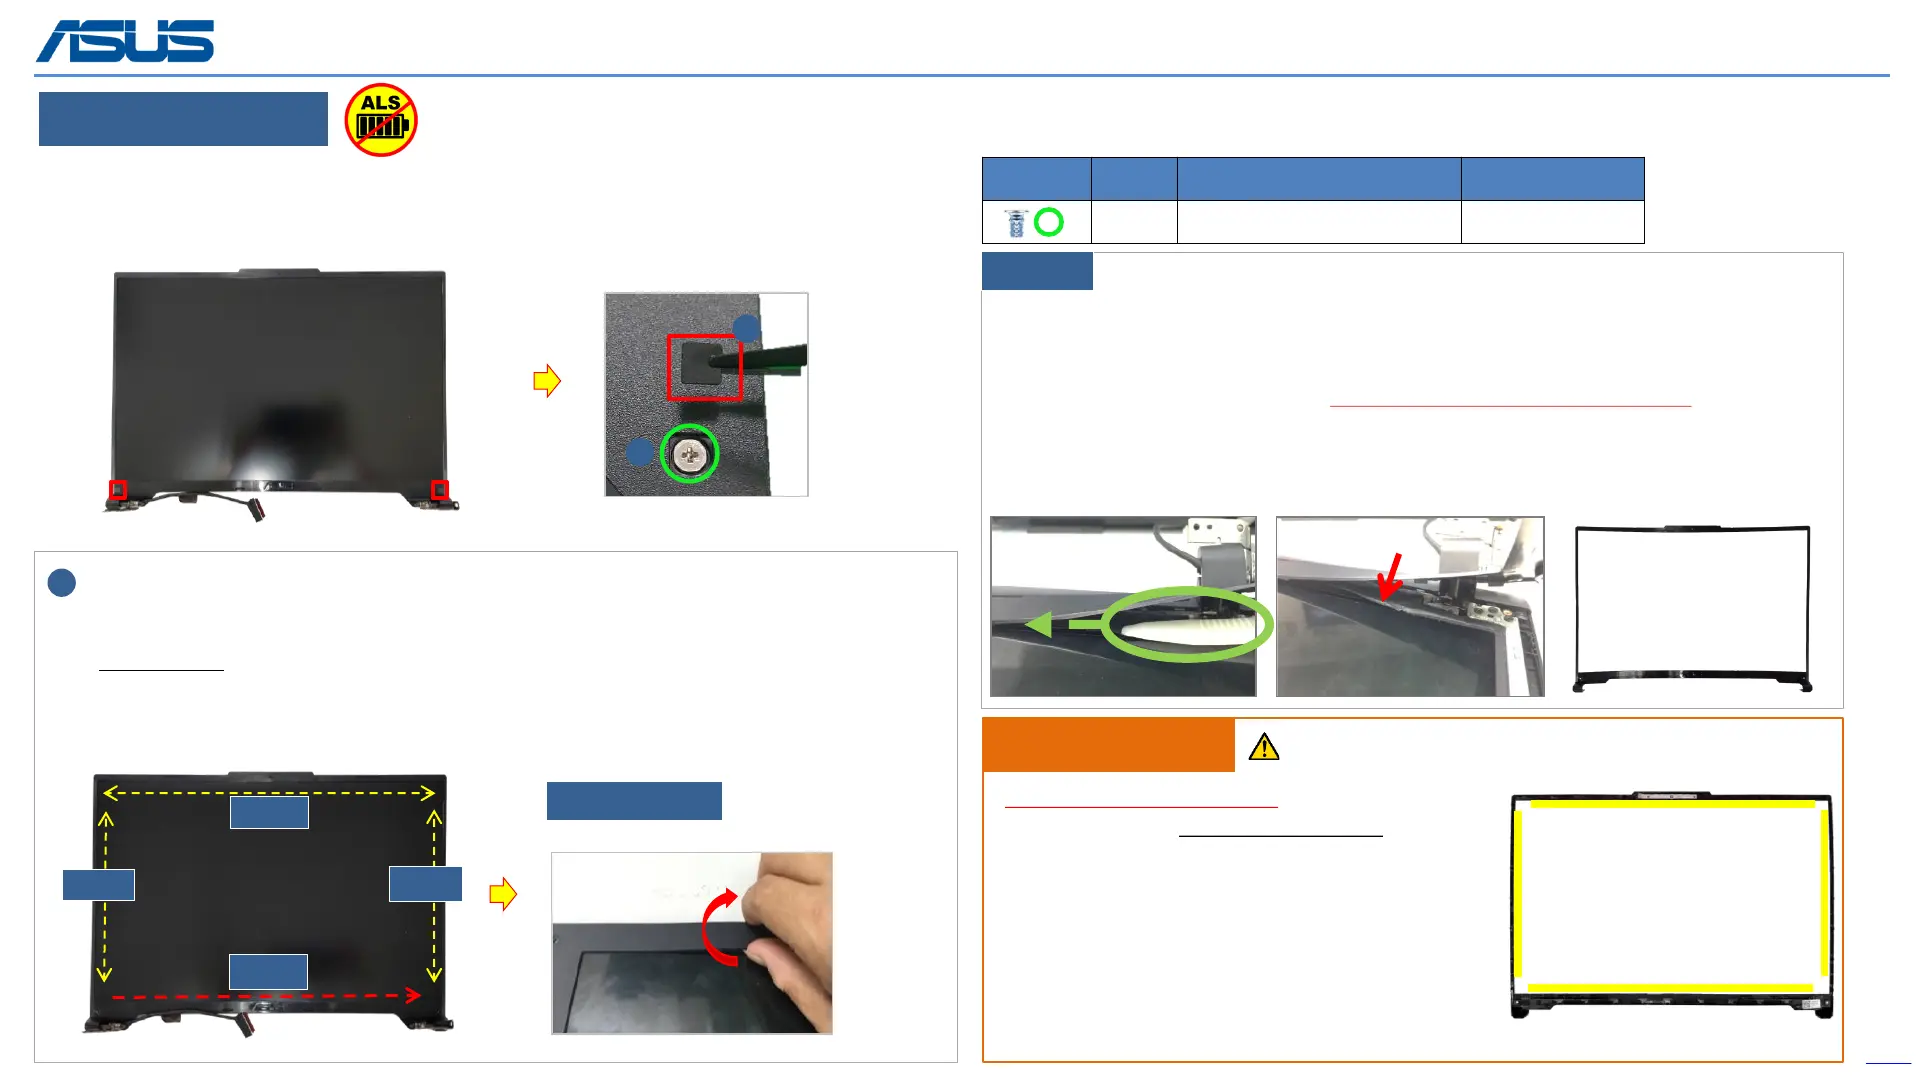
Step 3-1~3-3, Start from the middle area of each side of bezel,
Using the forefinger to hold the outer edge firmly and the thumb flipping the
bezel inner edge outward to release the hooks as indicated in the diagram shown.
(It can be helpful, if holding the bezel outer edge firmly with forefinger.)
Due to some tapes behind the lower edge of bezel, please using plastic
blade to teardown the bezel.
Please follow the direction shown in the red arrow, to move plastic blade from left
to right and peel the bezel away slowly. While peeling, please move the blade in the
parallel direction to the panel and pressing the black Mylar downward (As circled in
green) to ensure the black Mylar and the tape behind the bezel are well separated.
3-1
3-2
3-3
3-4
Step 3-1~3-3
Thumb flipping the inner edge outward.
Please move blade slowly to separate the bezel away, and must
press the black Mylar downward with panel parallel direction.
When reuse the LCD BEZEL:
Please paste new LCD BEZEL ADHESIVE
before assembly BEZEL.
(New LCD BEZEL already contains LCD
BEZEL ADHESIVE *4pcs)
Assembly Notice
Panel’s black Mylar
3
1
2
Step 3-4
Step 1 : Remove BEZEL COSMETIC MYLAR*2pcs.
Step 2 : Remove screws*2pcs.
Step 3 : Remove LCD BEZEL.
UP
DOWN
LR
LR
The device has an Ambient Light Sensor (ALS) for power-off protection Function.



 To Next Page