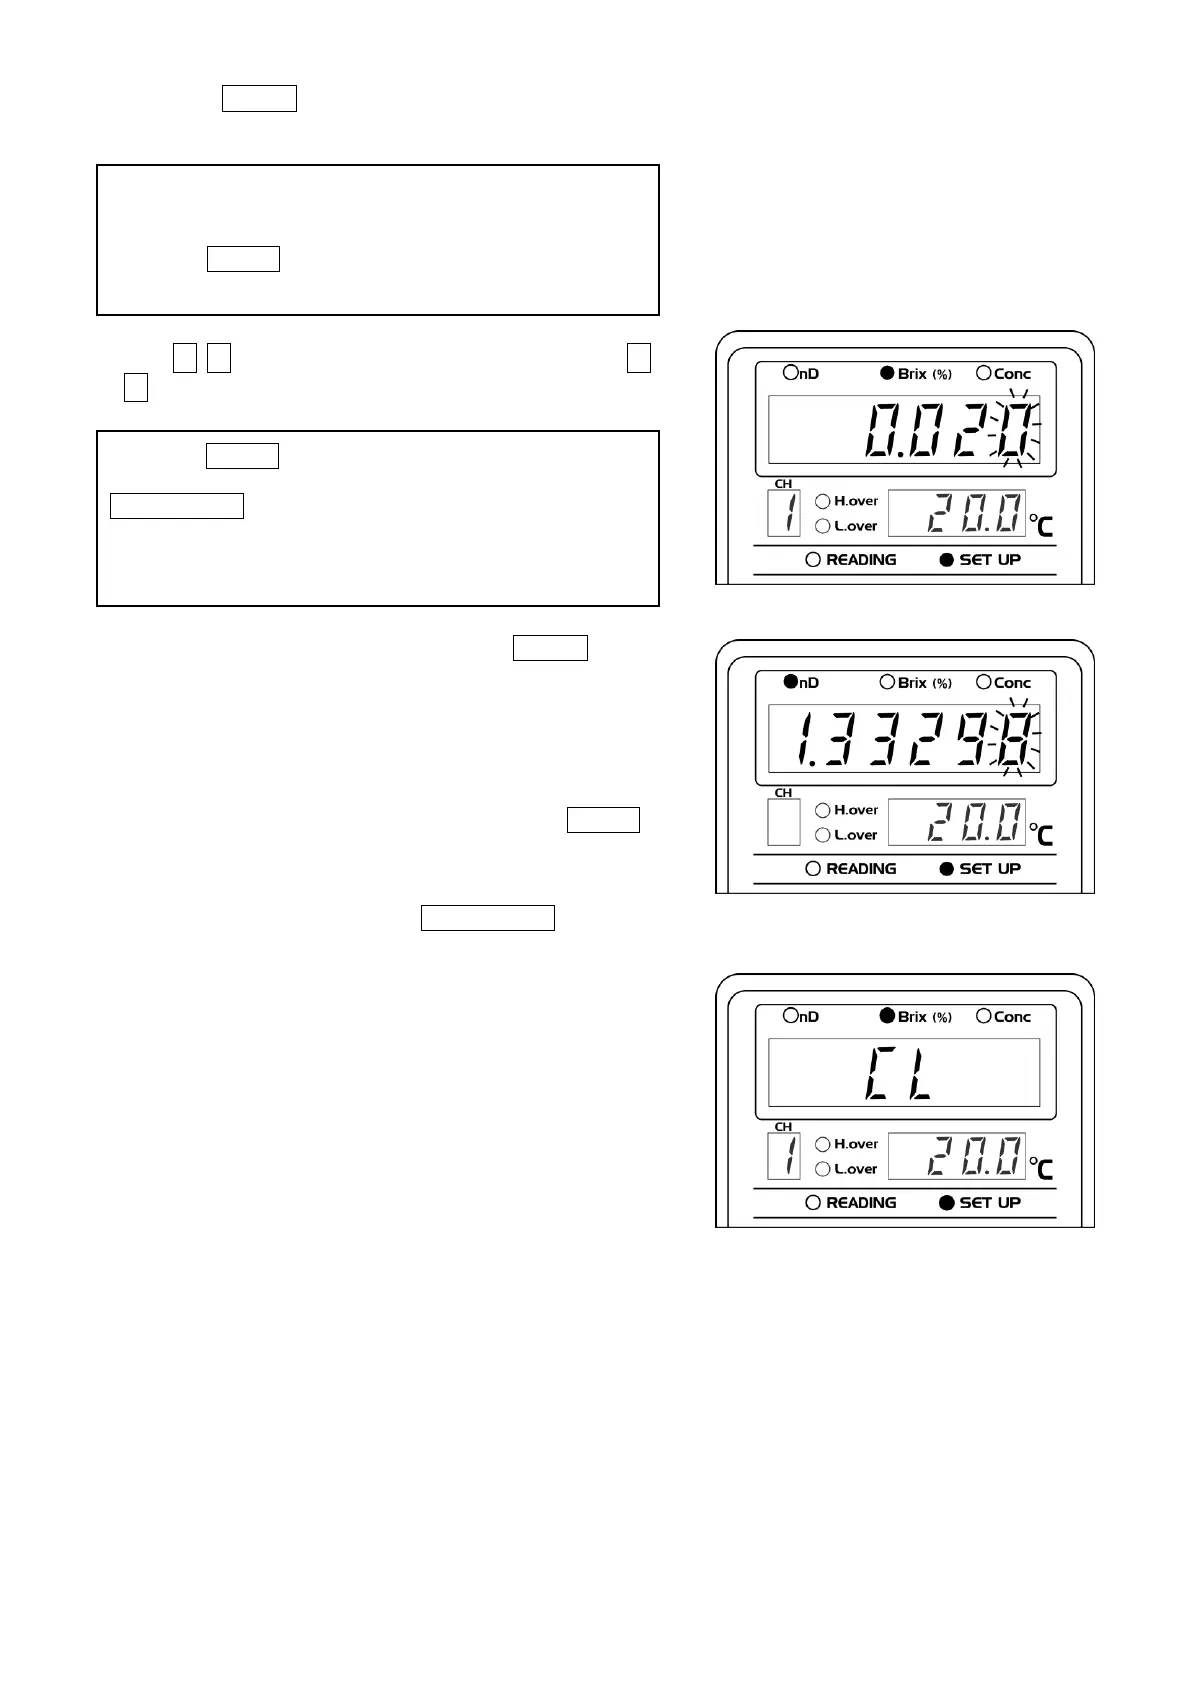
⑧ Press the ENTER key to access the SET UP mode.
The most recent measurement value will be displayed.
⑨ Use ← → key to move digit position and then use ↑
↓ key to set a standard value (Fig.11-4 and Fig.11-5).
⑩ After setting a standard value, press the ENTER key to
start data writing.
The measurement value display turns off during the data
writing process. This may take a while.
The bias is set and calibration is complete.
The "1. bIAS" screen will be displayed (Fig.11-3).
⑪ To abort while in the SET UP mode, press the SCALE
key.
"StoP" will appear after 10 seconds of inactivity
(Fig.11-2).To start taking measurements with the
post-calibration data press the START/STOP key.
If the last measurement value was LLL.LLL or
HHH.HHH, the screen for setting the bias will not
appear.
Press the SCALE key to return to the previous "1. bIAS"
screen (Fig.11-3).
Press the SCALE key to abort the change and return to
the previous "1. bIAS" screen (Fig.11-3). Press
START/STOP key to reset the factory default setting.
"CL" appears on the measurement value screen
(Fig.11-6), and it returns to the previous "1. bIAS"
screen.