11. Setting Measurement SET UP Mode
11-1. Calibration Procedure
① Make sure that the detection section (sample inlet unit) is properly mounted on the piping.
② Let purified water or a reference sample flow into the piping.
If the last measurement value was LLL.LLL or HHH.HHH, the screen for setting the bias will not appear.
③ Turn on the power as instructed in "9. Turning On the Power," on page 21.
④ Perform calibration in the appropriate measurement scale for your sample (nD, Brix CH1 to 3, or
Conc).
The example below is for calibration in Brix measurement mode.
⑤ Press the START/STOP key to pause the measurement.
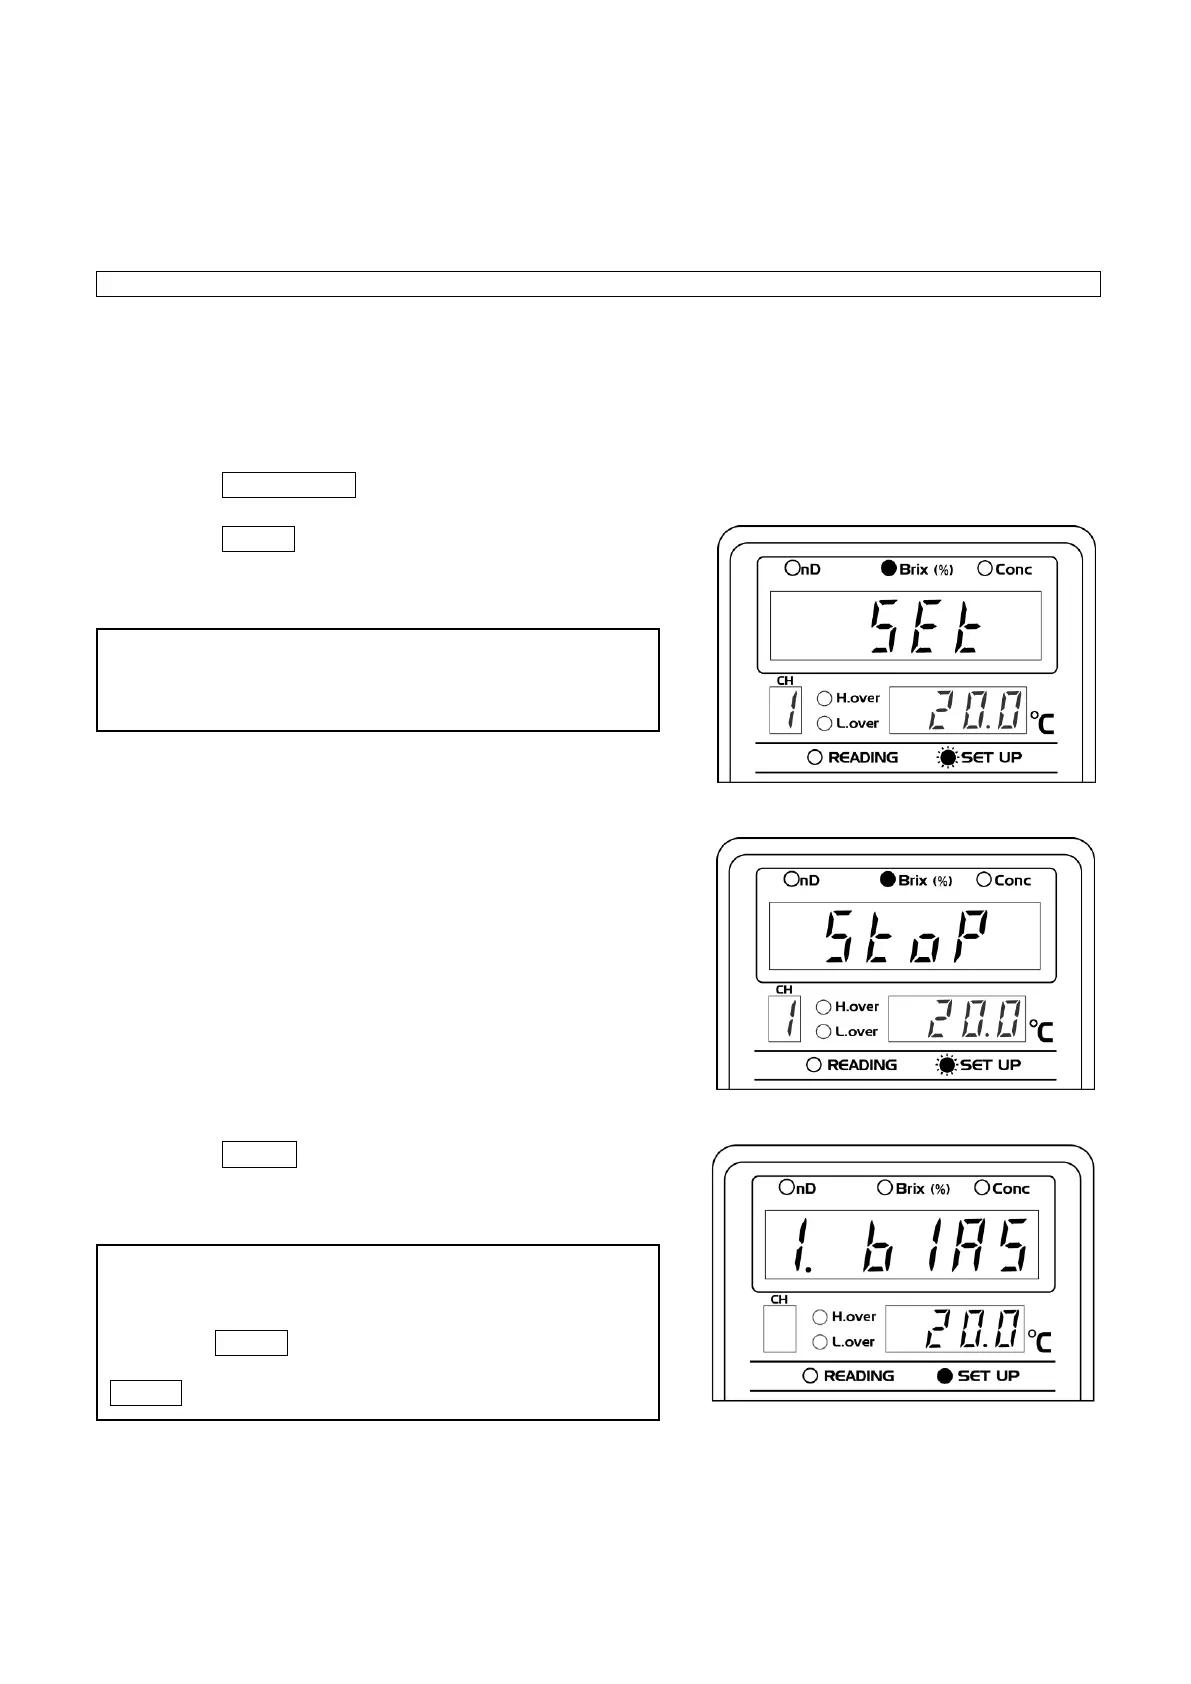
⑥ Press the SCALE key 5 times.The SET UP light will then
blink, and "SEt" will be displayed on the measurement
value display (Fig.11-1).
⑦ Press the ENTER key.
The SET UP light comes on and "1. bIAS" will appear on
the measurement value display (Fig.11-3).
Fig.11-1
Fig.11-2
Fig.11-3
If left inactive for 10 seconds, the display returns to the
"StoP" screen, following three short error beeps
(Fig.11-2).
If left inactive for 10 seconds, the display returns to the
"StoP" screen, following three short error beeps
(Fig.11-2).
Press the SCALE key to return to the previous "SEt"
screen (Fig.11-1) (During the SET UP operation, the
SCALE key serves as the cancel key).