2920 1462 00
24
Instruction book
3.4 Initial start-up
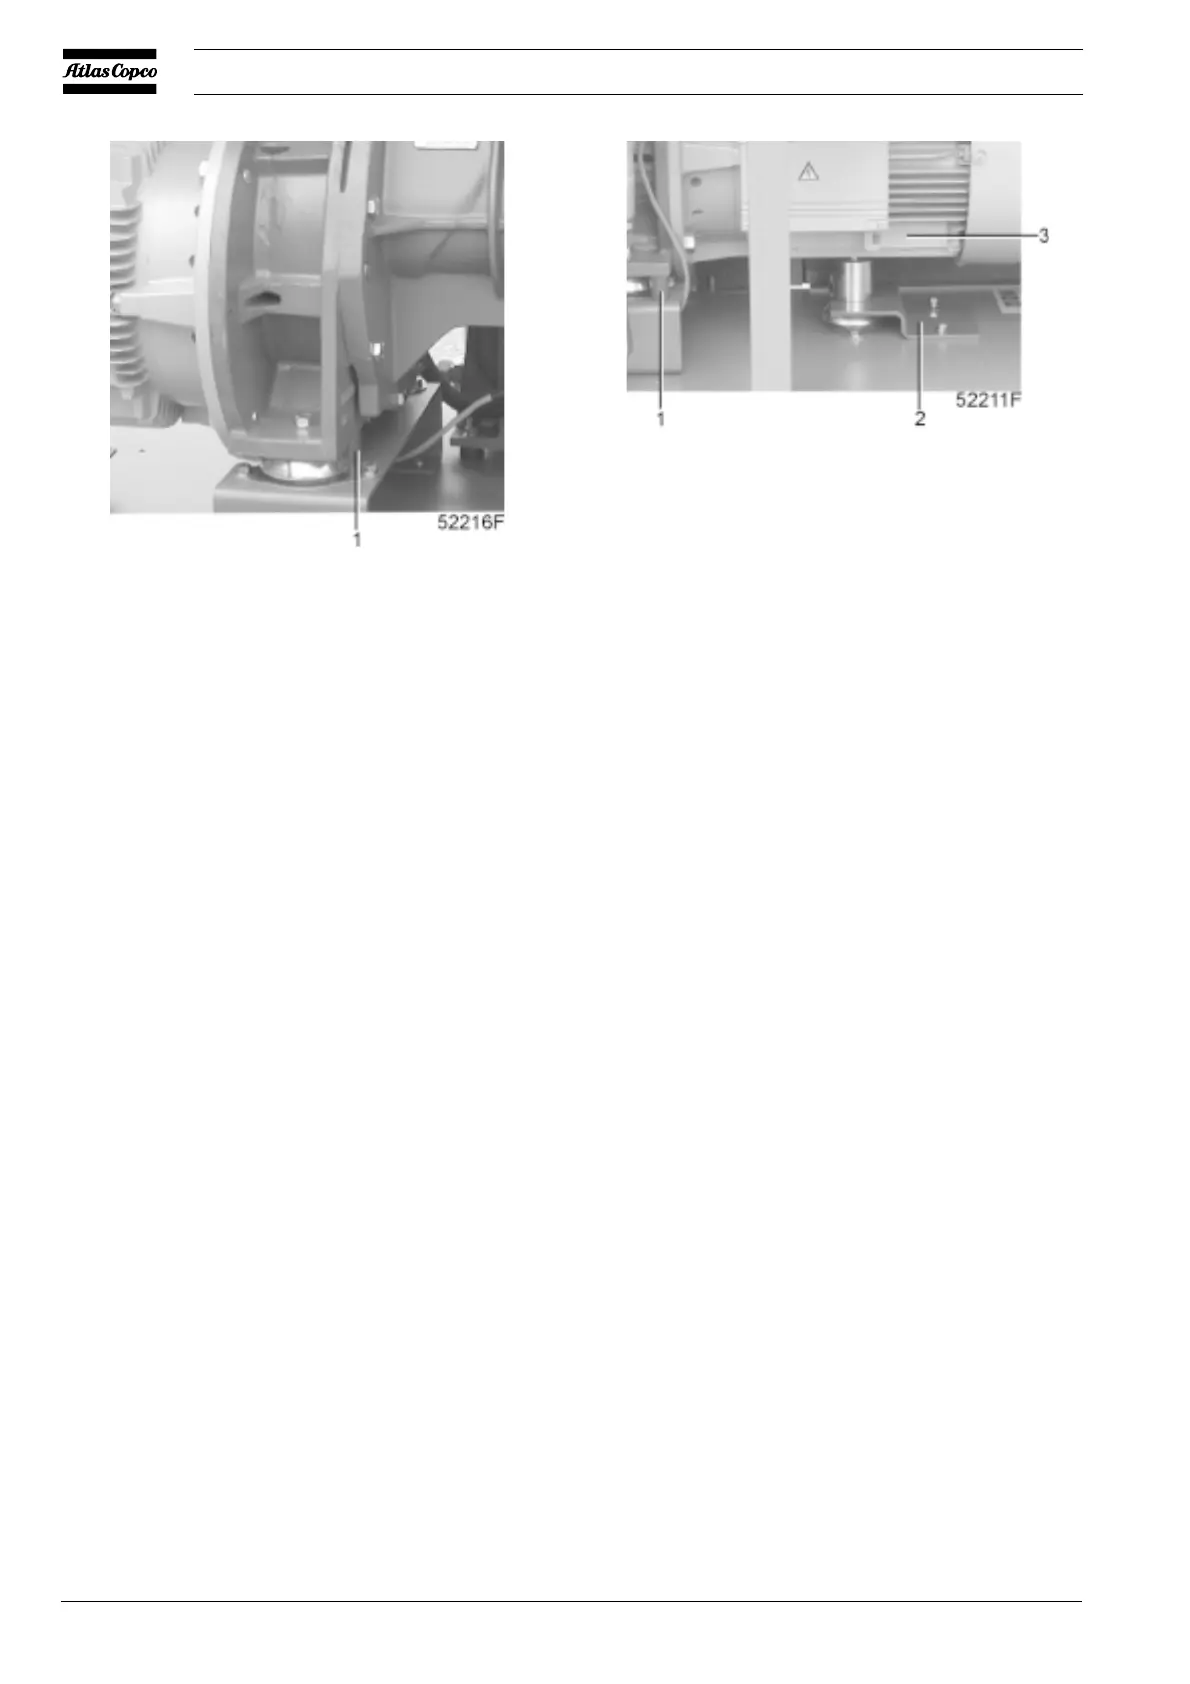
1. Remove transport spacers (1-Fig. 3.1) and transport support
(2-Fig. 3.1).
2. Check that the electrical connections correspond to the local
codes and that all wires are clamped tight to their terminals.
The installation must be earthed and protected against short
circuits by fuses of the inert type in all phases. An isolating
switch must be installed near the compressor.
3. Check transformer (T1-Figs. 1.10/1.15) for correct
connection, the settings of drive motor overload relay (F21)
and fan motor circuit breaker (Q15). Also check that
overload relay (F21) is set for manual resetting.
4. Fit air outlet valve (1-Figs. 3.4/3.6). Close the valve.
Connect the air net to the valve.
5. Fit the manual condensate drain valve (1-Fig. 3.2) (not
provided on GA Pack). Close the valve. Connect the valve
to a drain collector.
6. Connect the automatic drain outlet (2-Fig. 3.2) (not provided
on GA Pack) to a drain collector.
7. The drain pipes to the drain collector must not dip into the
water. For draining of pure condensate water, install an oil/
water separator which is available from Atlas Copco as
option. If the pipes have been led down outside the room
where freezing is possible, they must be insulated.
8. Check the oil level. The pointer of level gauge (7-Fig. 3.3)
should register in the green range or above it.
9. A label dealing in short with the operating instructions and
explaining the pictographs is delivered with the literature
set. Affix it next to the control panel. Make yourself familiar
with the instructions and pictographs explained (see also
section 2.5).
10. Check the compressor drive motor (3-Fig. 3.1) for correct
rotation direction. The correct direction is clockwise when
looking at the motor fan (seen from the non-drive end of
the motor). An arrow is stuck on the motor.
Switch on the voltage, start the compressor and stop it
immediately while observing the motor fan. Check the
1 Transport bush, to be removed
2 Transport support, to be removed
3 Drive motor
Fig. 3.1 Transport fixations
rotation direction while the motor starts running. Confirm
the check while the compressor is coasting to a stop. Note
that it is normal that the rotation direction reverses just
before stopping.
If the rotation direction is incorrect, switch off the voltage
and reverse two of the voltage supply lines.
Important
Incorrect rotation direction of the drive motor may result in
damaging the compressor.
11. Later production compressors are provided with a phase
sequence relay (K25-Figs. 1.10/1.15):
Check the compressor drive motor (3-Fig. 3.1) for correct
rotation direction. The correct direction is clockwise when
looking at the motor fan (seen from the non-drive end of
the motor). An arrow is stuck on the motor.
Switch on the voltage and start the compressor. If the
compressor has failed to start, check the display (Fig. 1.12).
If the message Overload mot / Fan mot (Elektronikon II)
or the pictograph for motor or fan motor overload
(Elektronikon I, see section 1.4.5) appears, check the phase
sequence relay (K25):
- If the yellow LED is out, the rotation direction is
incorrect. In this case, switch off the voltage and reverse
two of the voltage supply lines.
- If the yellow LED is alight, switch off the voltage and
reset the overload relay (F21-Figs. 1.10/1.15).
12. Check also the rotation direction of the compressor cooling
fan (3-Fig. 1.5). The correct direction is anti-clockwise
when looking at the fan from the top of the compressor.
If the rotation direction is incorrect, switch off the voltage
and reverse two incoming electric lines at the connections
of circuit breaker (Q15-Figs. 1.10/1.15).
13. Check the programmed settings. Consult the User manual
for the Elektronikon I and II regulators.
14. Start and run the compressor for a few minutes. Check that
the compressor operates normally.
 Loading...