- 22 -
Deployment of HiLight P2+
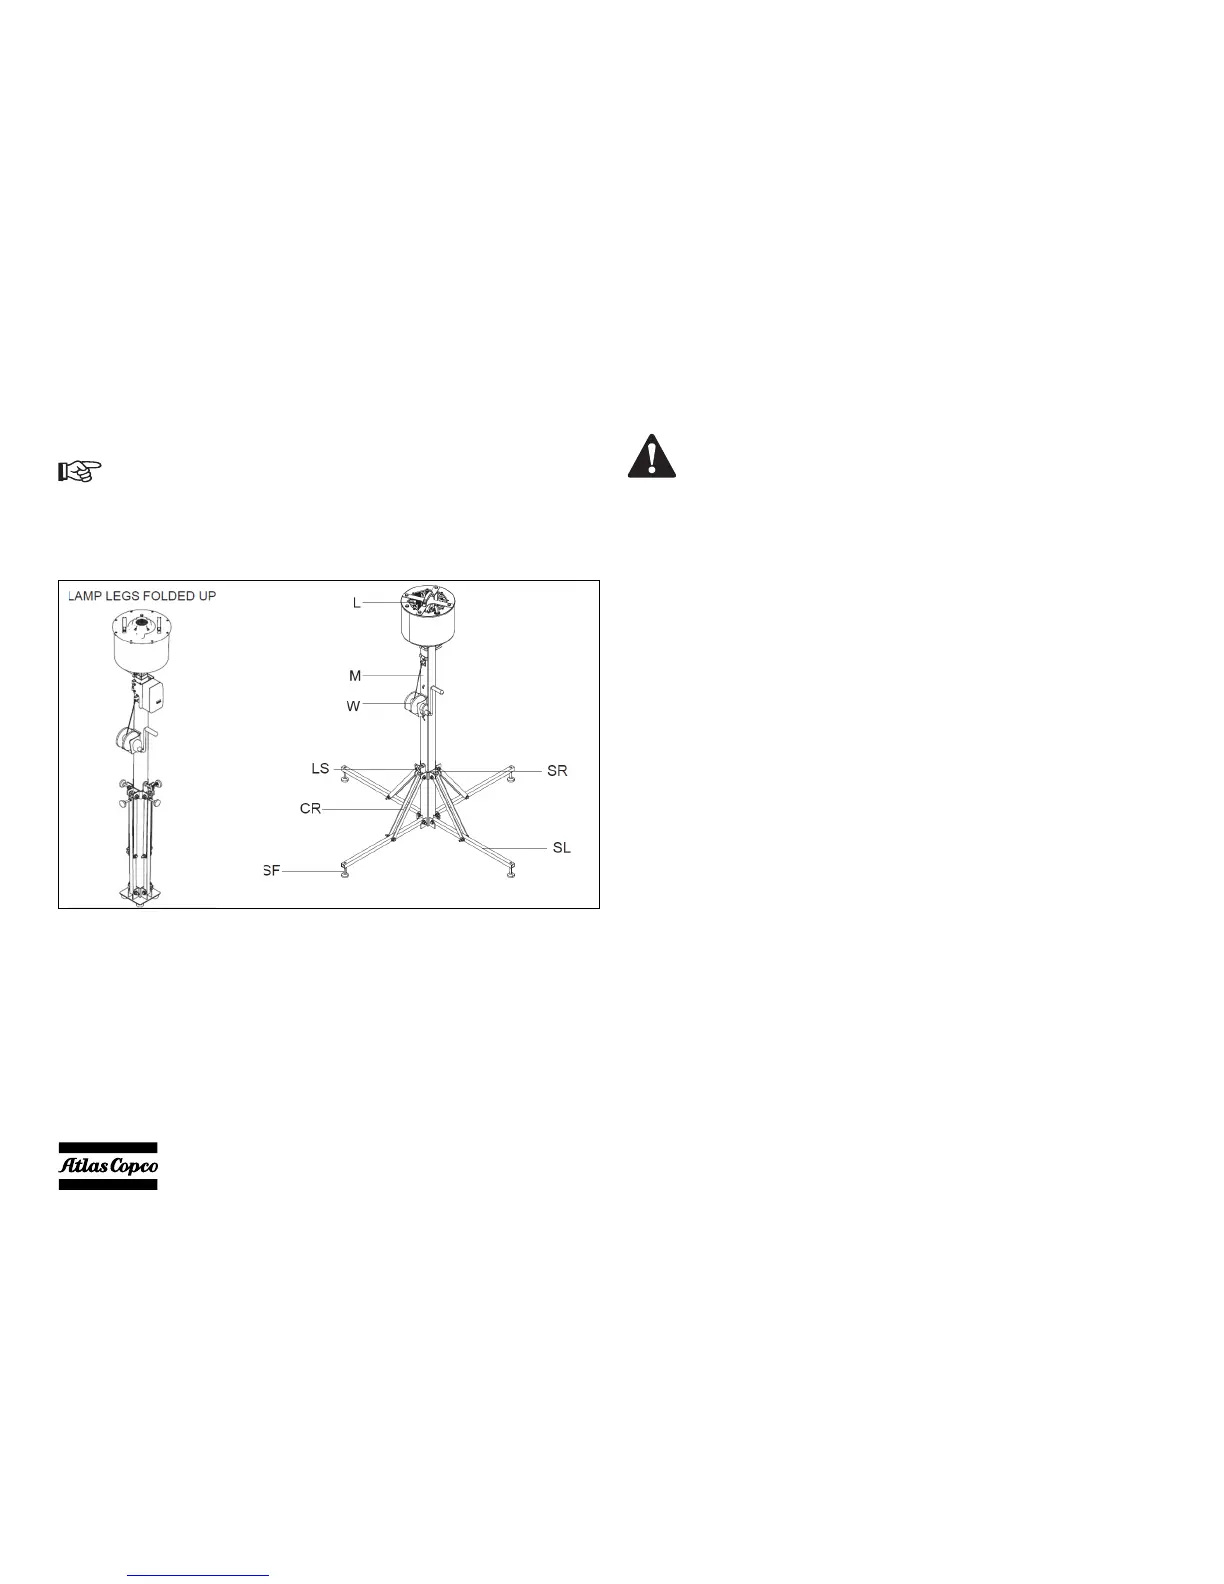
Setting up HiLight P2+
1. Remove the unit from the carry-case.
2. Remove the Locking screw (LS).
3. Put the unit on the ground with its support legs (SL) unfolded on the ground as
shown.
4. Fit the locking ring (SR) to the mast (M) with a locking screw (LS). The
light
tower
mast (M) has 2 holes in the vertical direction. The locking ring (SR) can
be fitted to the mast (M) in these 2 positions.
Before using the HiLight P2+, read the instruction manual carefully.
Obey all instructions given in the manual.
CAUTION FOR LOCKING SCREW:
If care is not taken, the locking screw (LS) can scratch the mast (M)
or prevent the inner mast from getting raised.
- To prevent scratches, do not let the locking screw (LS) touch
the mast (M) while changing the position of the locking ring
(SR).
- Rotate the locking screw (LS) so that it is inserted in the hole
of the outer mast (M) only. Always take this precaution before
running the winch to prevent damage to the inner mast and
to make sure that the inner mast can be raised.