- 66 -
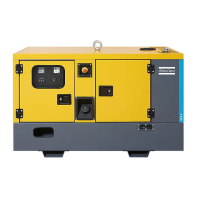
4.5 Operating the Eberspächer Preheater (option)
4.5.1 Description heating operation
When the preheater is switched on, the signal lamp in
the mini-clock control element is lit. The waterpump
starts and after a fixed program of prerinsing and
preheating, the combustion air fan, the glow plug and
the fuel dosing pump set combustion going. Once a
stable flame has formed, the glow plug is switched off
by a timer.
Depending on the heat requirement, the heater will
switch between three levels: LARGE, SMALL and
OFF (control interval). The temperature thresholds
are preset in the electronic control device. If the heat
requirement at level SMALL is so low that the
cooling water temperature reaches 85°C (185°F), the
device goes into control interval. Continuously the
fan keeps running for about 130 sec. The signal lamp
will stay lit during the control interval and the
waterpump continues to run.
If the heater does not ignite within 90 seconds after
fuel pumping has started, the start procedure must be
repeated. If the heater fails to ignite once again after
90 seconds a fault shut down is effected.
It is possible to override a fault shut-down by briefly
switching the heater off and then on again.
When an emergency stop has to be performed:
– Switch off the preheater at the control element.
– Remove the fuse or disconnect the heater from the
battery.
Safety procedure before starting after a longer
period of standstill
– Check whether the fuse is in its place and / or the
wiring is connected to the battery.
– Check if all parts are firmly fixed.
– Check the fuel system visualy on leaks.
Preheater altitude capability
– Up to 1,500 meters:
no restrictions
– Above 1,500 meters:
Operation possible for short periods
Continuous operation NOT possible
Before performing any maintenance,
always switch off the preheater and
remove the fuse or disconnect the heater
from the battery.
Do not repeat this action more than
twice in succesion!
1 Button Mode
2 Button Time down
3 Button Time up
4 Button ON/OFF select pre-set time
5 Time, pre-set time and heating time
6 Symbol pre-set time is active
7 Symbol heating ON
8 Symbol pre-set time 1,2 or 3
 Loading...