- 21 -
Operating Manual SUNTEST
®
CPS+
5
Installation
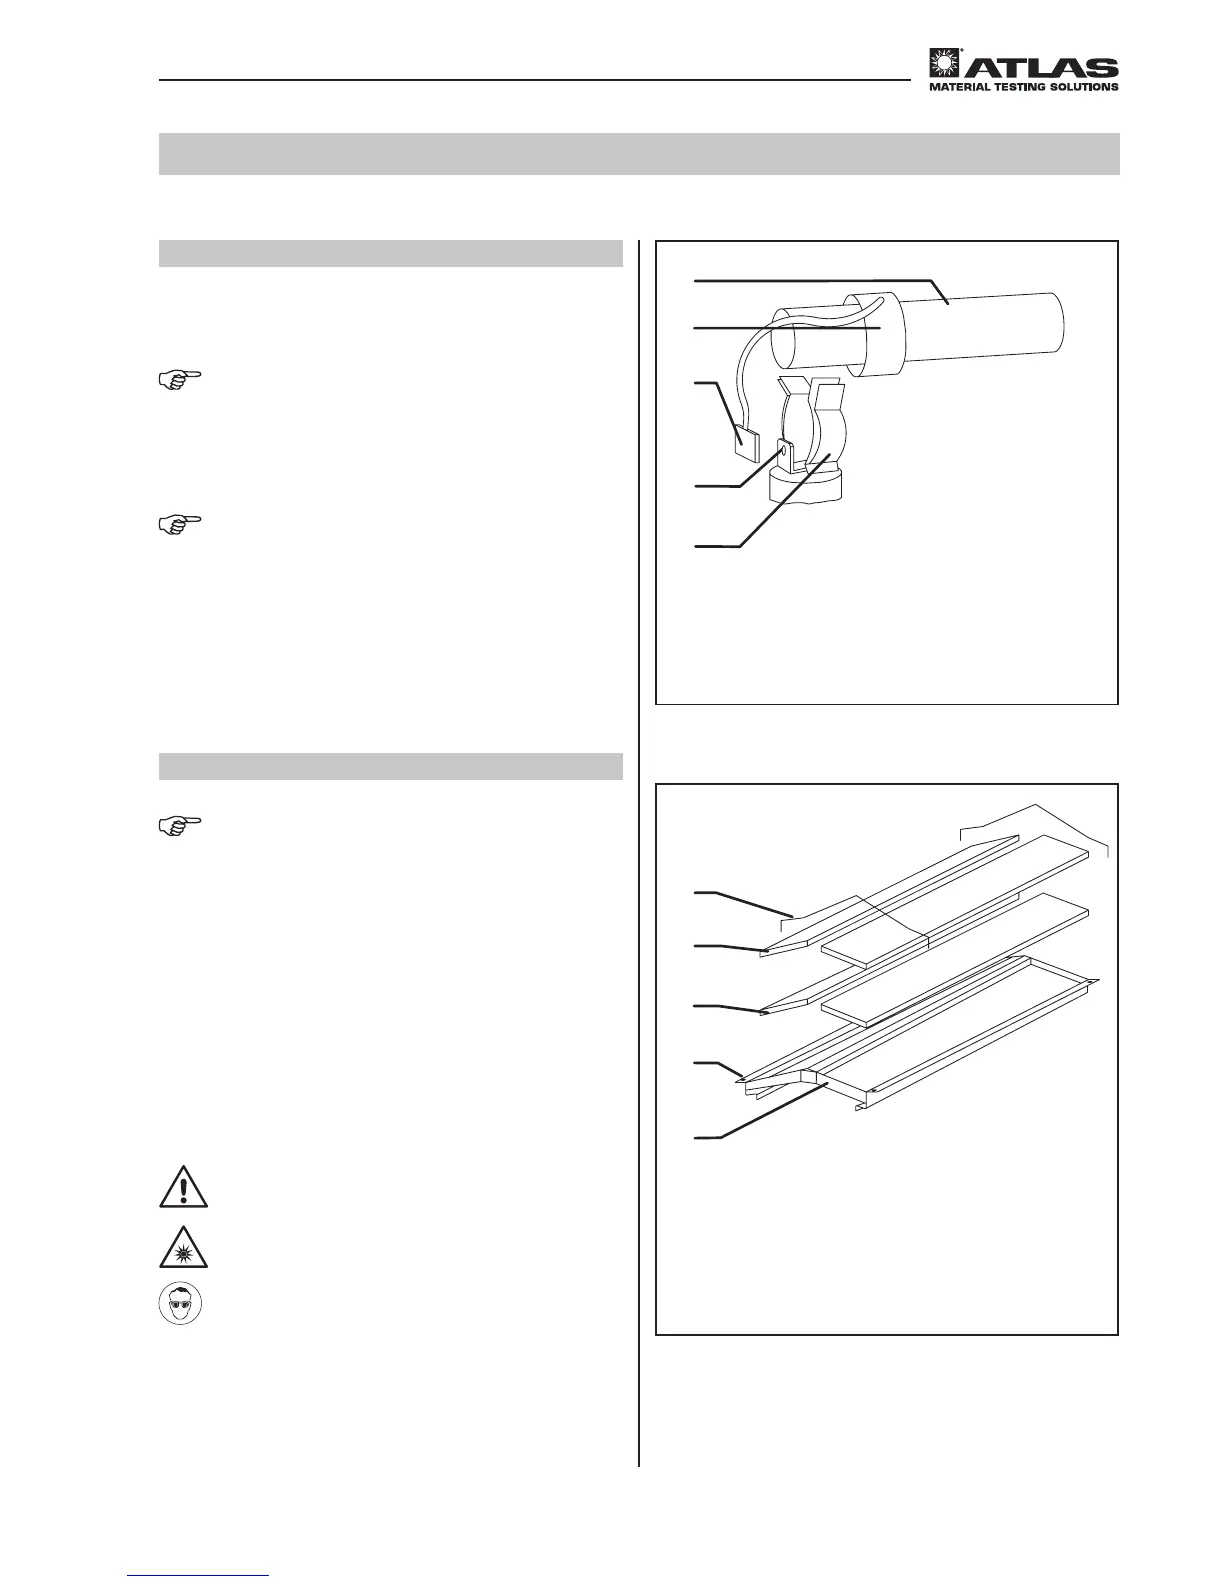
Xenon lamp
Lamp socket (2x)
Flat connector (2x)
Plug-in contact (2x)
Mounting (2x)
Retaining clips
Light mirror (reecting)
UV mirror (transparent)
Holes for retaining clips
Mirror support
5.2.5 Installation of the mirrors
NOTE – Mirror installation
The mirrors are pre-mounted. When cleaning or replacing,
install the irrors in the sequence described
Clean the mirrors with a soft cloth before installation.
1. First, place the transparent UV mirrors
in the mirror
support
2. Then position the light mirror
3. Fix the mirrors in the holes
by inserting the two
retaining clips
4. Insert the mirror support
with components tted into
the radiation compartment
5.2.4 Installing the xenon lamp
Before installation, the xenon lamp should be cleaned
with a lint-free cloth moistened with a pure, mild solvent,
e.g. isopropyl alcohol.
NOTE – Lamp installation
Residues from nger prints may burn into the xenon lamp
glass tube and cause uneven irradiance
• Grasp the xenon lamp only at the socket
• Wear clean cotton gloves for installation
NOTE – Position of the lamp holder
The lamp holder is located in the assembly compartment
1. Carefully press the xenon lamp
at the lamp sockets
in the mounting
.
2. Insert the at connector
into the plug-in contact
.
2
1
3
4
5
2
1
3
4
5
WARNING – UV radiation being emitted
If the instrument is operated without basic
lter system, UV radiation is emitted on the
upper side of the instrument and can result in
damage to skin and retina. Do not operate the
instrument without lter systems installed.
Mount, as a minimum lter conguration,
the basic lters:
• UV mirror
• Optical lter “Max UV reduced IR“
Fig. 14
Fig. 15
 Loading...