- 23 -
Operating Manual SUNTEST
®
CPS+
6.3 Testing procedure with optional
unit
Various accessories are available to enhance the
functionality of the SUNTEST
®
CPS+ (see chapter 11,
“Accessories”).
• Water-cooled sample table:
For temperature-sensitive materials
• Cover masks:
For a direct comparison between exposed and non-
exposed sample surfaces
• SunCool
®
cooling instrument:
For reducing the test chamber temperature in the
range of approx. 12 °C – 16 °C in the SUNTEST CPS+
• Immersion instrument:
For cyclic wetting of samples
• SunTray
For adding and removing samples from the test
chamber without switching off the light of the
SUNTEST unit
NOTE – Immersion and cooling instrument
The immersion and cooling instrument cannot be oper-
ated simultaneously.
6
Operation and shutdown
6.1 Conguration of the instrument
WARNING – Pull out the power plug
Coming in contact with live parts can re-
sult in a fatal electrical shock.
When installing the instrument, set the ON (I)
/ OFF (O) switch to the “OFF (O)” position and
pull out the power plug. Secure the power
plug to avoid reconnection.
1. Set the ON (I) / OFF (O) switch to the “OFF (O)” po-
sition. Pull the power plug out of the power socket.
Secure the power plug against being inserted again.
2. Use the sample table as described in chapter 5
“Installation”
3. Insert the optical lter, the xenon lamp and the mirrors
as described in chapter 5 “Installation”
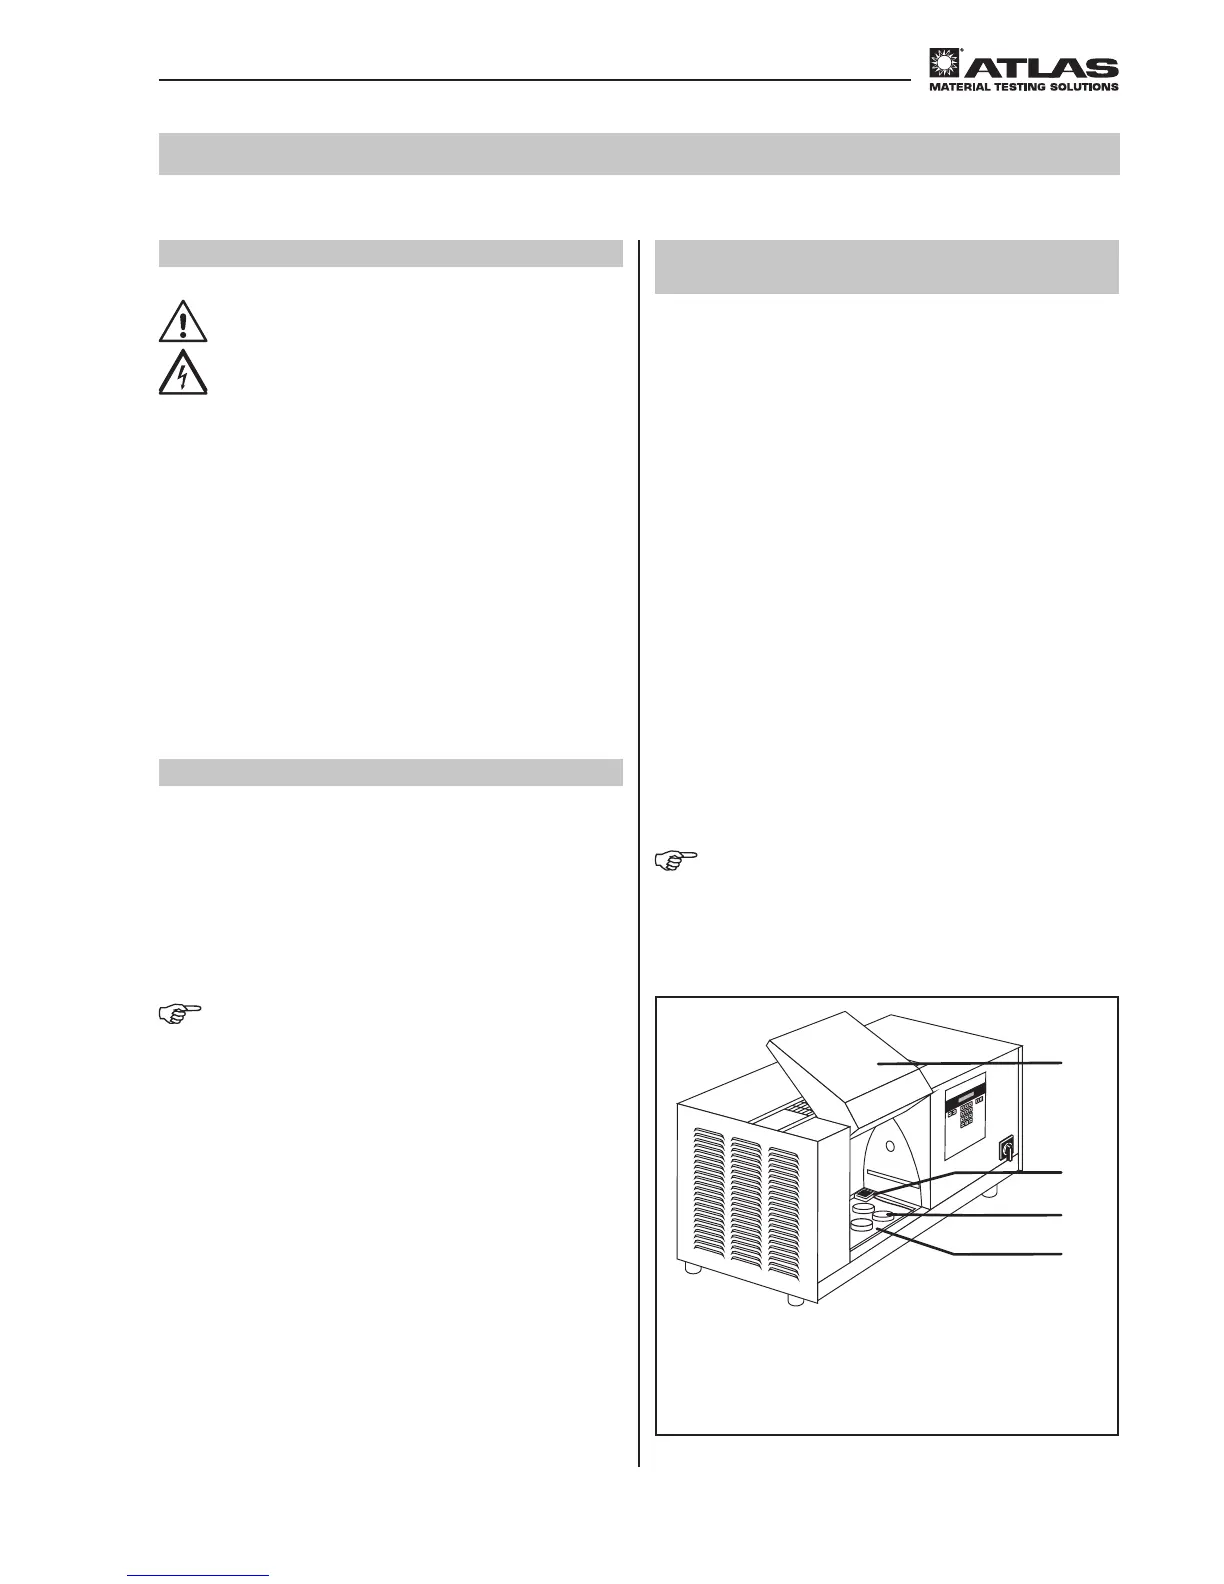
Test chamber door
Black standard sensor (BST sensor)
Samples
Sample table
6.2 Standard testing procedure
After mounting the radiation system (see chapter 5.2),
the instrument is ready for operation. For a standard
testing procedure, please proceed as follows:
1. Center the samples
in the test chamber. Thin or
very light samples
can be xed by using optional ad-
ditional cover masks (see chapter 11, “Accessories”).
NOTE – Positioning of sensor
In order to be able to reproduce and compare tests, the
black standard sensor (BST sensor) should always be
placed at the same location on the sample table.
2. Place the black standard sensor
on the sample
table
.
3. Close the test chamber door
.
0
1
2
3
4
Fig. 18
 Loading...