Owner Installation Instructions NeoSlider™ - Sliding Gate Opener NES-24V1 11
Limit Actuators Installation
Fixing limit actuator to rack
1. Manually open the gate to the open position and mark this on the gate rack under the actuating arm.
2. Manually close the gate to the closed position and mark this on the gate rack under the actuating arm.
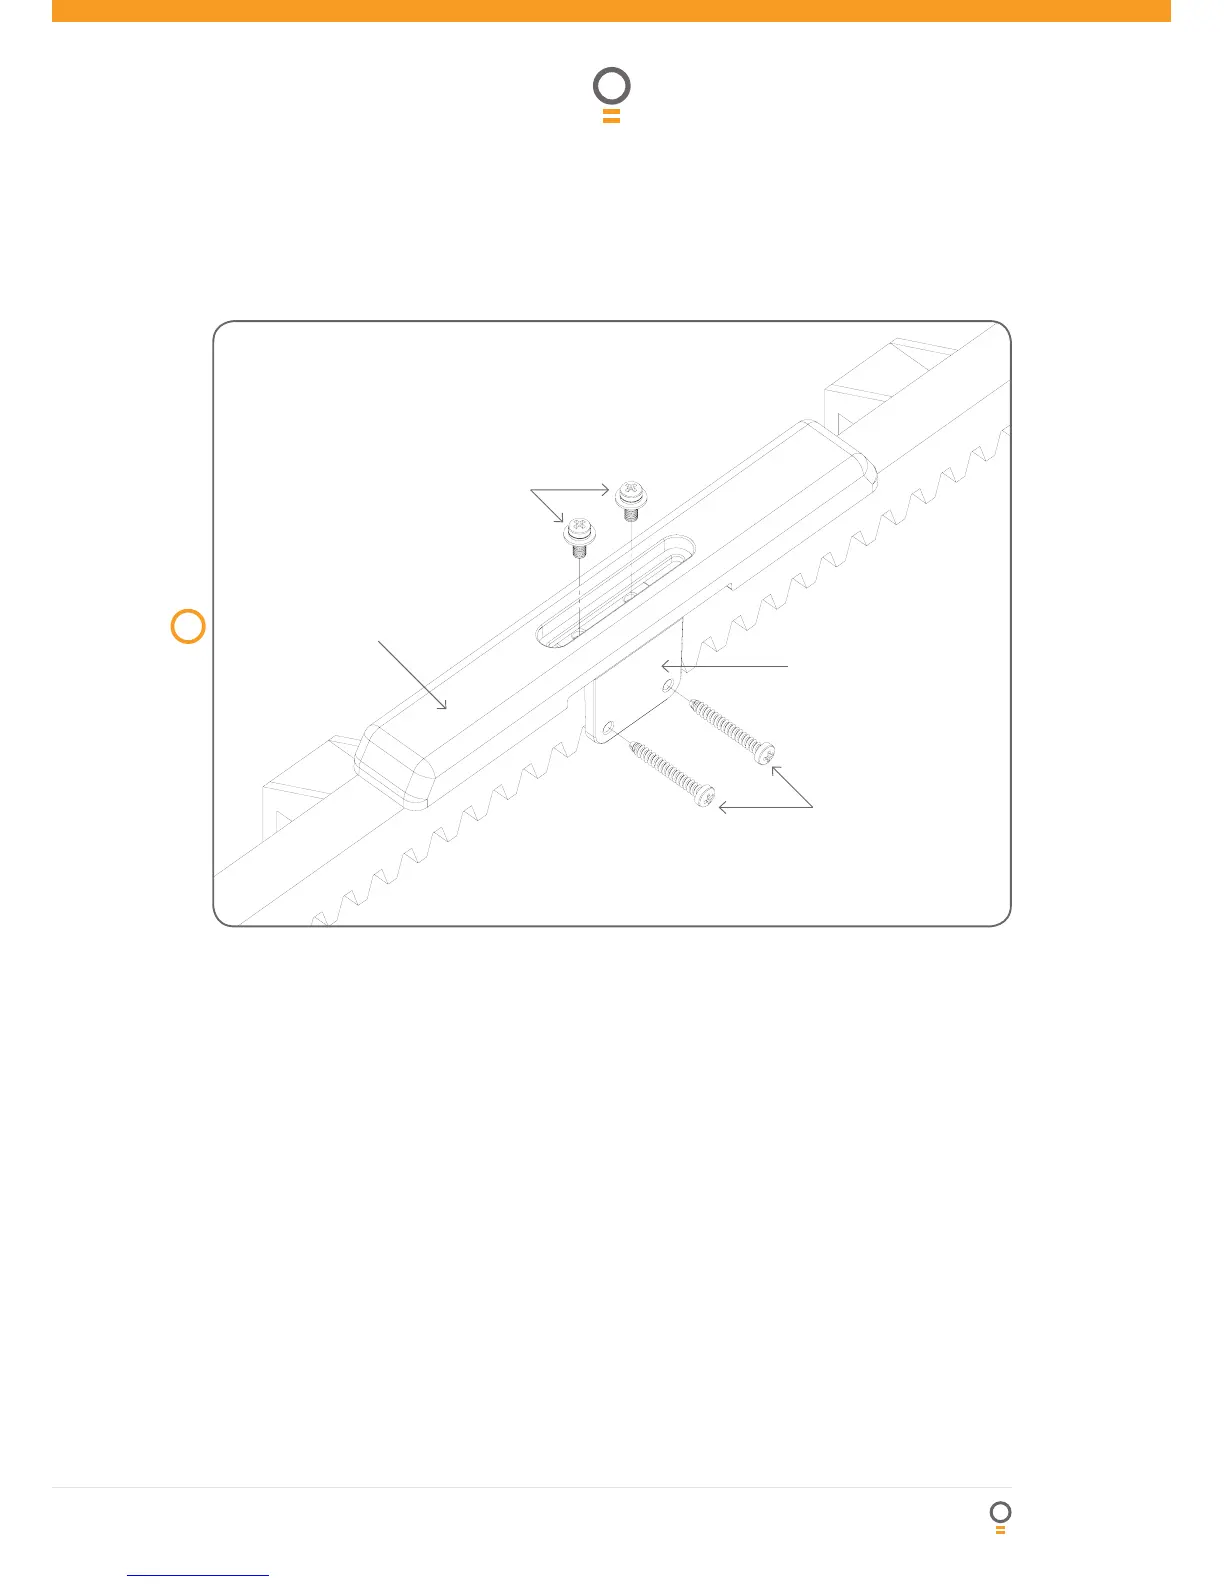
3. Place start of limit actuator at marked position and move it 5 to 10mm towards the centre of the gate. Align
the face of the limit actuator with the side of the rack and screw the limit actuator to the rack (Fig. 06).
4. Re-check limit positions by manually opening and closing the gate, checking to see that the limit is activated at
the desired open and close position. If neccessary, make adjustments by sliding the actuator in the required
direction. When the fi nal settings are established, tighten the limit actuator screws - each actuator must be
secured with two (2) screws.
06
fi g
Mounting holes
M4 x 10 w/washer screws
Actuator mounting block
M4 x 30 screws


 To Next Page