Do you have a question about the Automatic Technology NES-24V1 NeoSlider and is the answer not in the manual?
General safety guidelines for operating the gate opener and maintaining safe conditions.
Specific warnings about child supervision and awareness of gate movement during operation.
Emphasis on testing obstruction force and recommending Photo Electric beams for enhanced safety.
Guidelines for gate balance, removing locks, electrical connections, and power cord safety.
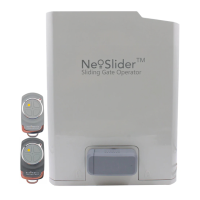
Key operational features, TrioCode security, and transmitter storage capabilities.
The role of the LCD console in operation, setup, and installation guidance.
Details on the Intelligent Safety System, lock/light controls, and extensive operating modes.
Information on SmartSolar, battery backup, and manual operation methods.
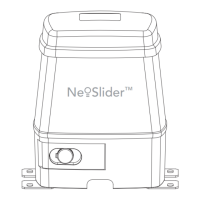
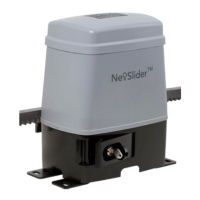
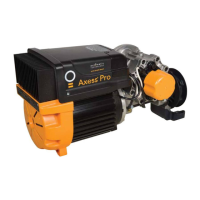
Description of the NeoSlider™ kit components and the drive unit.
Essential checks and site requirements before starting the drive unit installation.
Step-by-step instructions for securely mounting the drive unit in its position.
Procedures for mounting the gate rack onto the gate for meshing with the pinion gear.
Guide on fixing and adjusting limit actuators to define gate travel endpoints.
Identifies all terminal blocks and connectors on the control board.
Explains the purpose of console buttons, display, and programmer connector.
Visual representation of the control board with its component connections.
Overview of how to navigate through the different menus.
Details specific menus for settings, adjustments, and diagnostics.
Critical caution on using green/yellow cables solely for earthing purposes.
Emphasizes the need for a certified electrician for 240V AC power installations.
How the controller powers up, showing startup and main screens.
Steps to enter the menu for configuring gate travel limits.
Guide to manually setting the gate's fully open and fully closed positions.
Process for automatic limit learning and setting the pedestrian access point.
Procedure to re-learn gate travel characteristics and force adjustments.
Steps to manually set the duration or position for pedestrian access.
How the motor operates, stops, reverses, and detects obstructions.
Features for smooth operation, lock activation, and warning lights.
Details on various input functions (PE, OPEN, CLOSE, STOP) and modes like Vacation.
Adjusting the sensitivity of the obstruction detection system.
Setting up various auto-close timers and modes for automatic gate closure.
Programming the duration for lock activation during gate cycles.
Configuring when the courtesy light activates and deactivates.
Modifying motor speed parameters for opening, closing, and slow speed.
Configuring PE input response, PED input function, and open input polarity.
Settings for activity reports, vacation mode, password protection, and battery/solar operation.
Guidance on how to find specific parameters within the control board menus.
Step-by-step instructions for changing parameter settings and saving them.
Procedure to reset parameters back to their factory default values.
How transmitters are stored, labeled, and assigned functions to buttons.
Information on compatible transmitter types and how to select them.
The process of pairing a transmitter button with a specific gate function.
Modifying the functions assigned to individual transmitter buttons.
Options for managing transmitter storage and identification details.
How to edit the characters that form the transmitter's name or ID.
Methods to view and sort stored transmitters by number, ID, or serial number.
How to locate, edit, delete, or copy existing transmitter records.
Moving through the transmitter list and choosing actions like code, delete, edit, or copy.
Procedures for coding transmitters into empty slots or replacing existing ones.
How to copy functions from an existing transmitter to a new one remotely.
Steps to initiate remote coding using an existing transmitter.
Guide to navigating the diagnostic menus and selecting specific tools.
Verifying the status of various input signals to the control board.
Confirming transmitter operation and stored codes by sending test signals.
Reviewing a log of past gate operations and fault events.
Displaying the number of available and used transmitter memory slots.
Checking the service counter and setting maintenance intervals.
Viewing counts for specific events such as open cycles, close cycles, etc.
Resetting control board parameters and travel limits to factory defaults.
Erasing all programmed transmitter codes from the system.
Detailed instructions for fitting, wiring, and aligning PE safety beams.
Guidance on wiring solenoid/magnetic locks and AC/DC courtesy lights.
Solutions for common issues like gate not moving, reversing, or not opening/closing fully.
Troubleshooting tips for transmitter communication failures and auto-close malfunctions.
Information on external factors like radio interference affecting transmitter range.
Essential technical data including voltage, power, motor type, and dimensions.
Notes on gate size limits, balance requirements, and transmitter compatibility.
Instructions on using order codes when requesting replacement parts.
A comprehensive enumeration of all parts with their respective order codes.
Details on warranty duration, coverage, and essential conditions for claims.
Defines the scope of ATA's liability and lists common warranty exclusions.
A section for logging important information about the gate opener's purchase and installation.
| Brand | Automatic Technology |
|---|---|
| Model | NES-24V1 NeoSlider |
| Category | Gate Opener |
| Language | English |