ATS Series Installation Manual2
Table of Contents
1. Safety Warnings! 3
2. Before you Begin 5
3. Tools Required 5
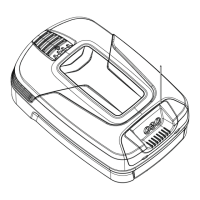
4. Kit Contents 6
5. Position 6
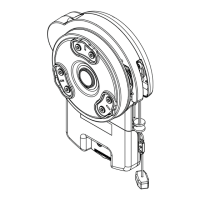
6. Fit the Opener 7
7. Bracket Position 7
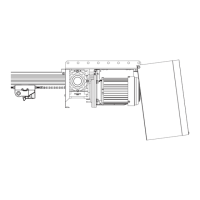
8. Perforated Angle 8
9. Mounting Brackets and Arms 8
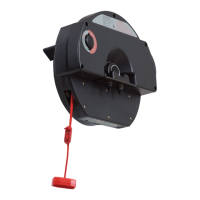
10. Safety Beam Kit 9
10.1 Inserting batteries 9
10.2 Assemble the Mounting Bracket 9
10.3 Mounting the Bracket 9
10.4 Aligning the Transmitter and Receiver 9
11. Specifications 10
12. Setting Limits 11
12.1 Set the Limit Positions and adjust speed: 11
12.2 Clearing the Door Limit Positions 12
12.3 Re-profiling the Door 12
12.4 Controller memory reset 12
13. Safety Testing 13
13.1 Test the Close Cycle 13
13.2 Testing the Open Cycle 13
13.3 Test the Manual Door Operation 13
13.4 Test the Battery Backup 13
14. Auto-Close & Accessories 14
14.1 Auto-Close 14
14.2 Terminal Block 15
14.3 Connecting or Disconnecting Accessories 15
14.4 Battery Backup (Optional) 15
15. Coding a Transmitter 16
15.1 Storing the Transmitter Code 16
15.2 Remotely Coding Transmitters 16
15.3 Erasing All Transmitter Codes 17
15.4 Vacation Mode 17
15.5 Installing the Wall Mounted Transmitter 17
Installation Instructions
Home Owner Instructions
WARNING! IMPORTANT SAFETY INSTRUCTIONS
FOLLOW ALL INSTRUCTIONS SINCE INCORRECT INSTALLATION CAN LEAD TO SEVERE INJURY.
• before installing the drive, remove all unnecessary ropes or chains and disable any equipment, such as locks, not needed for
powered operation;
• before installing the drive, check that the door is in good mechanical condition, correctly balanced and opens and closes
properly;
• install the actuating member for the manual release at a height less than 1,8 m;
• install any fixed control at a height of at least 1,5 m and within sight of the door but away from moving parts;
• permanently fix the labels warning against entrapment in a prominent place or near any fixed controls;
• permanently fix the label concerning the manual release adjacent to its actuating member;
• after installation, ensure that the mechanism is properly adjusted and that the drive reverses when the door contacts a 40
mm high object placed on the floor.
• necessary information for the safe handling of a drive weighing more than 20 kg. This information shall describe how to use
the handling means, such as hooks and ropes;
• the drive must not be used with a door incorporating a wicket door (unless the drive cannot be operated with the wicket door
open);
• after installation, ensure that parts of the door do not extend over public footpaths or roads.
• vertical doors and gates need an anti-drop feature or device;
• information if a hazardous part of the drive is intended to be installed at a height of at least 2.5 m above floor level or other
access level;
• except for horizontally moving pedestrian doors, ensure that entrapment due to the opening movement of the driven part
is avoided
16. Smart Phone Control 18
17. Opener Safety & Security 19
17.1 Your Door CAN NOT be used when: 19
17.2 Your Door CAN be used when: 19
17.3 To Disengage the Opener: 19
17.4 To Re-engage the Opener: 19
18. Operating your Opener 19
19. User Operating Controls 20
20. Troubleshooting 21
21. After Installation Care 23
21.1 Service Checklist 23
21.2 Battery Replacement 24
21.3 Battery Disposal 24
21.4 Warranty 24
22. Appendix 25
A - Status Indication during Operating Mode. 25
B - Adjustment Mode Instructions 26
C - Adjusting Force Margins 27
D - Battery Functions 27
E - Setting the PET mode position 27
F - Setting Limits via Transmitter 28
G - Setting up Tilt Door 29