ATS Series Installation Manual26
Parameter
Value options = Indicated by brightness
of main light
1 2 3 4 5 6
MARGIN x1 1.0A 1.2A 1.4A 1.6A 2.0A -
PE AUTO-CLOSE x2
OFF 15sec 30sec 60sec 90sec -
AUTO-CLOSE x3
OFF 15sec 30sec 60sec 90sec 120sec
LIGHT TIMER x4 30sec 60sec 90sec 120sec
180sec 240sec
AUX OUTPUT x5
Mimic
light
1sec 30sec 60sec 120sec 180sec 240sec 300sec 600sec toggle
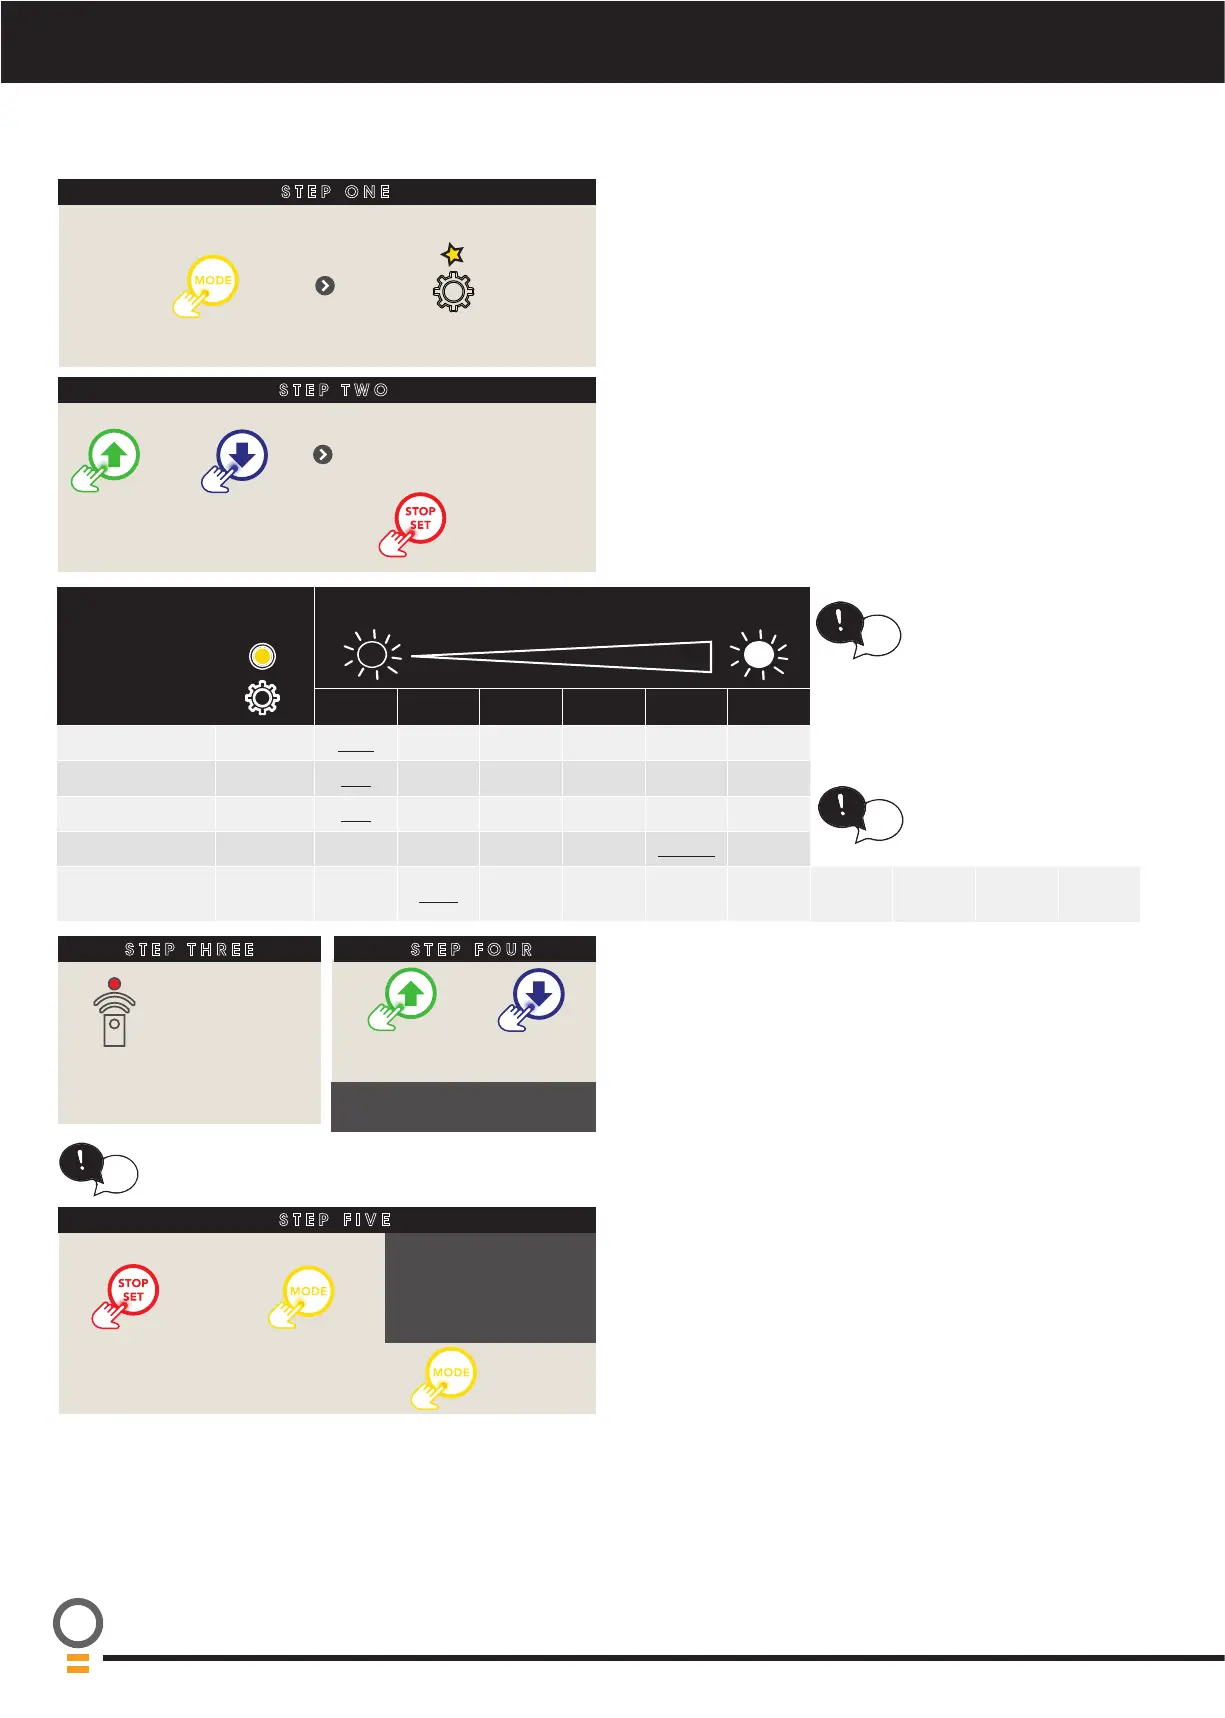
B - Adjustment Mode Instructions
When parameter edit mode
is active, if any button other
than MODE is pressed, then
when MODE is pressed
again, operating mode will
be selected instead of the
NETWORK adjustment
mode.
tip
AUX OUPUT
• Configures how the AUX Output operates. If
configured for Mimic light mode then the AUX output
will activate whenever the main light output is on.
• All other settings require either a remote control code
set to the AUX function or the Phone App to be used
to activate the output.
• The time settings option indicates how long the output
will remain on when triggered. If the output is already
on, then a 2nd trigger will turn the output off.
• The toggle On/Off setting does not use a timer and
the output simply changes state on each trigger..
STEP ONE
Remove controls cover
till gear LED
starts ashing
Press
repeatedly
ADJUSTMENT MODE INSTRUCTIONS
STEP TWO
STEP FOUR
If no beep is heard, max
or min setting is reached.
Press to move
through options as
per table below
OR
Observe the number
of ashes to indicate
the parameter.
Press
to enter
parameter
the remote LED is
lit when editing
active
OR
Use either button to
scroll through
Pressing the MODE button when a parameter is
being adjusted will load the default value.
tip
Press to save
OR
Press to leave
unchanged
Press to
exit
Operating MODE is
entered after 5 secs,
unless a new
adjustment is started
or saved.
STEP FIVE
STEP THREE
Remove controls cover
till gear LED
starts ashing
Press
repeatedly
ADJUSTMENT MODE INSTRUCTIONS
STEP TWO
STEP FOUR
If no beep is heard, max
or min setting is reached.
Press to move
through options as
per table below
OR
Observe the number
of ashes to indicate
the parameter.
Press
to enter
parameter
the remote LED is
lit when editing
active
OR
Use either button to
scroll through
Pressing the MODE button when a parameter is
being adjusted will load the default value.
tip
Press to save
OR
Press to leave
unchanged
Press to
exit
Operating MODE is
entered after 5 secs,
unless a new
adjustment is started
or saved.
STEP FIVE
DEFAULT parameter
(underlined)
tip
LIGHT TIMER
• Adjusts the time the main light will remain on after the
door is operated or a remote control code set to the
Light remote control function is used.