Step 7: Establish PC to PLC Communications, (cont’d)
Provisioning your Wireless CLICK PLUS PLC via Bluetooth, (cont’d)
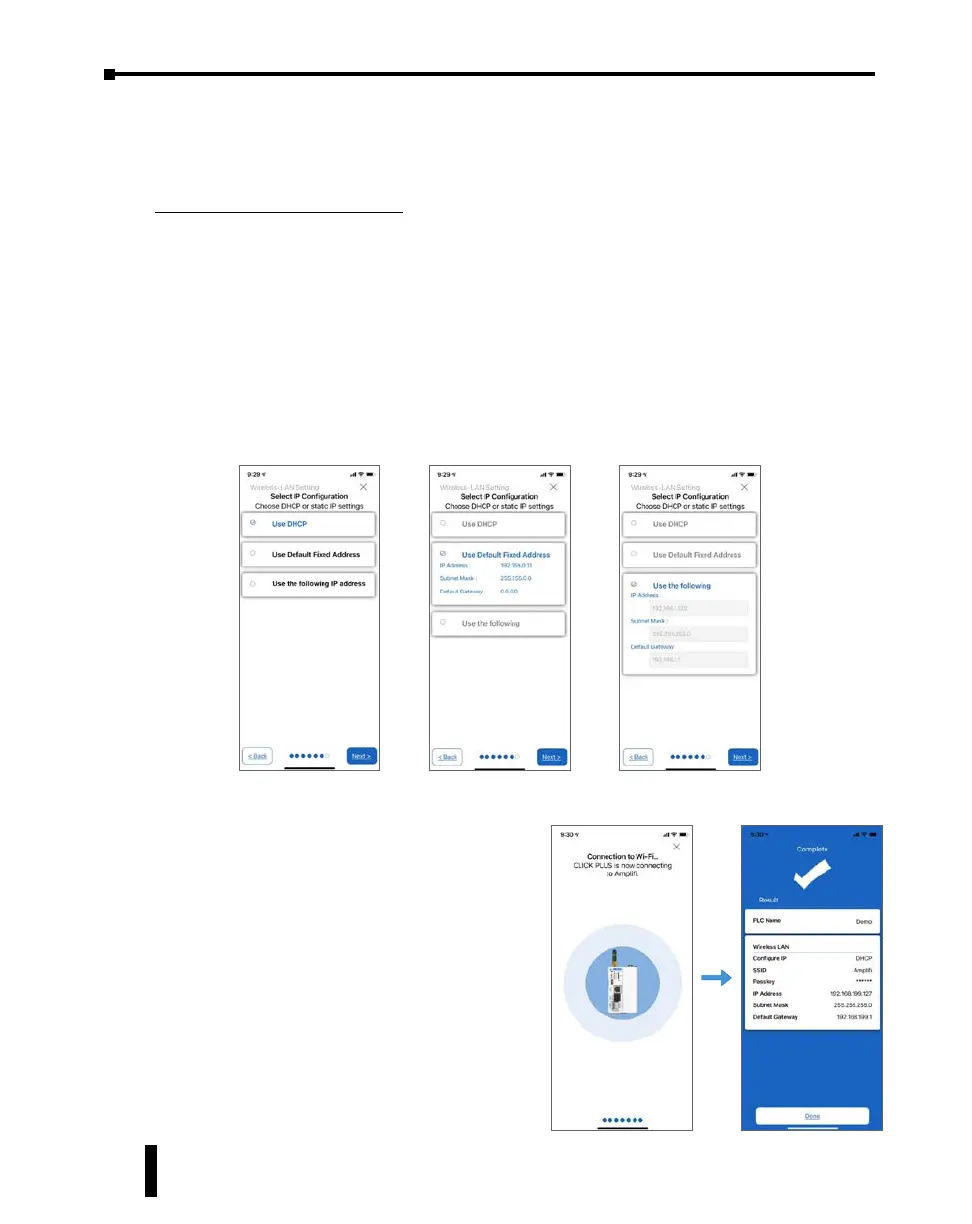
Setup the Network Parameters
9. Once the PLC is connected to the wireless access point or wired network, choose which IP
address configuration to use.
i. Use DHCP: Automatically assign a network IP address to the CLICK PLUS PLC.
This is often the simplest way to connect. Tap Next to continue.
ii. Use Default Fixed Address: The CLICK PLUS wireless LAN default IP address
is 192.168.0.11. This can be selected if it is a valid IP address for your wireless
network. Tap Next to continue.
iii. Use the following IP address: Choose this option if you need to input a valid IP
address for your network. Tap Next to continue
10. The CLICK PLUS will connect to the
access point and exchange configuration
information. If the settings are correct, the
App will show the Completion screen and
the network settings of the CLICK PLUS can
be viewed. If using a wireless connection, the
CLICK PLUS WLAN LED will also be ON.
The PLC is now connected to the network
and accessible to PC’s running the CLICK
Programming Software and connected to the
same network.
CLICK PLUS PLC Hardware User Manual, 1st Edition, Rev. K – C2-USER-M
1-24
Chapter 1: Getting Started