Step 7: Establish PC to PLC Communications, (cont’d)
Provisioning your Wireless CLICK PLUS PLC via Bluetooth, (cont’d)
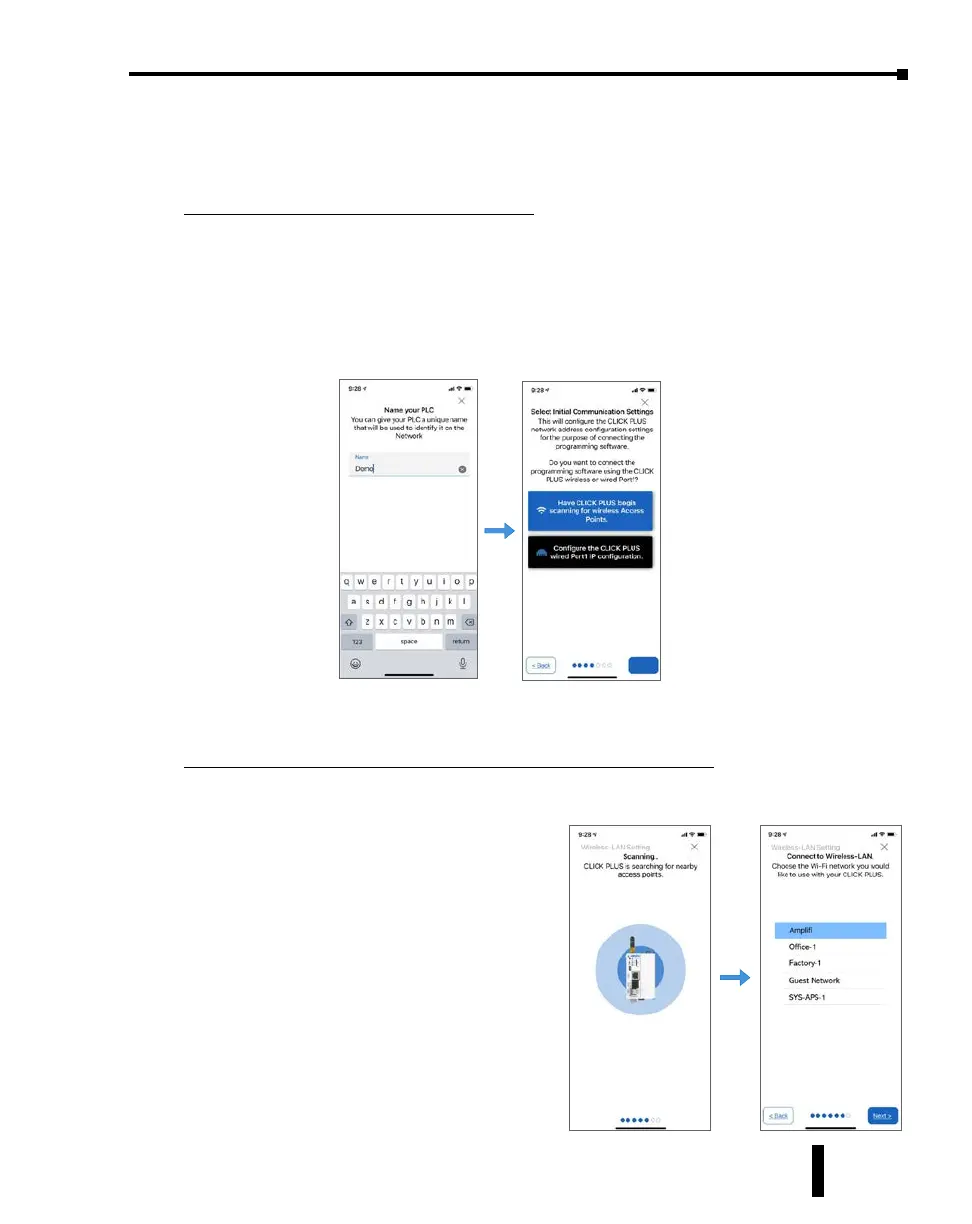
Name the CPU and select port to congure
6. You will be requested to assign a name to the PLC. This name will be used to identify
it on the network when using the programming software connection Ethernet browse
tool. It is good practice to choose a unique name if there are other CLICK PLCs on the
network. Enter a name for the PLC and tap Next.
7. Choose which network port to provision. This will configure the CLICK PLUS network
address settings for the purpose of connecting the programming software.
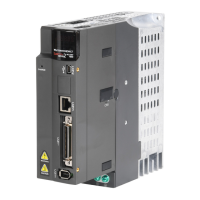
Setup the Wireless LAN Connection (Skip for Wired Connection)
For this option you will need an active Network Access point available within range of the
CLICK PLUS PLC, and know the password to allow the PLC to connect to the Network.
8. The CLICK PLC will scan for any access
point within range and then display all
access points that are available (you may
need to scroll the list to find the desired
Access Point). Select an Access Point and
type in the correct password that the PLC
will need to connect. If the incorrect
password is entered, you will be prompted
to correct it after the CLICK PLUS fails to
connect.
CLICK PLUS PLC Hardware User Manual, 1st Edition, Rev. K – C2-USER-M
1-23
Chapter 1: Getting Started