16
shorted circuit. Take note of this wire’s identification code or
color.
Follow the wire as far as you can along the wiring harness.
Here is an example for this application.
If you are following a short in the brake light circuit, you may
know that the wire must pass through the wiring harness at the
door sill. Locate the color coded wire in the harness and
expose it.
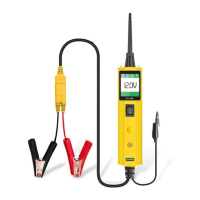
Probe through the insulation with the probe tip, and depress
the power switch forward to activate and energize the wire.
If the circuit breaker tripped, you have verified the shorted
wire. Cut the wire and energize each end with the probe tip.
The wire end which trips the circuit breaker again is the
shorted circuit and it will lead you to the shorted area.
Follow the wire in the shorted direction and repeat this
process until the short is located.
Remove the blown fuse from the fuse box.
Use the probe tip to activate and energize each of the fuse
contacts. The contact which trips the circuit breaker is the
Red / Green
polarity LED
●
●
●
●
●
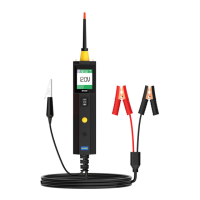
The Red / Green Polarity LED lights up when the probe tip
voltage matches the battery voltage within ±0.8 volts. It is
added information that could be valuable to the technician.
If the circuit you are testing is not within a 0.8 volt (plus or
minus) of supply voltage, you will see the voltage reading on
the LCD but you will not hear a tone or see a red or green LED.
This tells you either you have a voltage drop in excess of 0.8
volt from battery voltage or you are probing a circuit that has
an increase of a 0.8 volt or more over battery voltage.
To determine battery voltage, simply remove the tip from the
circuit and press the power switch forward. Battery voltage will
then be displayed on the LCD. The difference between the
battery voltage and what is read on the circuit is either voltage
drop or voltage increase. This allows you to determine a
voltage drop without running back to check the battery. It’s just
another one of time saving feature the tool has.
●
●
●