Installation - Page 17
DECT - Installation Manual Page 17
38HBKD0001SAH – Issue 14 (27th October 2003) Installing a DECT Expansion Board (DEB)
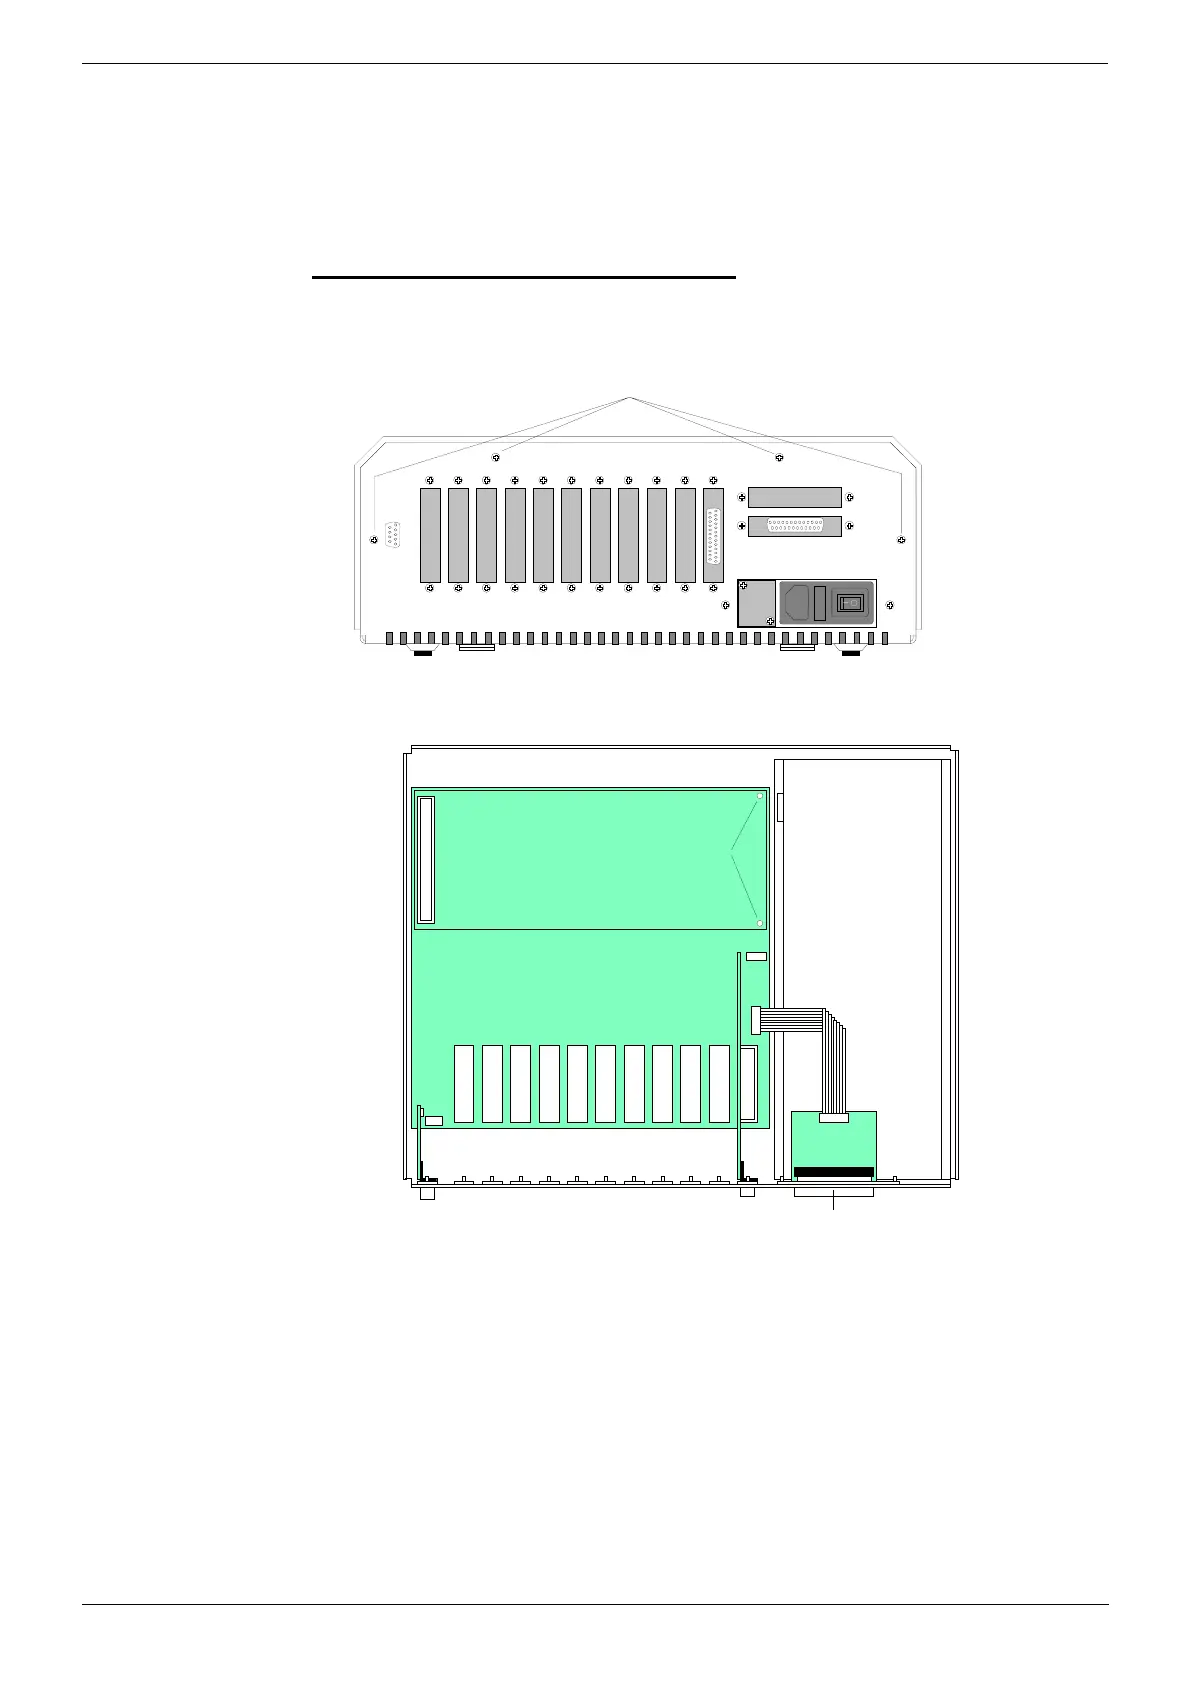
Installing a DECT Expansion Board (DEB)
The basic control unit can support eight Base Stations. The DECT
Expansion Board (DEB) allows it to support another eight. It installs onto
the Control Unit motherboard. The DECT Expansion Board supplied with a
5m cable for connection to the MDF, internal connector socket lead and
two support pillars.
To install the DECT Expansion Board:
1. Disconnect the Control Unit from the mains power supply.
2. Remove the cabinet cover by removing the screws on either side and
four screws on the base.
Cover Fixing Screws
(plus two on either side)
3. Insert the two plastic pillars supplied with the DECT Expansion Board
into the motherboard.
Power Supply
Posi t i on f or DECT
Expansion Board
Suppor t Pil l ars
Bl ank i ng Pl at e for 2nd
DECT Expansion Board
Con n ect or Sock et
4. Plug the DECT Expansion Board onto the motherboard.
5. Remove the blanking plate above the existing Base Station cable
connector. Replace it with the connector socket supplied as part of the
DECT Expansion Board.
6. Unless adding DECT Alog Boards (see Installing DECT Alog Boards
(DAB) on page 18), replace the Control Unit cover and reconnect the
main power supply.