Page 18 - Installation
Page 18 DECT - Installation Manual
Installing DECT Alog Boards (DAB) 38HBKD0001SAH – Issue 14 (27th October 2003)
Installing DECT Alog Boards (DAB)
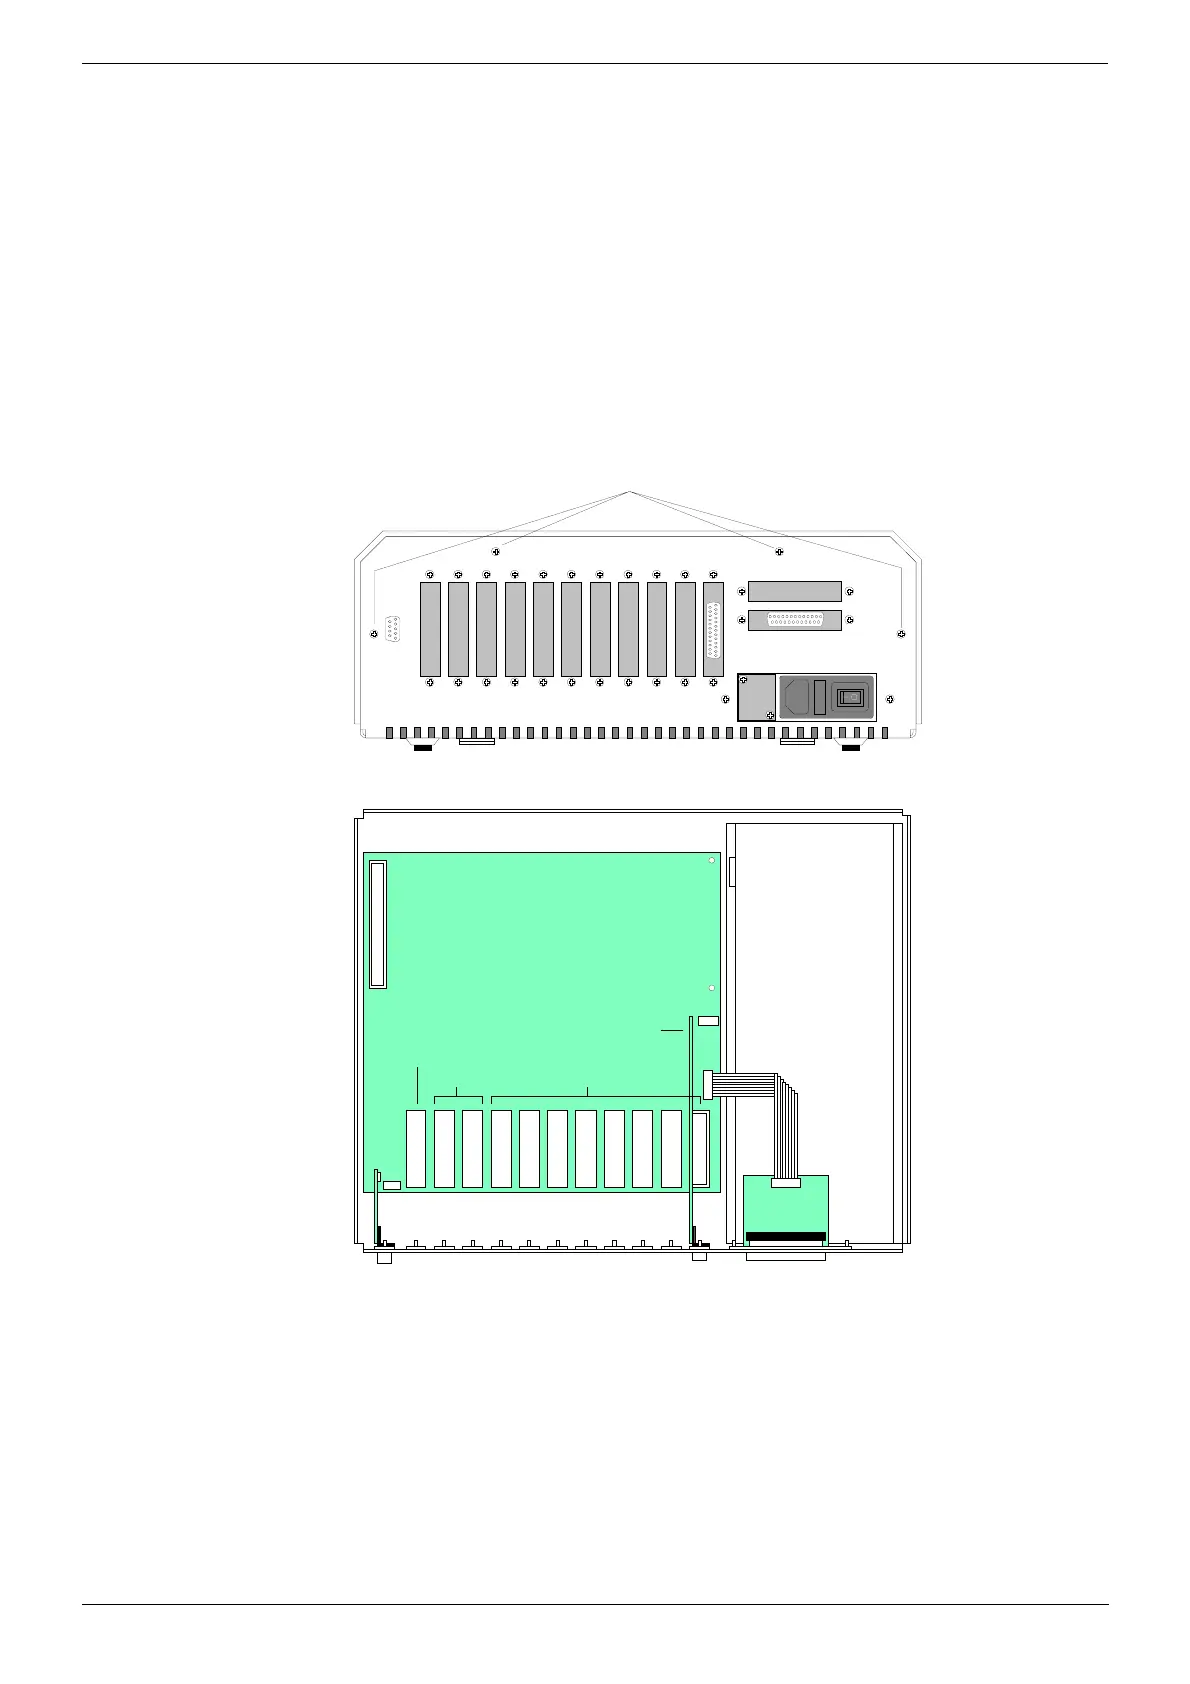
The Control Unit has eleven slots for device cards. From the right, the first
8 slots are for DECT Alog Boards (DAB or DAB-ER), i.e. two-wire links to
the PBX.
The DAB is used for timed break recall (TBR) analogue links and is the
board used for connections to switch analogue circuits. The DAB-ER is
used when earth recall analogue links are required though the DAB-ER
can also support TBR.
Each DAB or DAB-ER card is supplied with a 5m cable for connection to
the MDF panel.
1. Disconnect the Control Unit from the mains power supply.
2. If necessary remove the cabinet cover by removing the screws on
either side and four screws on the base.
Cover Fixing Screws
(plus two on either side)
3. Working from the right, remove the blanking plate from the first
available slot (Slots 0 to 7).
Power Supply
Blanking Plates for Connectors
Not Used
DECT Al og Boar d (DAB)
Sl o t s
76543210
Installed DAB card in Slot 0.
Link Car d
Sl o t
4. Insert the card into the slot.
5. Repeat this process for any other Alog Interface Board being installed.
6. Replace the cabinet cover and secure the cover screws.