Linked DECT Systems - Page 61
DECT - Installation Manual Page 61
38HBKD0001SAH – Issue 14 (27th October 2003) Installing a Linked DECT System
Installing a Linked DECT System
Install DCU's, DAB cards and base stations as normal. Note that the
DCU's must be mounted horizontally level with each other and no more
than 500mm apart to allow for Link Cable connection.
1. Ensure that the mains power supply to both Control Units is off.
Remove the cabinet covers.
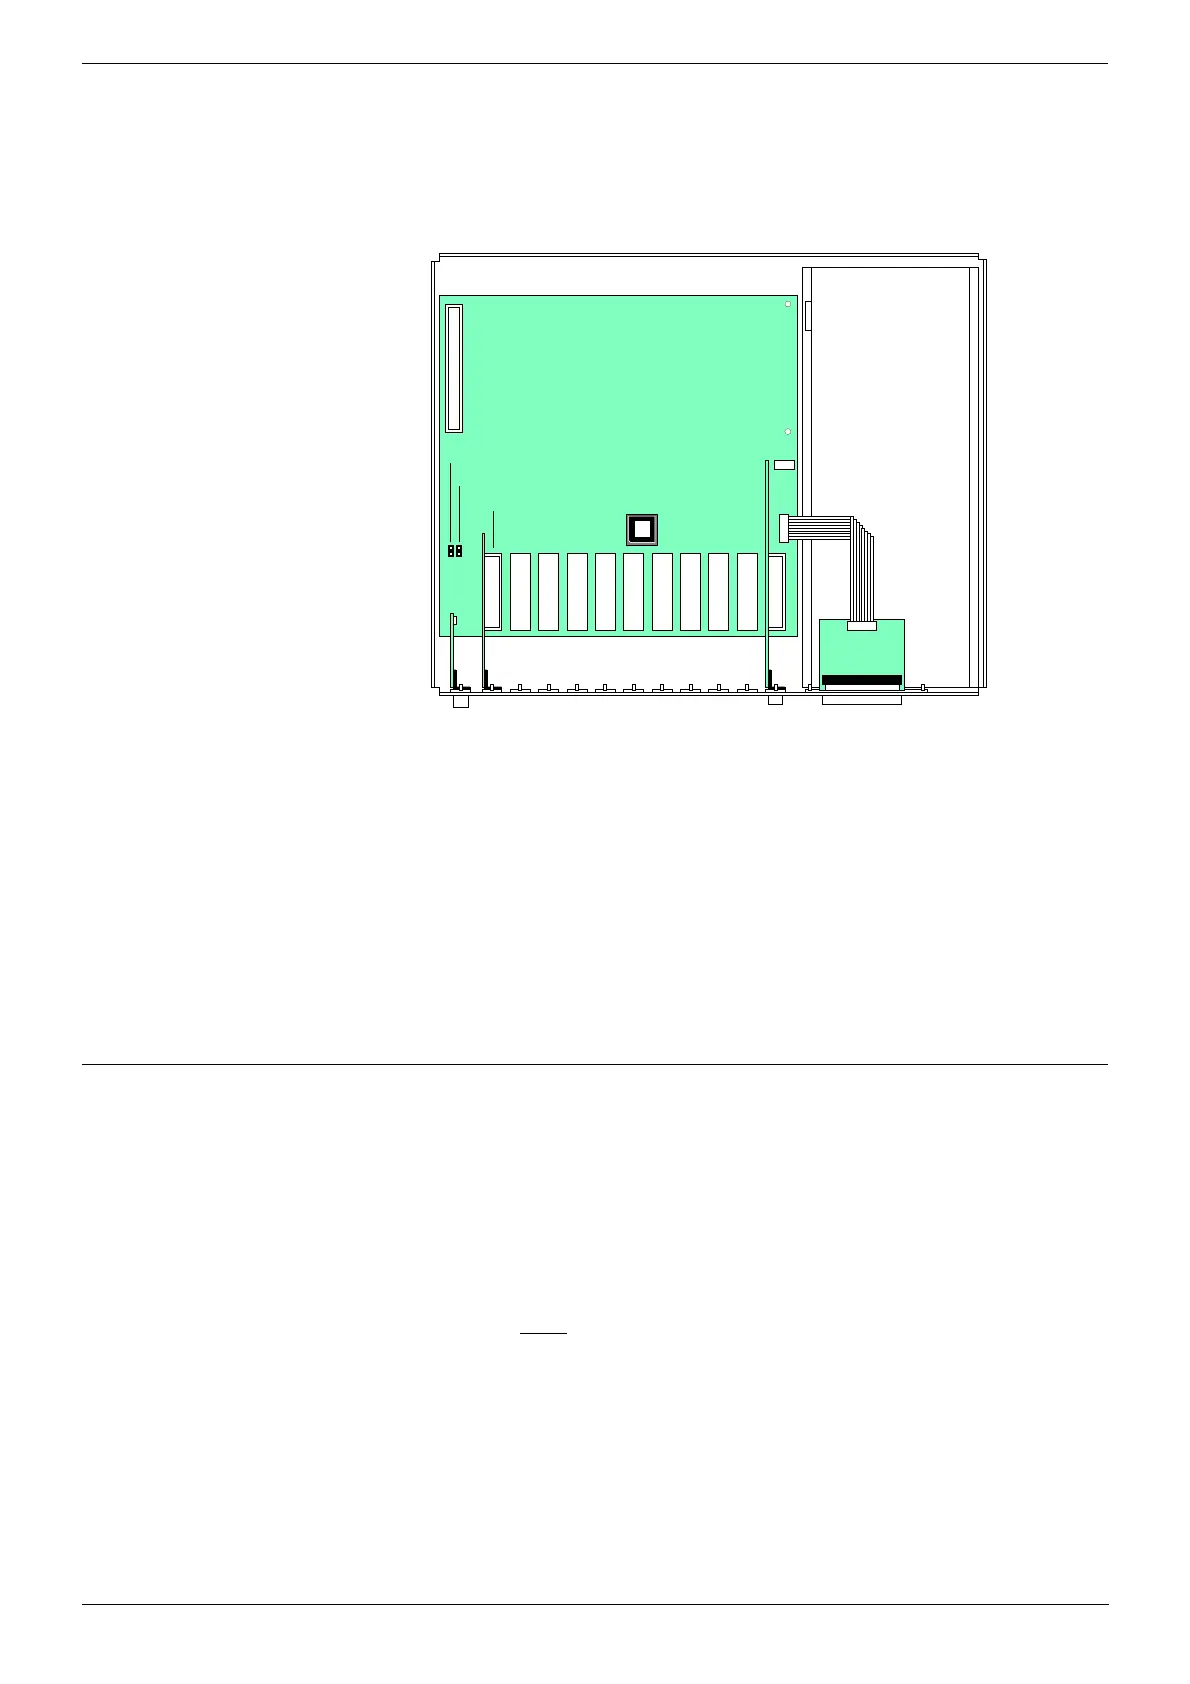
Power Supply
Link Car d Slot
Sl ave/ Mast er J u mper
Boot Command Interpreter Jumper
Epr om IC Socket
2. Check the Eprom chip in each cabinet. If either is an 13298200 chip,
replace it with one of the 13298201 chips supplied in the Link Kit (see
Eprom Replacement on page 63).
3. In each cabinet remove the blanking plate from the first available slot
on the left (the slot next to the serial cable connector).
4. Insert the Link cards into those slots. Ensure that your insert the
correct card into each DCU; the card for the master system has a
female connector, the card for the slave system has a male connector.
Connect the two cards using the supplied Link Cable.
5. You can program the system using either CCFP or SIO (see either:
Programming a Linked DECT System using CCFP on page 61 or
Programming a Linked DECT System using SIO on page 62)
Programming a Linked DECT System using CCFP
1. Ensure that the mains power supply to both Control Units is off.
Remove the cabinet covers.
2. In each cabinet, at the bottom-left of the motherboard, are a pair of
jumpers with one jumper connector.
3. In the Slave Cabinet, remove the jumper connector and in the Master
Cabinet, place the jumper connector on the right-hand jumper
(Slave/Master Jumper).
4. Apply power to both
cabinets.
5. With your PC connected to the Master DCU (for direct connection see
page 31 or via a modem see page 33 ) and CCFP running, select:
Options | Preferences | Link Setup
6. Select Assign as Link System. This will setup the system correctly
and initiate reset of the CCFP Administration program. A configuration
display appears:
Master/Slave System Configuration Detected
7. Program the system as per normal. E.g. the registration of handsets
beyond 64 is automatically catered for by CCFP.