Hardware Installation
3-20 Issue 6 September 2001
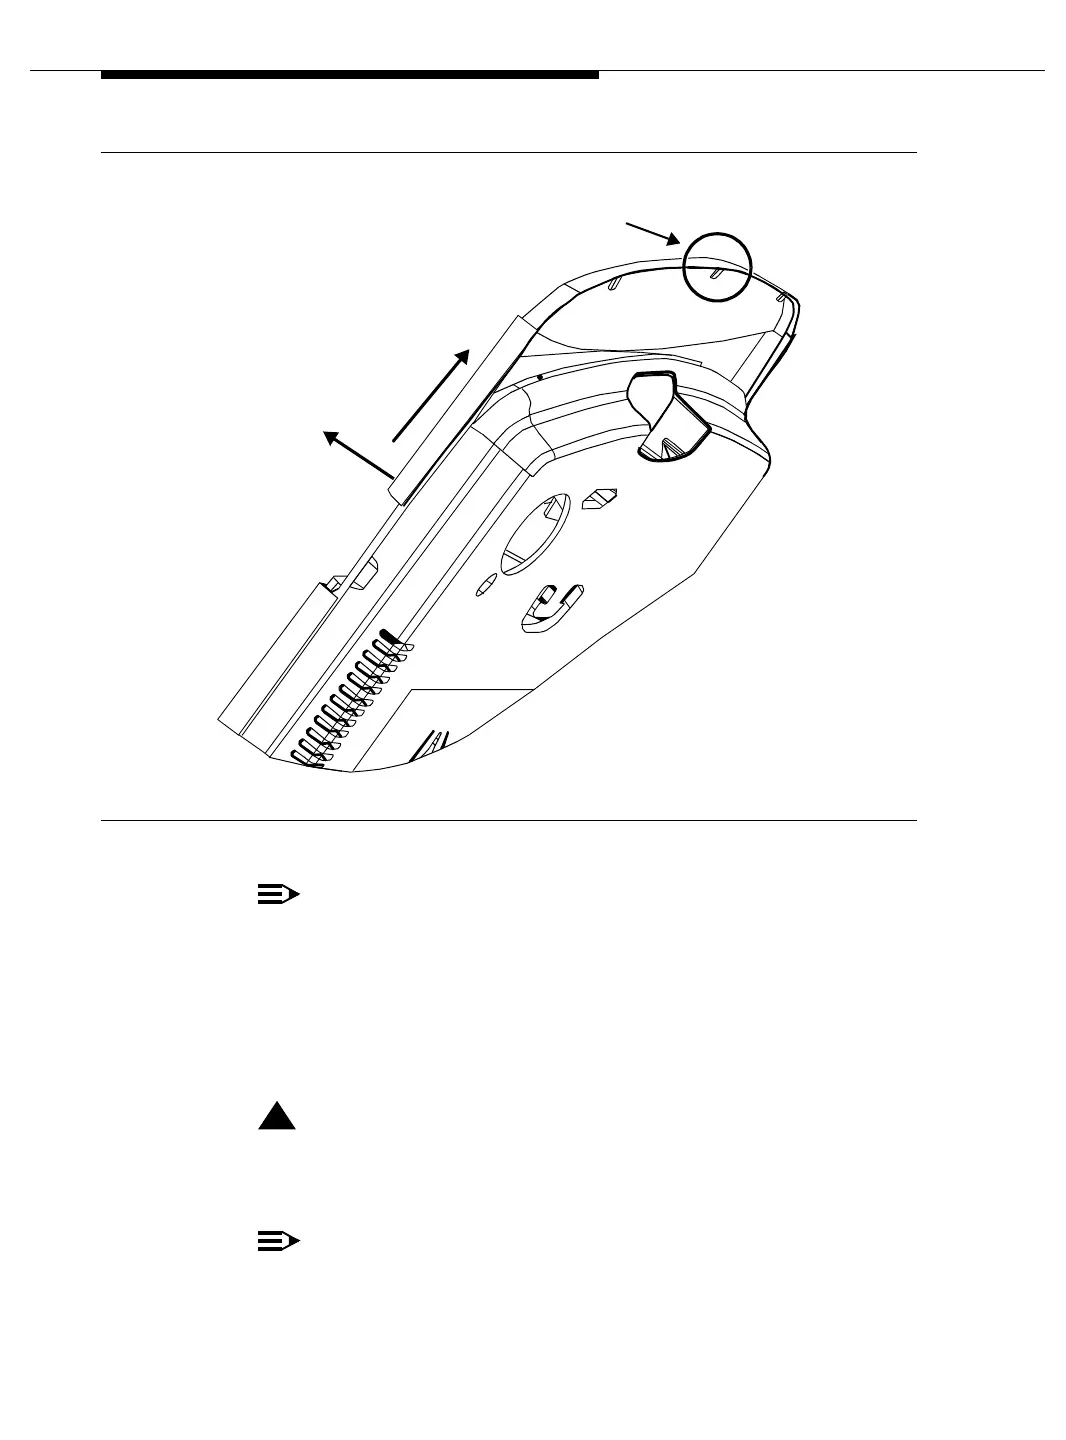
Figure 3-7. Removing the WFB Cover
NOTE:
If the WFB is mounted vertically on a wall or column, ensure that the
Avaya logo is facing upright.
9. Connect the D8W cable to the RJ45 connector in the WFB as shown in the
following figure. Use a digital port tester to ensure proper wiring. (Refer
to the “Conditions Indicated by the Digital Port Tester LA85” table later in
this chapter.)
!
WARNING:
Handle the cable with care to minimize the possibility of damage to
the cable’s interior components or the connecting contacts.
NOTE:
The RJ45 is a modular telephone connector.
1. Gently lift
2. Slide
NOTE: Align tabs in cover
with slots in base.
corners of
cover
off.
cover.

 Loading...