•
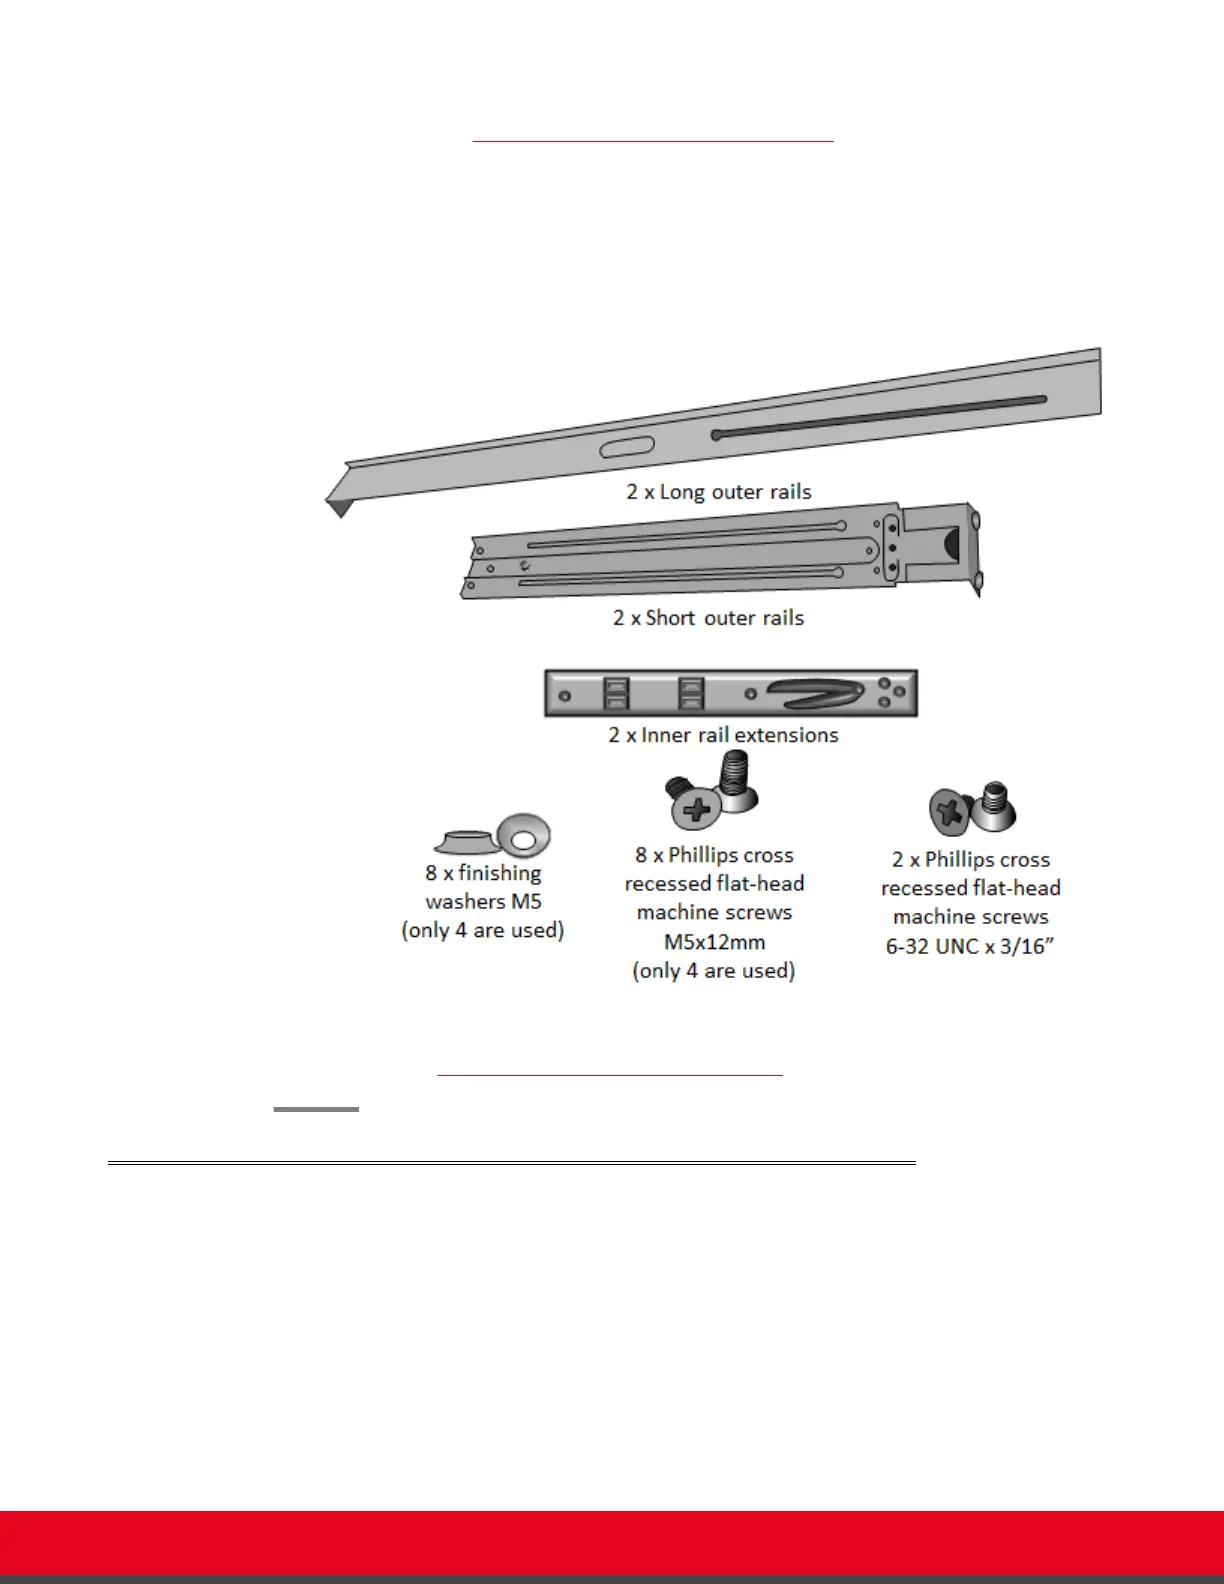
Two inner rail extensions, used to attach the device to the outer rails on the rack (as
described in Mounting the Device on to the Outer Rails on page 15)
•
Eight flat-head long screws (Phillips cross recessed flat-head machine screws
M5x12mm). You need only four to mount the device.
•
Eight brackets (finishing washers M5). You need only four to mount the device.
•
Two flat-head short screws (Phillips cross recessed flat-head machine screws 6-32
UNCx3/16")
Figure 3: Preparing the parts required to mount the rails
5. Continue with Mounting the Outer Rails on to the Rack on page 11.
Mounting the Outer Rails on to the Rack
About this task
This procedure describes how to mount the outer rails on to the rack. The outer rails are used to support
the inner rails, which are attached to the device.
After fastening the outer rails to the rack itself, you attach the inner rails to the device. You can then slide
the inner rails along the outer rails to mount the device on to the rack.
Installation Guide for Avaya Scopia
®
Application Server Version 2 Setting up the Device | 11

 Loading...


