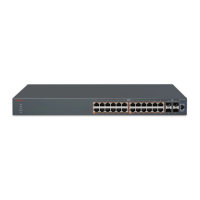
To install an Avaya VSP 4000 on a table or shelf, perform this procedure.
Caution:
Do not place an Avaya Ethernet Power Supply Unit or Avaya Ethernet Redundant Power Supply
on top of an Avaya VSP 4000. The switch housing of an Avaya VSP 4000 cannot support the
weight of these units. For a translation of this statement, see
Translations of safety
messages on page 41.
1. Remove the screws that hold the USB cover but do not remove the USB cover.
Caution:
To ensure proper operation, the USB FLASH drive must remain inserted in all models of VSP
4850 (factory built and converted from ERS 4850), with the cover installed for additional
protection against removal. The USB FLASH drive on the VSP 4850 switch is uniquely bound
to the system it was first used on and cannot be transferred to a different switch.
2. Attach the included rubber footpads on the bottom of the switch at the locations indicated.
3. Set the switch on a table or shelf as illustrated below. Allow at least 2 inches (5.1
centimeters) on each side for proper ventilation and at least 5 inches (12.7 centimeters) at
the back for power cord clearance.
Installing the Avaya Virtual Services Platform 4000 on a table or shelf
May 2016 Installing Avaya Virtual Services Platform 4850GTS Series 23
Comments on this document? infodev@avaya.com

 Loading...