Chapter 4: Configuring and Installing I/O in Stage 48 13
5 Loosen the two interior captive thumbscrews that secure the
card to the console chassis.
6 On the back of the console, remove the four screws that se-
cure the card to the console chassis.
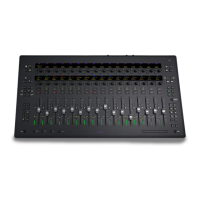
7 Gently slide the card out of the slot. You may need to use a
screwdriver or other flat-edged tool to pry the card away from
the slot.
8 Remove the AI16 card in slot B of SC48(and the AI16 card in
slot C if applicable) following the same procedure.
9 If you are finished removing cards, do the following to close
and secure the Top Panel:
• Loosen the captive thumbscrews and carefully lower the
Top Panel into position.
• Replace the screws that secure the Top Panel to the con-
sole chassis.
Removing an Output Card
Output cards can be removed from SC48 and installed in
Stage 48. The following procedure shows how to remove an
output card from slot D of SC48.
To remove an AO16 card:
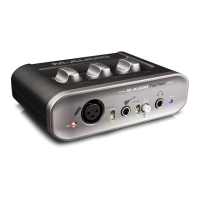
1 Remove the 26 screws that secure the Top Panel to the con-
sole chassis.
2 Hold the front edge of the Top Panel and carefully lift it up-
wards to a vertical position.
Figure 6. Loosening the captive thumbscrews
Do not pry the card from the top. Doing so can damage the
copper strips located along the top of the card.
Figure 7. Removing the card from the slot
Figure 8. Removing the 26 Top Panel screws
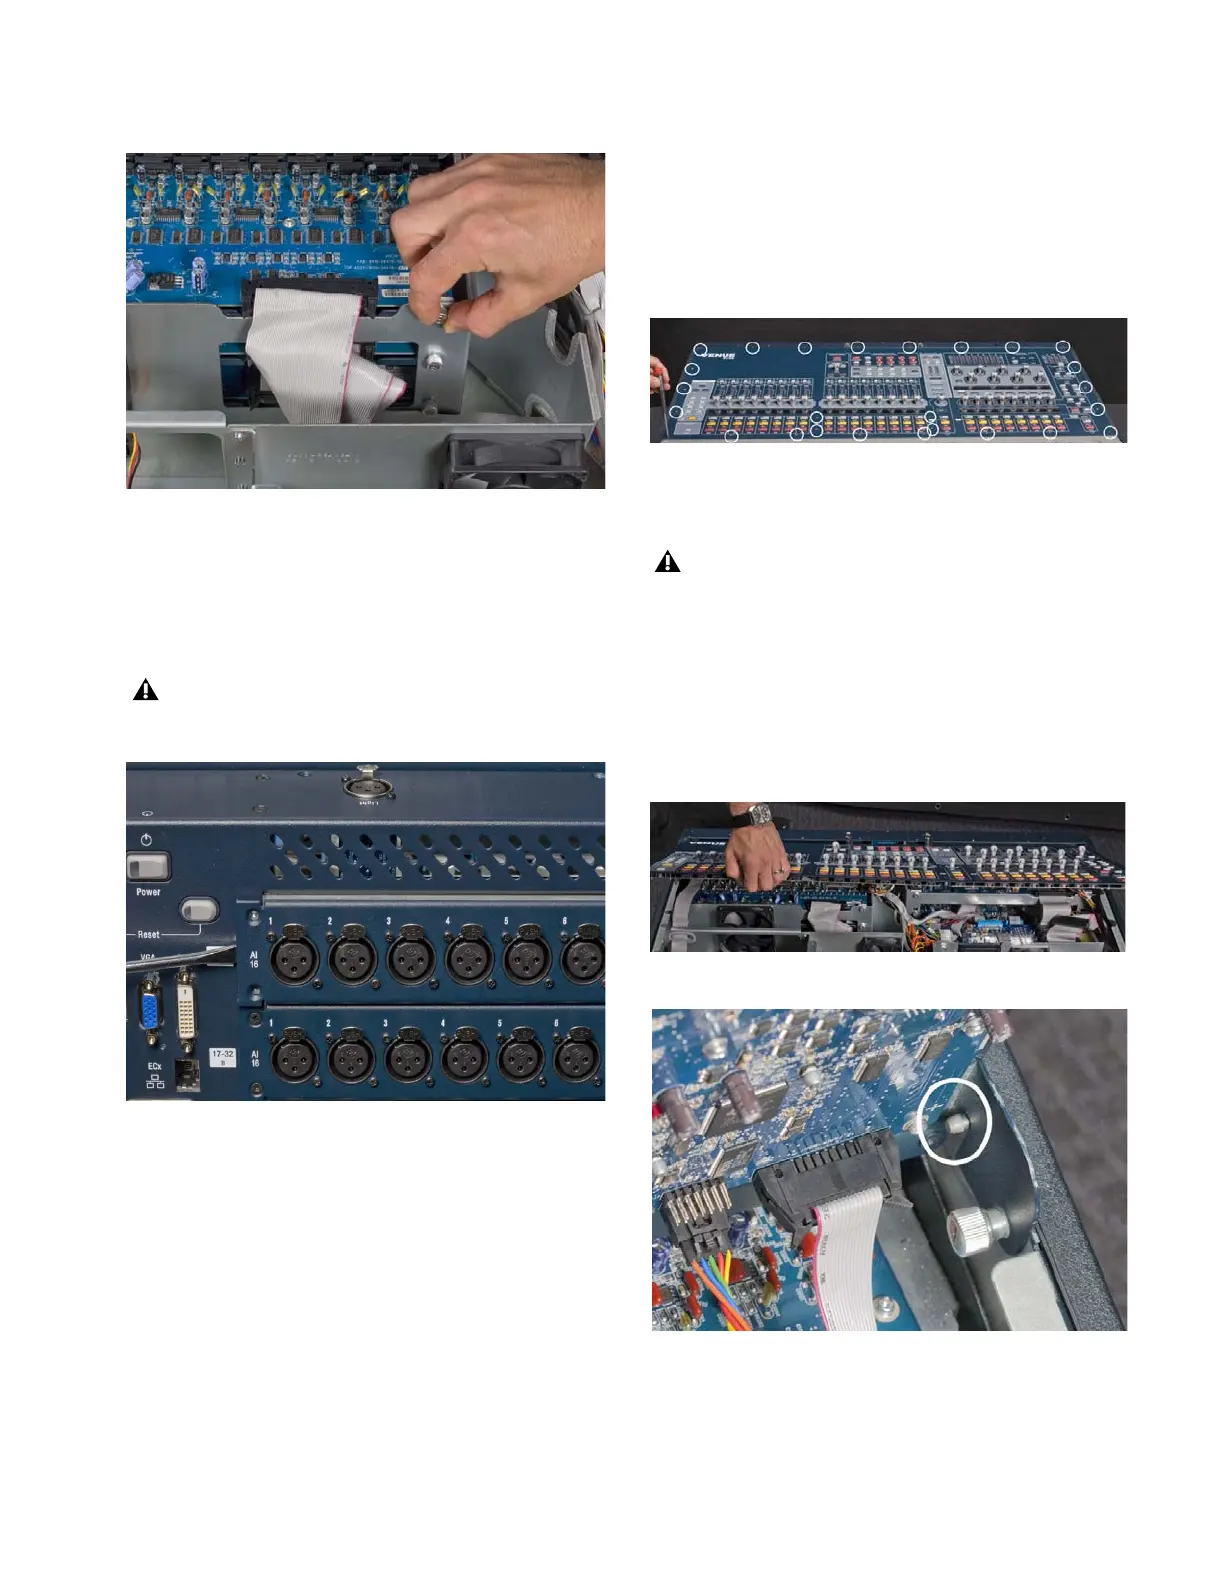
If you sense any resistance when lifting the Top Panel up-
wards, do not force it. The Top Panel has slots that pivot on
posts attached to the sides of the console chassis
(Figure 10). Removing the Top Panel screws may cause the
Top Panel to slide towards the front of the console so that
the Top Panel slots are not correctly aligned with the posts.
If this occurs, slide or push the Top Panel towards the rear
of the console before lifting, making sure the posts are cor-
rectly aligned with the slots.
Figure 9. Lifting the Top Panel to vertical
Figure 10. Correct alignment of Top Panel slot and pivot post