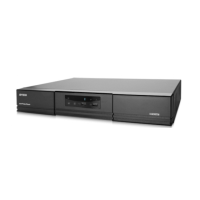
FRONT AND REAR PANEL
4
13) AUDIO (SEQ + )
Press SEQ + simultaneously to select the audio channel you want for listening to the live audio (in the live
mode) or playback audio (in the playback mode).
14) PTZ (SLOW + ZOOM)
Press these two buttons at the same time to enter / exit the PTZ control mode.
15) USB port
To quickly backup or upgrade firmware/OSD, you can insert a compatible USB flash drive into this USB port.
Before using the USB flash drive, please use your PC to format the USB flash drive as “FAT32” first.
16) EJECT (Selected models only)
Press to open / close the built-in DVD Writer.
17) “MENU” + “ENTER” (Key lock)
Press these two buttons at the same time to lock keys on the DVR front panel.
Press any button on the DVR front panel and enter the DVR password to exit the key lock mode.
2.2. Rear Panel
1) INPUT (1 ~ 16CH / 1 ~ 8CH)
INPUT: Connect to video sources, such as cameras.
Note: If you want to make a video backup with audio, please make sure whether your DVR supports the
audio function, and connect audio cameras to the channels which support the audio function.
2) MONITOR
Connect to a CRT monitor for video output.
3) Audio IN
Connect to audio sources, such as cameras equipped with the audio function.
Please get to know whether your DVR supports the audio function, and how many audio inputs are supported
first.
Note: Depending on the model you have, this DVR series supports UP TO FOUR audio-in channels, which
are Audio 1, Audio 2, Audio 3 and Audio 4 accordingly, and the audio data will be recorded with the
video data of CH1, CH2, CH3 and CH4 respectively.
For example, if your DVR supports two audio-in, its audio channels will be Audio 1 and Audio 2.
When you playback CH1, you will also hear the audio recording of Audio 1.
4) Audio OUT
Connect to an audio device, such as a microphone or speaker.
Note: Depending on the model you have, this DVR series supports UP TO TWO audio-out channels.
Please get to know whether your DVR supports the audio function, and how many audio outputs
are supported first.
5) USB (Selected models only)
To quickly backup or upgrade firmware/OSD, you can insert a compatible USB flash drive into this USB port.
Before using the USB flash drive, please use your PC to format the USB flash drive as “FAT32” first.
6) IR
Connect the IR receiver for remote control (IR receiver optional).
7) EXTERNAL I/O
Insert the supplied 25 PIN DSUB to this port for connecting external devices (external alarm, PTZ camera, etc).