MAIN MENU
18
5) CLEAR HDD
Select the HDD you want to clear, and click “YES” to confirm or “NO” to cancel.
It’s recommended to clear all data in the hard disk when:
It’s the first time to use this DVR to ensure the recorded data are not mixed with other data previously saved in the
same hard disk.
The DVR firmware is upgraded for the system to work more stably. Before clearing all HDD data, please remember
to make video backup.
DVR date and time are changed accidentally when the recording function is activated. Otherwise, the recorded
data will be disordered and you will not be able to find the recorded file to backup by time search.
6) RESET DEFAULT
Click “SUBMIT” to reset all settings as default, and select “YES” to confirm or “NO” to cancel. The DVR will
reboot after reset.
7) REMOTE CONTROL ID
This function is available when users need to control two or more DVRs with one IR remote controller. The
ID set here is used to identify the DVR the remote controller is going to control. Please also read the user
manual of the IR remote controller for details.
8) SERIAL TYPE
Here shows the serial type of the DVR (RS-485).
9) VIDEO FORMAT
Here shows the information of the DVR video format (NTSC / PAL).
10) VERSION
Here shows the firmware version information.
5.3.3 USB BACKUP / DVD BACKUP
Insert a compatible USB flash drive to the USB port at the front panel, or press to eject the DVD writer and
place a DVD-R or CD-R to it.
Note: Before using the USB flash drive, please use your PC to format the USB flash drive to FAT32 format
first. For the list of compatible USB flash drives, please refer to “APPENDIX 3 COMPATIBLE USB
FLASH DRIVE LIST” at page 57.
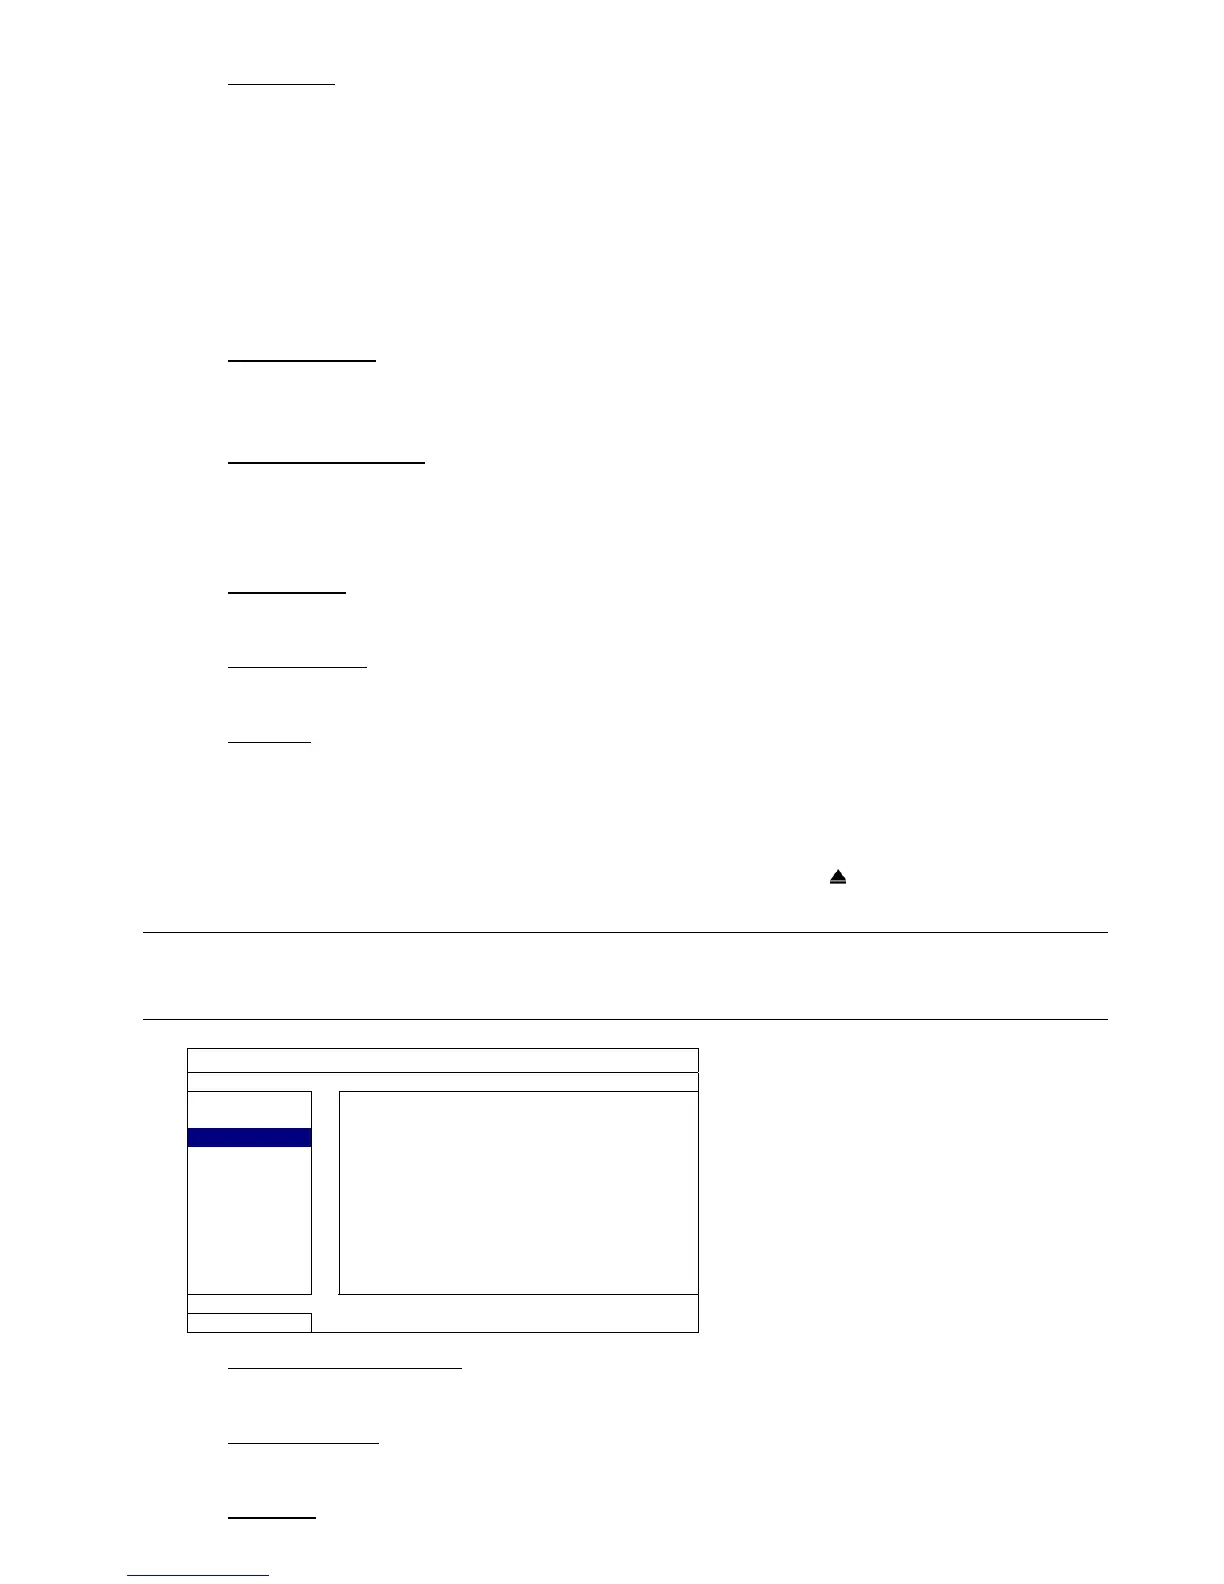
SYSTEM
TOOLS START DATE 2009/NOV/19
SYSTEM INFO START TIME 08:30:21
USB BACKUP END DATE 2009/NOV/19
DVD BACKUP END TIME 17:59:29
CHANNEL
HARD DISK ALL HDD
BACKUP SUBMIT
REQUIRE SIZE: 554MB SUBMIT
EXIT AVAILABLE SIZE: 3788.0MB
1) START DATE / START TIME
Select the start date & time.
2) END DATE / TIME
Select the end date & time.
3) CHANNEL