BEFORE USING THIS DVR
2
12) AUDIO (SLOW + ZOOM)
Press “SLOW” + “ZOOM” to select live or playback audio from audio channel 1~4.
Live audio from audio channel 1~4
(indicated in white).
Playback audio from audio channel 1~4
(indicated in yellow).
Audio channel unselected
13) P.T.Z. ( + SEQ)
Press “ ” + “SEQ” at the same time to enter / exit the PTZ control mode.
14) USB port
There are two USB ports on the front panel, one for connecting your USB mouse for mouse control, and the other
one for connecting your USB flash drive for video backup.
Note: It’s not allowed to have two USB mice or two USB flash drives connected on the front panel.
Note: For the compatible USB flash drive list, please refer to “APPENDIX 3 COMPATIBLE USB FLASH
DRIVE LIST” at page 57.
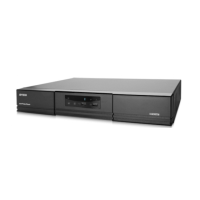
1.3 Rear Panel
1) 75Ω / HI-IMPEDANCE (For AVC799B & 797B Only)
When using Loop function, please switch to HI-IMPEDANCE. When you don’t use Loop function, please switch to
75Ω.
2) VIDEO IN (1 ~ 16 / 1 ~ 8 / 1 ~ 4): Connect to the video connector of a camera.
VIDEO LOOP (1 ~ 16 / 1 ~ 8): Video output connector.
Note: The DVR will automatically detect the video system of the camera, please make sure that the
cameras are properly connected to the DVR and power-supplied before the DVR is turned on.
3) AUDIO IN (1~4)
Connect to the audio connector of a camera if the camera supports audio recording.
Note: To make a video backup with audio, make sure the camera which supports the audio function is
connected to the video-in channel and audio-in channel. For example, the audio data from audio
CH1 will be recorded with the video data from video CH1.
4) AUDIO OUT
Connect to a speaker with 1 mono audio output.
Note: To know how many audio outputs your DVR supports, please refer to its specifications.
5) MONITOR
Connect to a CRT monitor for video output.
Note: While connecting to a CRT monitor, it’s also supported to connect to a LCD monitor simultaneously
for dual video output.
6) CALL
Connect to a monitor specific for sequence display.
7) VGA
Connect a LCD monitor directly.
Note: While connecting to a LCD monitor, it’s also supported to connect to a CRT monitor simultaneously
for dual video output.