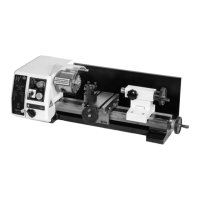
GENERAL OPERATING INSTRUCTIONS
SETTING AND ADJUSTMENTS
GERERAL SAFETY POINTS
Warning Do not operate the mill in any function unless the head clamping lever is
tightened.
Tool Changing
Note. The taper socket in the spindle mandrel does not have a ʻdrive flatʼ and all
tooling, including the drill chuck is secured and driven by the taper lock and the draw
bar.
Make sure the power is switched off or better still remove the power from the machine.
Locate and put to hand the 8mm A/F spanner and the tommy bar. Remove the Draw Bar
Cover.
Hold the quill immoveable by inserting the tommy bar into the quill hold pocket and loosen
the draw bar. Unscrew two or three turns and then strike sharply with a hammer (preferably
a copper face, to prevent the head of the draw bar peining over) this will break the lock
between the tool and the spindle tapers .
Unscrew the draw bar from the tool. Ensure the tool is supported, i.e. will not fall onto the
workpiece/table et al. When it is free put the tool carefully aside, remove the draw bar, check
the thread, check the taper and the thread of the new tool are clean and undamaged,
introduce the new tool into the taper, re-insert the draw bar and screw into the top of the tool.
Screw in the draw bar finger tight. Hold the quill immoveable and tighten with the spanner.
DO NOT OVERTIGHTEN. Replace the draw bar cover.
Remove all tooling and reconnect the machine. Ensure the tool path is clear, switch on, and
check that the tool is correctly seated, is running true etc. If all is O.K, proceed.
!
Milling (all cases) Ensure the workpiece is securely clamped to the table.
Along the longitudinal Ensure that the quill is locked in position before
Axis (X) milling is commenced. Ensure the traverse slide lock
is tightened.
Along the Traverse Axis (Y) Ensure that the quill is locked in position before milling is
commenced. Ensure the worktable lock is tightened.
Milling or Drilling Vertically Ensure the traverse slide and the worktable locks are
(Z) tightened.
Milling Head adjustment
The Milling Head is mounted over a dovetail section. In order to maintain the ʻtightnessʼ of the
fit; between the sloping surface of the component and its mating surface, on the left hand
side, a gybe strip has been inserted. To adjust the gybe strip, use the supplied allen key and
spanner, release the lock nuts and screw the gybe strip grubscrews clockwise to compensate
for any slackness or anti-clockwise to loosen the movement. Check, using the rise and fall
drive feed handles, that the head moves smoothly, If not, repeat the adjustments until the
movement is smooth and tight over the whole of the travel.
32