Azbil Corporation Parts Replacement
VDC, VAC, VST, VAA - Diaphragm Control Valve 6-5
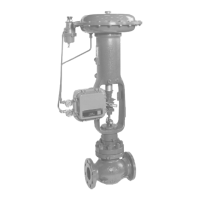
6-4 : Diaphragm Replacement of Diaphragm Motor (See Figure 1-6, 1-7.)
Always after removing the stem connector and disconnecting the actuator stem from
the valve stem, turn the spring adjuster counterclockwise to fully slacken the spring.
6-4-1 : Direct- acting Type
(a) For VA1D, VA2D OR VA3D
Disconnect air connection. Turn the spring adjuster clockwise until the spring is
fully slackened. Remove hex clamp bolts of the diaphragm case assembly and then
remove diaphragm case (upper). Take out cotter pin and remove slotted nut. If the
actuator stem also rotates while doing this, hold it by applying a wrench to pointer
lock nut. Remove stopper and replace diaphragm.
After reassembling the valve, compress the spring. For this, follow the procedure
explained in Chapter 6. “Control Valve Adjustment”, Items (b) “Spring Compression
Adjustment”.
(b) For VA4D OR VA5D
Disconnect air connection. Turn the spring adjuster clockwise until the spring is
fully slackened. Remove hex clamp bolts of the diaphragm case assembly and then
remove diaphragm case (upper).
Pull out cotter pin and remove slotted nut. If the actuator stem also rotates while
doing this, hold it by applying a wrench to the pointer lock nut. Remove the stopper
and diaphragm plate. Replace diaphragm.
After replacing diaphragm, assemble the actuator following the above procedure in
the reverse order.
After reassembling the valve, compress the spring. For this, follow the procedure
explained in Chapter 6. “Control Valve Adjustment”, Items (b) “Spring Compression
Adjustment”.
6-4-2 : Reverse - acting type.
(a) For VA1R, VA2R or VA3R
Disconnect air connection. Remove hex clamp bolts of the diaphragm case assembly
and then remove diaphragm case (upper). Take out cotter pin and remove slotted
nut. If the actuator stem also rotates while doing this, hold it by applying a wrench to
pointer lock nut. Remove stopper and replace diaphragm.
After replacing the diaphragm, assemble the actuator following the above procedure
in the reverse order.
Disconnect air connection. Remove hex clamp bolts of the diaphragm case assembly
and then remove diaphragm case (upper).