Conductivity Calibration
Automatic Calibration
The 9 series meter allows 1 to 5 points calibration in the conductivity
mode. Before calibration, ensure that selected cell constant (K = 0.1,
1, 10) matches connected electrode. If you have selected the manual
calibration ( ), the meter will wait to enter a cell constant.
For better accuracy, we recommend to perform 3 points calibration or
select a standard solution closest to the sample conductivity you are
measuring. The meter will automatically detect the standard solution
and prompt the user to perform the calibration. The following table
shows the default standard solution for each measurement range.
Default Standard Solution
If you have changed the conductivity electrode, the meter must be
recalibrated. Every electrode has a different cell constant.
Single Point Calibration
1.1 Press the Mode key to enter the conductivity measurement mode
and select 1 point calibration in the setup menu.
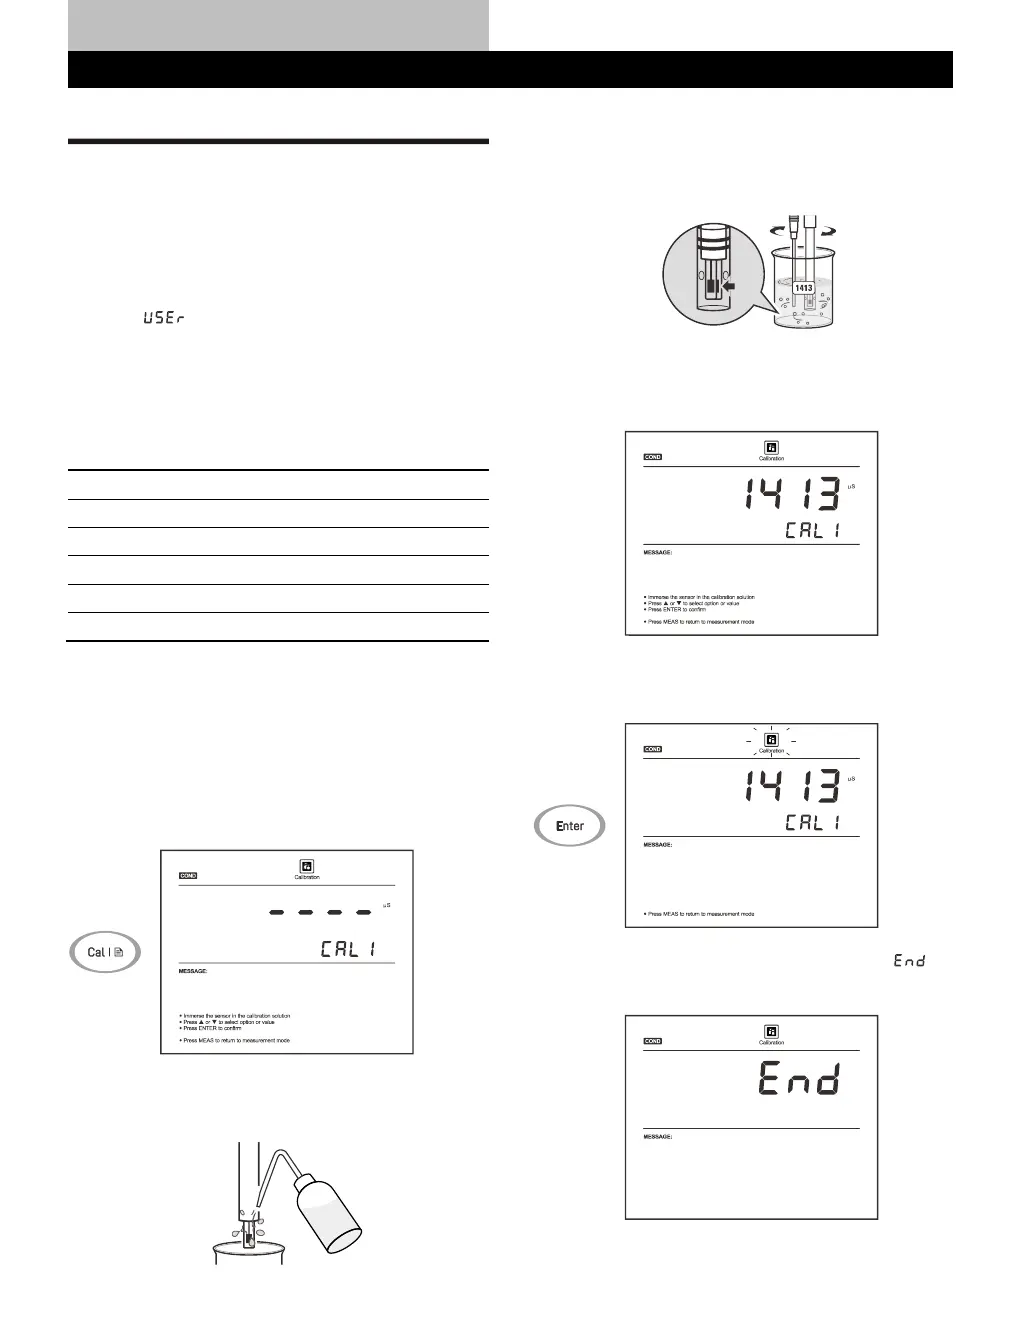
1.2 Press the Cal key, the display shows ----/CAL1, the meter waits
for recognizing the standard solution.
1.3 Rinse the conductivity electrode with distilled water, then rinse
with a small amount of standard solution.
1.4 Place the electrode (and temperature probe) into the standard
solution, stir gently to remove air bubbles trapped in the slot of
the sensor.
The meter will automatically show the calibration standard (e.g.,
1413 µ S/cm).
1.5 If necessary, press the / key to modify the calibration value.
Press the Enter key, the Calibration icon begins flashing.
1.6 When the reading has stabilized, the meter will show and
return to the measurement mode.

 Loading...