aAOFENE
www.baofengradio.us
http://www.baofengradlo.us
www.foscam.us
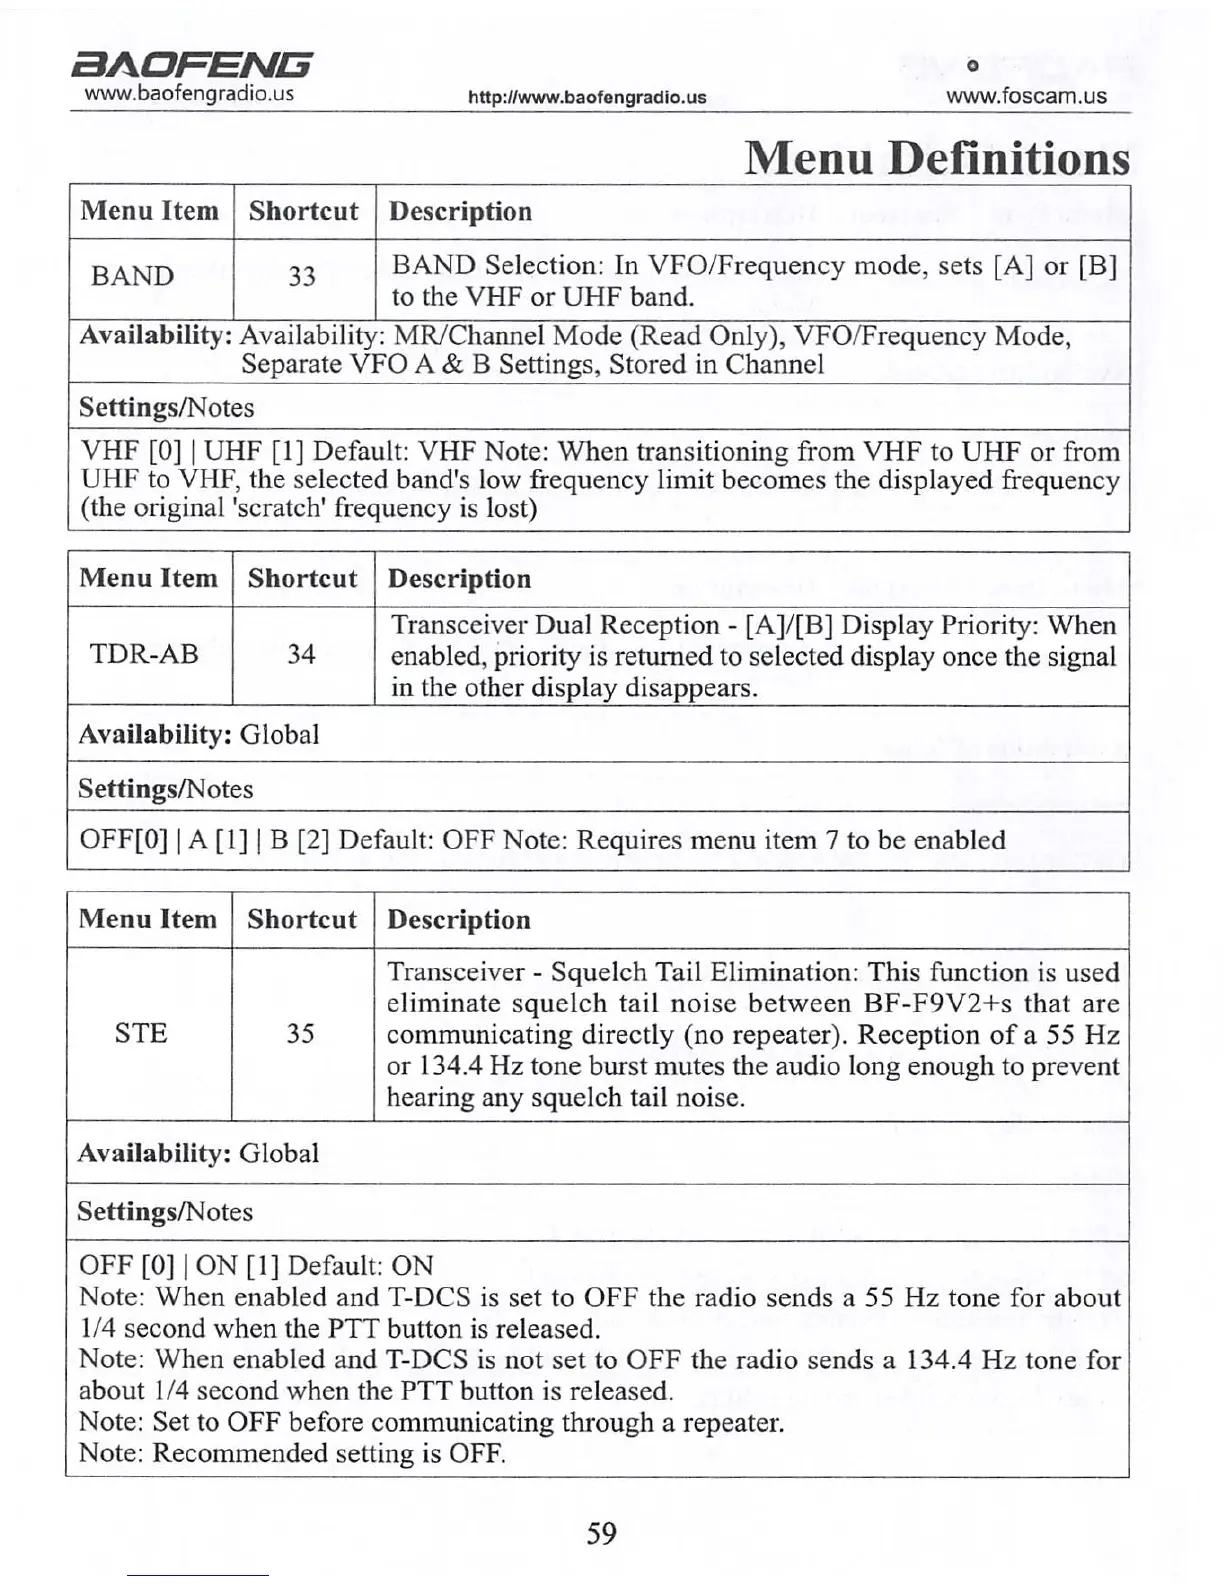
Menu Definitions
Menu Item
BAND
Shortcut
33
Description
BAND Selection: In VFO/Frequency mode, sets [A] or [B]
to the VHF or UHF band.
Availability: Availability: MR/Channel Mode (Read Only), VFO/Frequency Mode,
Separate VFO A & B Settings, Stored in Channel
Settings/Notes
VHF [0] | UHF [1] Default: VHF Note: When transitioning from VHF to UHF or from
UHF to VHF, the selected band's low frequency limit becomes the displayed frequency
(the original 'scratch' frequency is lost)
Menu Item
TDR-AB
Shortcut
34
Description
Transceiver Dual Reception - [A]/[B] Display Priority: When
enabled, priority is returned to selected display once the signal
in the other display disappears.
Availability: Global
Settings/Notes
OFF[0] | A [1] | B [2] Default: OFF Note: Requires menu item 7 to be enabled
Menu Item
STE
Shortcut
35
Description
Transceiver - Squelch Tail Elimination: This function is used
eliminate squelch tail noise between BF-F9V2+S that are
communicating directly (no repeater). Reception of a 55 Hz
or 134.4 Hz tone burst mutes the audio long enough to prevent
hearing any squelch tail noise.
Availability: Global
Settings/Notes
OFF [0] | ON [1] Default: ON
Note: When enabled and T-DCS is set to OFF the radio sends a 55 Hz tone for about
1/4 second when the PTT button is released.
Note: When enabled and T-DCS is not set to OFF the radio sends a 134.4 Hz tone for
about 1/4 second when the PTT button is released.
Note: Set to OFF before communicating through a repeater.
Note: Recommended setting is OFF.
aAORENCS
www.baofengradio.us http://www.baofengradio.us
www.foscam.us
Charging and Battery Maintenance
Charging the Battery
Follow the steps below to set up and use the charger:
1. Plug the end of the power adapter into the charger base.
2. Plug the power adapter into an electrical wall socket.
3. Place the radio or battery in the charging slot on the charger.
4. Make sure the contact plates of the battery are making contact with the charger.
Ensure that the radio fits snugly into the dock. When the red LED stays on, the
radio is charging.
5. The radio is fully charged once the LED on the charger stays green. Please remove
the radio after it is fully charged to avoid over-charging the battery.
Charger LED Codes
Charging Status
LED Indication
Standby (no-load)
Red LED flashes while Green LED glows
Charging
Red LED glows solidly
Fully Charged
Green LED glows solidly
Error Red LED flashes while Green LED glows
59 12