Preparation before use
04 05
No.
9
10
11
12
13
14
15
16
17
Shortcut name
Relay / offline
Scan on / off
Strict/normal
squelch
Encryption on/off
Voice control on/off
Area switching
Battery power
indication
Individual operation switch
End call
Purpose
Quickly switch between relay mode and offline mode.
Quickly turn the scan function on or off. Note:
double-segment double-waiting scan does not work
Quickly switch between strict squelch and normal
squelch (only for analog mode).
Quickly turn on/off encryption for channel (only for
digital mode).
Quickly turn on or off the voice control function.
Quickly select the area, allowing the user to switch
between two areas.
Quickly access to battery power. The user can check
the battery status by LED. The battery power is
sufficient if the LED is constantly in green, the battery
power is still available if the LED is constantly in yellow,
and the battery power is low if the LED is in red.
Quickly turn on or off individual operation function.
Quickly end the phone call (only for digital mode).
Indicator display
Red light flashes
Red light
Green light
Current charge status
Battery power is too low
In charging
The charging is completed
Note:Depending on dealer setting, different functions can be achieved by
pressing and pressing and holding the same button.
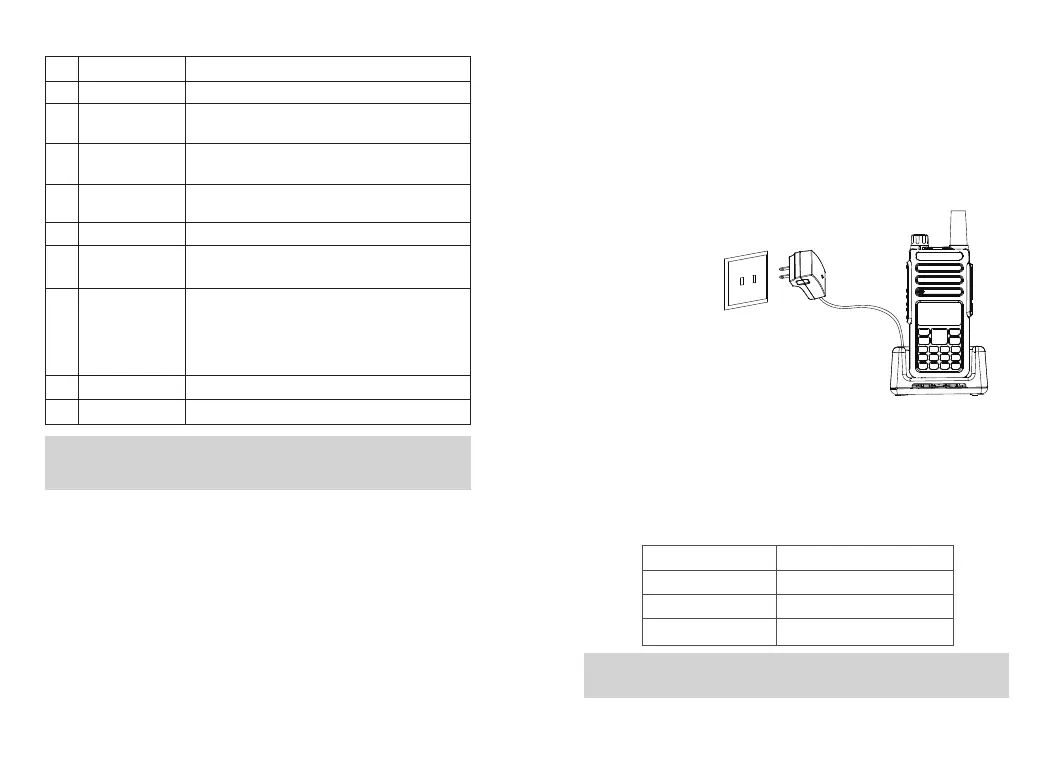
Charging
Note:Be sure to ensure that the product is off when charging. Battery into
the charger may be charging red flashing constantly flashing, this is the
battery power is too low, the charger to protect the battery pre-charge
process, is a normal phenomenon, Generally continue for 30 seconds to
turn the red light of the normal state of charge.
3. Insert the battery or the battery-equipped product into the charging
cradle correctly; the indicator light on the charging cradle shows the
charging status. When the indicator light is red, it indicates the start of
charging. When the indicator turns green, the charging is completed. The
specific table below.
1.Plug the power adapter into a power outlet;
2. Plug the other end of the power adapter into
the socket on the back of the charging cradle;
Note:For best battery performance, charge for a minimum of 4 hours on
first charge.