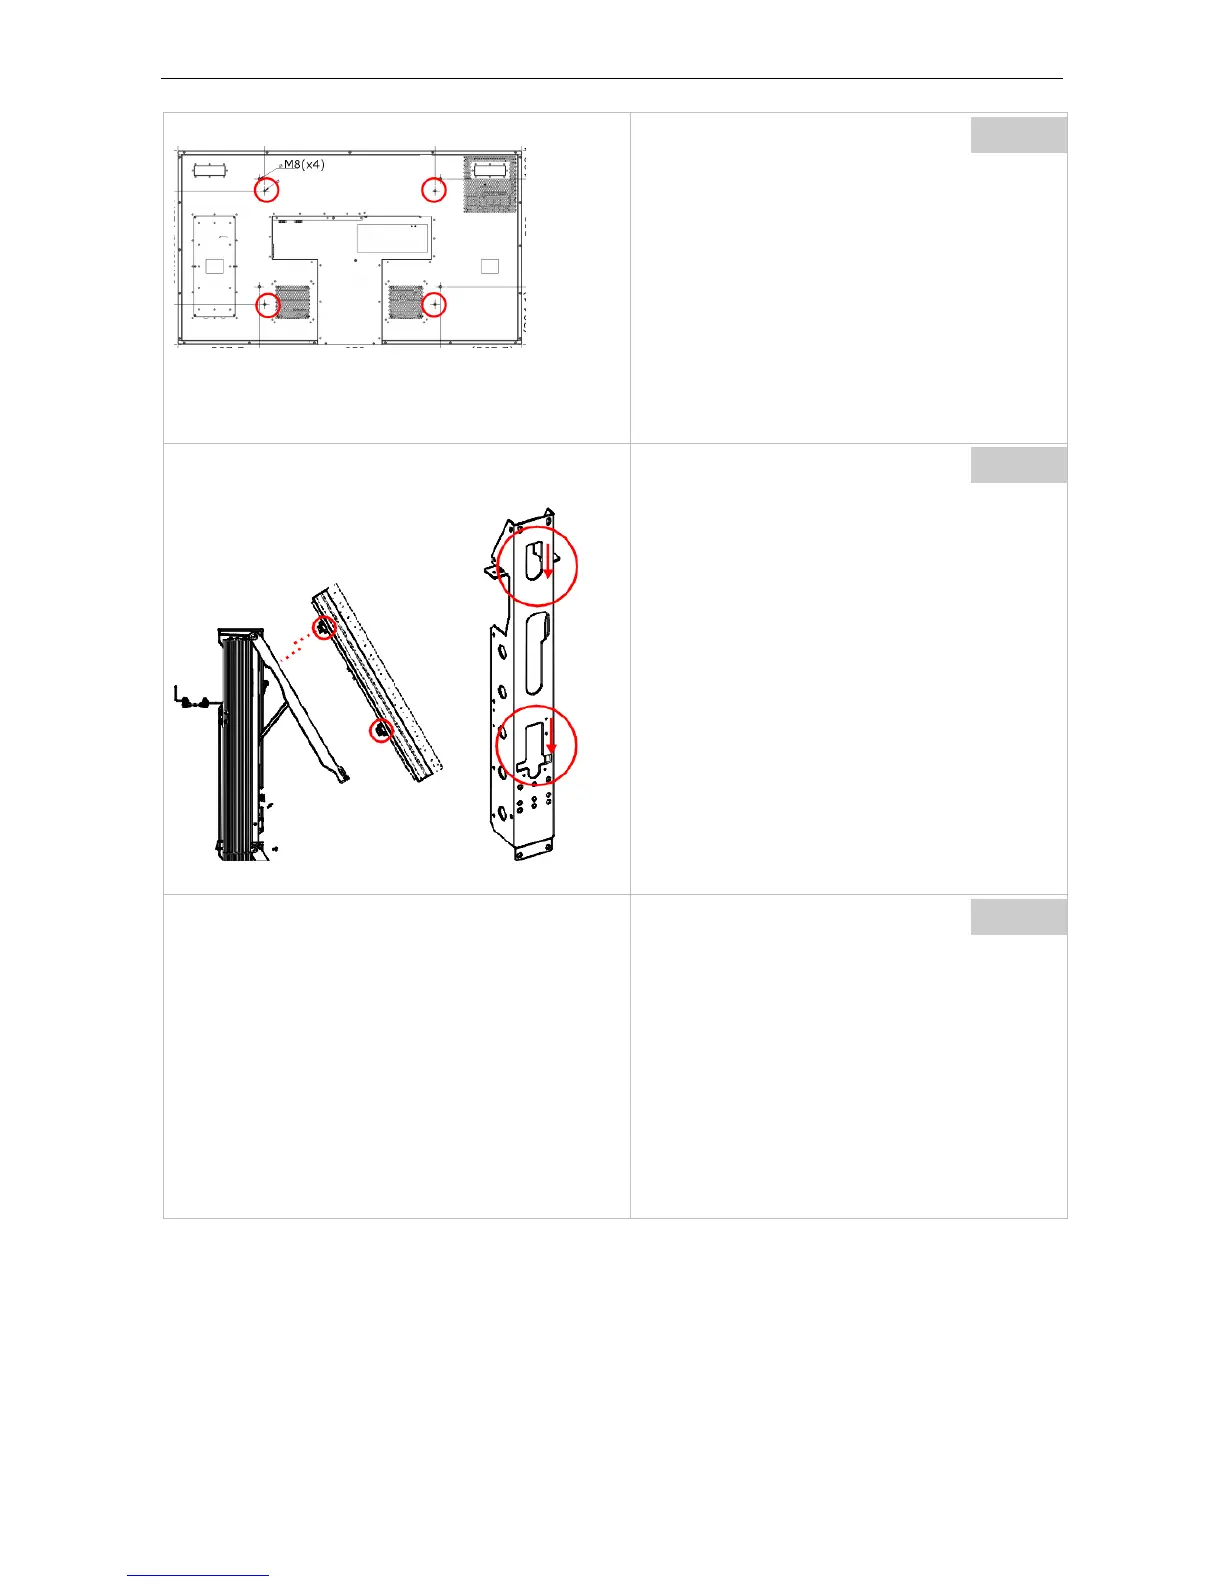
8. Installation of the displays
Step
To ease the adjustment process it is recom-
mended to restrict the adjustment to the two
lower interface poi
nts. This approach should give
sufficient margin to cover the typical Z-
misalignments.
Please note:
The adjustable interface cannot cover the imper-
fec
tions which are a direct consequence of a bad
setup in terms of levelling.
Step
When the dip switches are set correctly, hang in
the monitors and when you are sure that the z
adjustment interfaces are in nominal position,
hang in the monitor.
The principle is simple and sophisticated:
The four interface points of the monitor are just
fed into the respective slots of the interface
frame.
Insert the "knobs" on top of the slots and move
them down: the narrow end of the bottom slot
together with gravity ensures that the monitors
keep safely in place!
No need for any fixation or securing screws.
Step
Installation of the monitors is done from top to
bottom, column wise.
Barco - LCD 5521 V4 - R591734 - Installation manual - Revision 00 - March-2017
_____________________________________________________________
83
 Loading...