19
Emergency Reserve Manifold
2005715.05
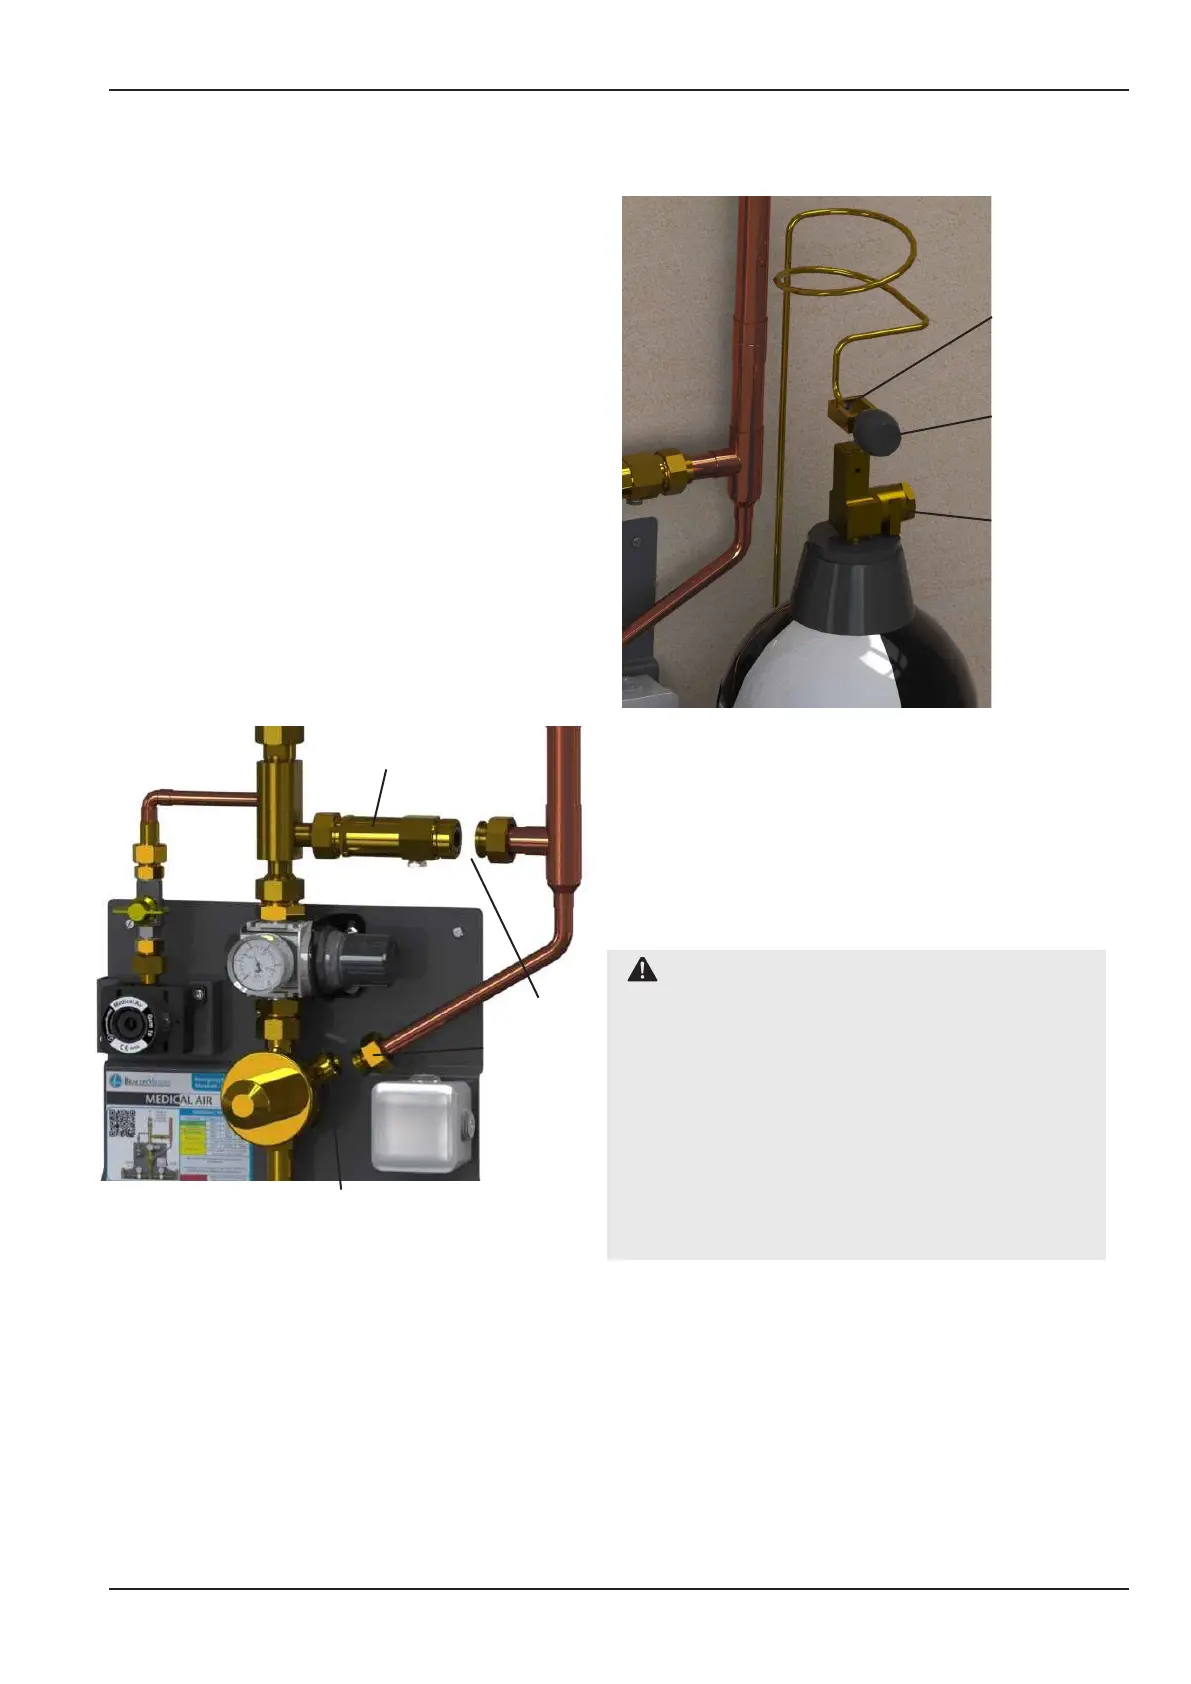
5.3.5 Close one cylinder valve and disconnect
the tailpipe at the cylinder end (see gure
15). Listen for a leak from the tailpipe. A minor
leak is permissible and likely but an obvious major
leak denotes failure of the manifold non-return
valve (NRV). If the latter happens, do not totally
detach the tailpipe but instead retighten it and test
other tailpipes in the same way. Any failed NRV’s
can be replaced (see section 6.8) after all cylinder
valves have been closed and the system has been
depressurised. Repeat this test when the new
NRV’s have been tted (See gure 15 and section
4.7 - Cylinder Operation).
Figure 14 - Relief Valve Inspection
Flat face
connector
with O-ring
seal & swivel
nut
1st stage relief valve
2nd stage relief valve
Figure 15 - Manifold header Non-Return Valve
Inspection.
Tailpipe to
cylinder
connection
Typical Cylinder
Valve
Bodok Seal
(b) all system pressures are normal;
(c) all alarms are showing “green” normal
lamps;
(d) the automatic manifold main isolating
valve is open; and
(e) the manifold is supplying the hospital.
5.3.2 Close the isolating valve on the ERM slowly
and conrm that there is no eect on the line
pressure to the hospital.
5.3.3 Open all cylinder and header high-pressure
isolating valves.
5.3.4 Check that the ERM safety valves are
not passing, by disconnecting their downstream
exhaust coupling and inspecting for a gas leak and
check the condition of the seals (See gure 14).
Replace the valve or seals as necessary. Reconnect
the exhaust pipework, ensure the O-ring seals
correctly in place.
5.3.6 Ensure the line valve ‘B’ is closed and one
cylinder and bank valve on 1 side of the ERM is
open (see gure 1). Open Valve ‘C’ and probe
the sampling outlet to produce a steady ow and
check the pressure on the line gauge does not dip
by more than 10%. If possible attach a owmeter
to the sampling outlet and pipe away to a safe
location while performing this test. Close valve ‘C’
when nished.
CAUTION:Foranaestheticandoxygen
manifolds ensure that the manifold room is well
ventilated and no potential ignition sources are
present while running this test. Run this test
forasshortatimeaspossible.Oxygencanbe
absorbed into clothing etc., so once the test is
complete it would be recommended to spend at
least20minutesoutdoorstoensuretheoxygen
has released. During this time stay away from
nakedame,donotsmokeetc.Donotperform
this test unless the risks can be kept within an
acceptable level.
5.3.7 Check the static pressure of the regulator
(should be typically as per table 4 in section 4).
Observe this pressure for typically 10-20 minutes
to ensure that there is no regulator creepage.
Excessive creepage will necessitate replacement
(see section 6.3) and a repeat of this test.
5.3.8 To test the “reserve low” contact gauge,
open one cylinder/header isolating valve until the
cylinder content gauge indicates full pressure, and
then close the valve.