Calibration and Adjustment Instructions for MC5 Multifunction Calibrator For Main Firmware Version 1.90
Page 5/16
Calibrating and Adjusting the Calibrator
Calibration
Since adjusting the measurement ranges affect the generation ranges (via feedback measure-
ment), all Quantity and Function/Port settings should first be calibrated before making any
adjustments. Do the calibration in Basic Mode and use the recommended calibration points pre-
sented on page 4 or any other suitable set of calibration points.
When all calibrations are done, prepare for enabling the adjustment mode by shutting down the
calibrator. To save the calibration date, you need to enable the adjustment mode even if no ad-
justment is required. For further information, see next chapter.
Enabling the Adjustment Mode
By default, the calibrator does not support adjustment of its
own measurement generation and simulation signals. This
prevents the calibrator from being accidentally adjusted.
To enable the Adjustment Mode, do as follows:
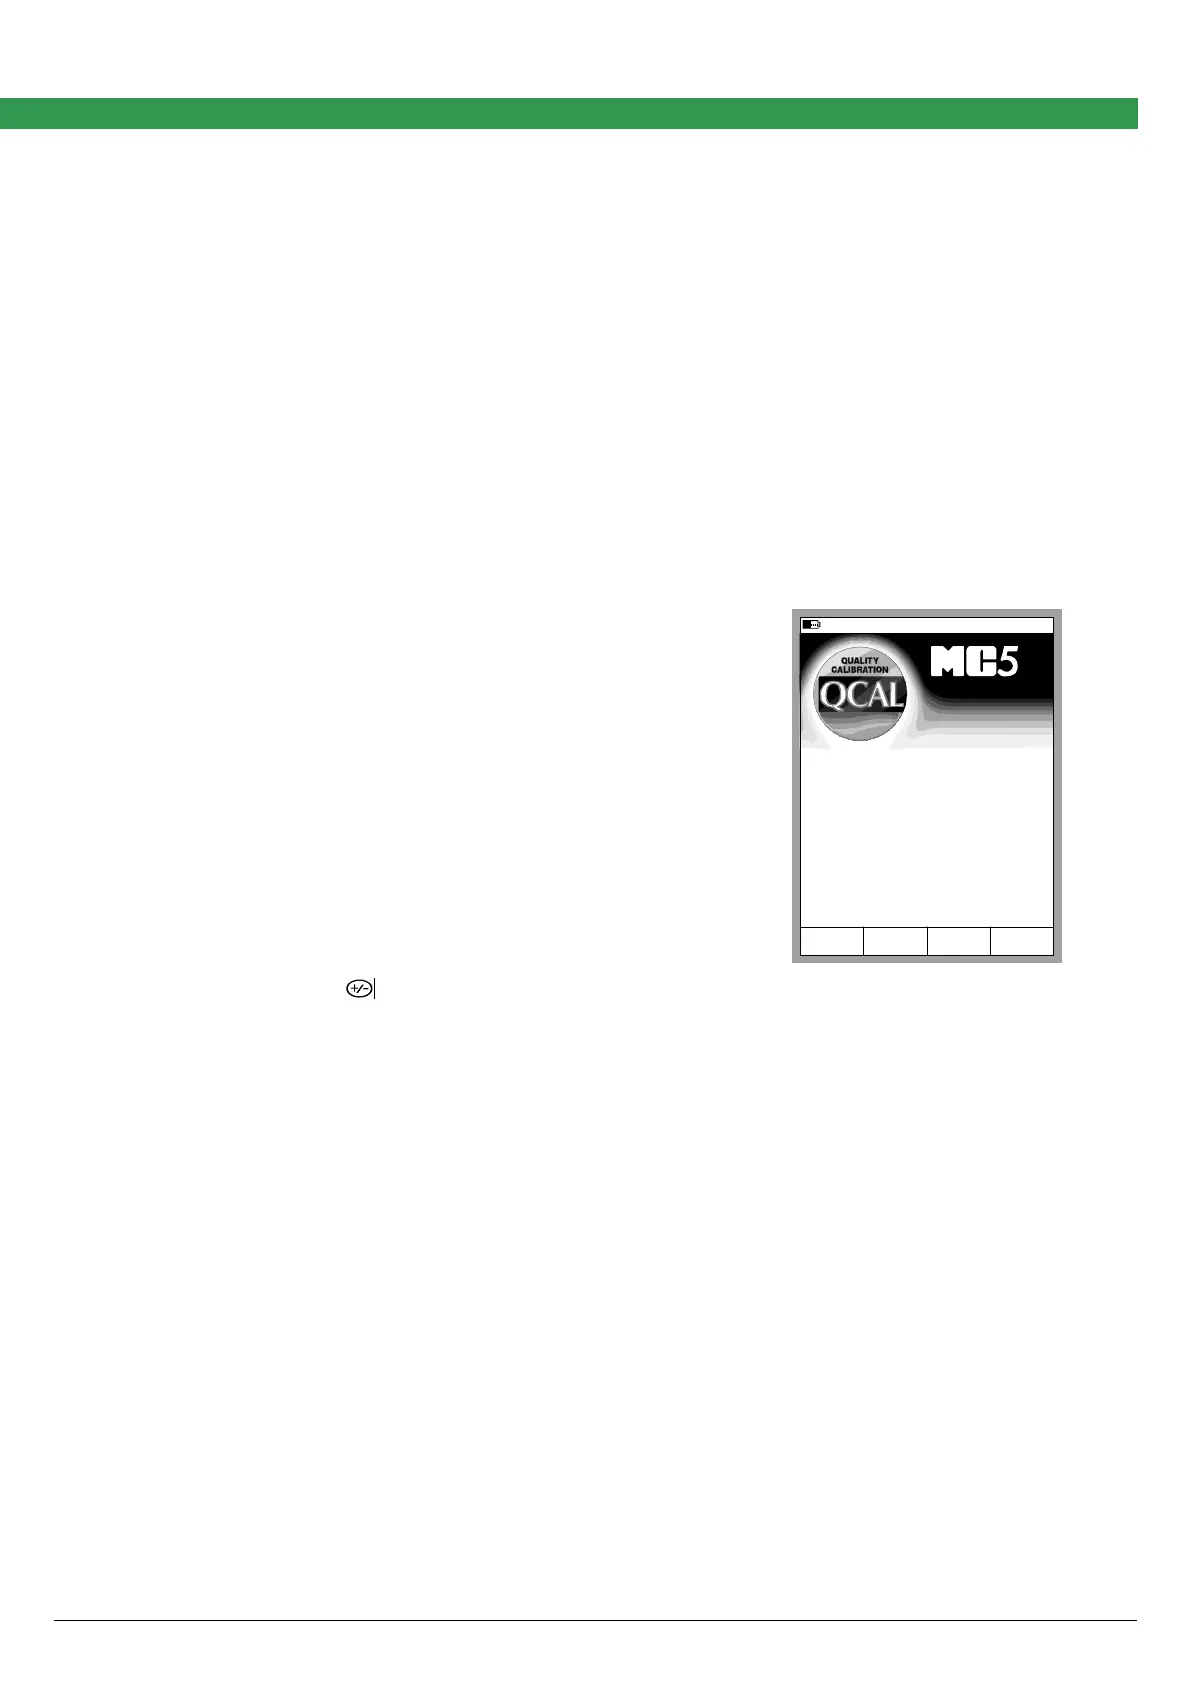
1. Start the calibrator. When the screen with the mod-
ule version numbers etc. appear, press the D/Wait
function key
Note.
Pressing the D/Wait function key is not needed if the calibrator's
calibration due date has expired. Then the calibrator beeps and
stops automatically on this screen and displays the message
"Calibrate soon".
Adjustment mode enabled
Wait
Serial number
E module version
Calibration due date
Main version
ET module version
23512365
1.50
20.03.2003
1.90
1.70
www.beamex.com
2. Press the key.
Check that the text "Adjustment Mode enabled" appears on the status bar.
Enabling the Adjustment Mode makes the Adjustment menus available.
To start adjusting the calibrator, select:
D/Menu, C/Others, 2/Maintenance, 2/Calibrator Adjustment and
1/Start Adjustments.
Notes:
The commands apply when the calibrator is in Basic State.
The measurement window of a Quantity is enlarged to indicate that calibration/adjustment is in progress.
If there is need for adjustment see chapters Adjustment of Measurement Ranges and
Adjustment of Generation/Simulation Ranges on pages 6 and 11 respectively.
If no adjustment is needed, set the calibration date into the calibrator’s memory. To do that, see
chapter Setting the Calibration Date When No Adjustment Was Required on page 16.