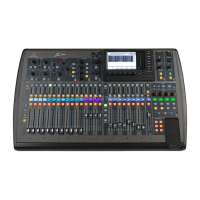
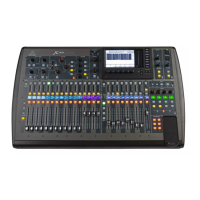
55 X32 DIGITAL MIXER Preliminary User Manual
7. 5 Setup Screen
The setup screen oers various controls for global, high-level functions of
the console such as display adjustments, sample rates and synchronization,
usersettings, and network conguration.
The setup screen contains the following separate tabs:
1. Global: This screen oers adjustments for console sample rate and
synchronization, as well as initialization options.
2. Cong: This screen oers adjustments for various global preferences of how
the console operates.
3. Remote: This screen oers dierent controls for setting up the console as a
control surface for various DAW recording software on a connectedcomputer.
4. Network: This screen oers dierent controls for attaching the console to a
standard Ethernet network.
5. Scribble strip: This screen allows a custom color, icon and name to be selected
for each channel which will appear in that channel's scribble strip mini display.
6. Preamps: This screen allows access to various preamp controls.
7. Card: This screen selects between the USB and FireWire connectors, and also
selects the input/output conguration.
7.5.1 Setup Screen: Global Tab:
The setup screen’s global tab allows the user to adjust various global controls of the
console, such as display brightness and contrast, sample rate, and the time and date.
To make adjustments in the global screen, perform the following steps:
1. Adjust the 1st encoder to select from the list of System Controls:
• Shutdown
• Reboot
• Update Firmware
2. Tap the 1st encoder to engage the selected function.
3. Adjust the 2nd encoder to select the sample rate and synchronization.
4. Tap the 2nd encoder to conrm your selection.
5. Adjust the 4th encoder to select an item to initialize.
6. Tap the 4th encoder to initialize your selection.
7. Adjust the 5th encoder to change the currently selected gure for the time
or date.
8. Tap the 5th encoder to scroll through the entries for time and date.
9. Adjust the 6th encoder to change the LCD or LED brightness.
10. Tap the 6th encoder to alternate between LCD and LED brightness.
7.5. 2 Setup Screen: Cong Tab:
The Cong tab allows a variety of global preferences to be selected. All of the
adjustments are made with just 3 encoders.
1. Adjust the 1st encoder to scroll through the list of preferences.
2. Tap the 1st encoder to conrm the selection.
3. Adjust the 4th encoder to scroll through the list of Link and Pan preferences.
4. Tap the 4th encoder to conrm.
5. Adjust the 5th encoder to select a bus pre-conguration scheme. Note that
individual channels and buses can be changed on the Sends screen.
6. Tap the 5th encoder to select the conguration.
7.5.3 Setup Screen: Remote Tab:
The setup screen’s remote tab allows setting up the console as a control surface
for various DAW recording software on a connected computer. With its large
complement of motorized faders, the console can act as an excellent controller
for various DAW software, allowing the user to make level adjustments quickly
and easily without using a mouse.
To adjust the various remote settings, perform the following steps:
1. Tap the 1st encoder to enable the console’s top panel Remote button.
Thisswitches various console hardware, such as the bus faders, tocontrol
computer DAW software instead of the console’s internal audiopath.
2. Adjust the 2nd encoder to select the specic control surface protocol used,
inconjunction with the target DAW software. Choices include:
• Mackie Control: Use this protocol to control any DAW software that is
compatible with a Mackie Control hardware control surface.
• HUI: Use this protocol to control any D.A.W. software that is compatible
with a HUI hardware control surface, such as Pro Tools.
3. Tap the 2nd encoder to assign the currently selected control surface protocol.
4. Adjust the 5th encoder to select whether the remote function uses the MIDI
In and OUT jacks or the X-USB card’s MIDI.
5. Tap the 5th encoder to conrm the selection.
6. Adjust the 6th encoder to adjust various MIDI-based operations for the
console. Choices include:
• MIDI In/Out: This toggles the MIDI input and outputs for the console
on/o.
• Card MIDI: Allows MIDI transmission through the X-USB card.
• USB In/Out: This toggles the console’s USB ports on/o.
• RTP (Real-time Transport Protocol): This toggles on/o the console’s
ability to interface with an Ethernet-based MIDI system.
• Enable MIDI scene recall: This toggles on/o the console’s response to
incoming MIDI messages for switching console scenes.
7. Tap the 6th encoder to toggle the currently selected MIDI option
on/o. Thiscan be useful if you want to ensure that any connected MIDI
transmitters cannot interfere with the console.
7.5. 4 Setup Screen: Network Tab:
The setup screen’s network tab contains settings used when connecting the
console to a standard Ethernet network. The user can set parameters such as
using a xed IP address or having one assigned, as well as setting up the Ethernet
and subnet mask settings.
To set the network address for the console, perform the following steps:
1. Adjust the 1st encoder to select which specic network eld to adjust.
Choices include:
• IP Address
• Subnet Mask
• Gateway
2. Adjust encoders 2, 3, 4, and 5 to set the 4 numerical elds to be adjusted,
forthe selected network eld.
3. Tap the 6th encoder to assign the adjusted settings.