26
with the cutting table 26 (the lines "close" on scale will coincide). To do so, unscrew the
flywheels 6, lift the lever-stick 4 and 5 (Fig. E), and then tighten the flywheels again 6. The
locking clip 52 will automatically block the planing tables 2 and 3.
11.2.2 Installing the cutting depth
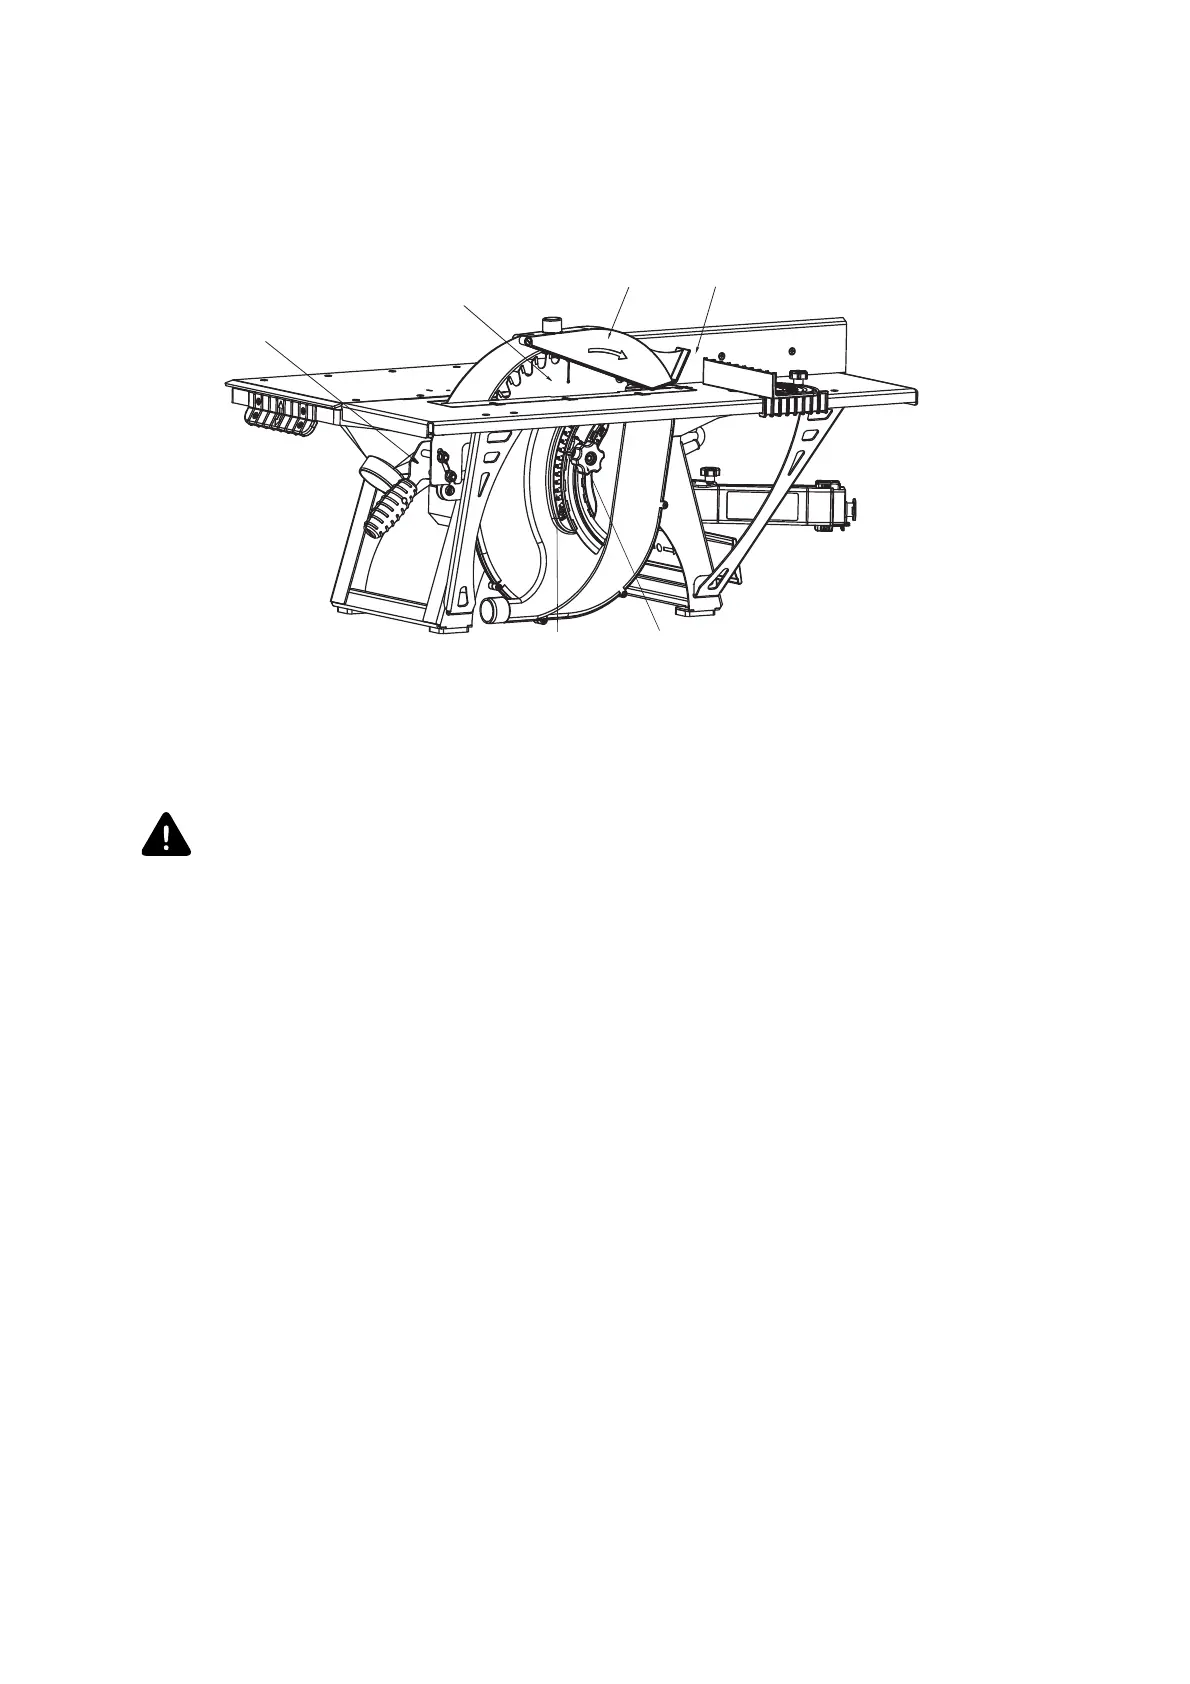
Fig. S
Installing the cutting depth
12 – ruler of the angular bum; 25 – saw blade; 27 – lever for lifting and lowering the saw blade; 29 – fencing of saw
blade; 32 – flywheel for saw blade/cutter disc fixation; 37 – cutting depth scale
Cutting depth installation is performed only when the cutting and planing tables are
brought together and set to the same level.
Adjusting the cutting depth is made with the help of the lever 27 by moving it up/down, after
releasing the flywheel 32. The depth of cutting is set on the scale 37 and fixed by the flywheel
32.
11.3 Longitudinal angular cutting with the use of a ruler
The ruler 12 with an angular bump 11 (Fig. Q, S) is fixed to the planing loading table with the help
of the flywheels.
The distance between the saw blade and the ruler can be measured by moving the lower part
of the angular bump in slots and moving the holes 2a of the loading table 2. Thus, you can
set any cutting width.
The ruler is installed both perpendicularly to the table and angularly (p. 11.1.4) and should fit
to the table at any rotating angle.
11.4 Angular cross cutting with the use of device
To install the device, it is necessary to set the slide 33 (Fig. T) through the open edge of the
table so that the hoop on the bottom covered the leading edge 5 of the cutting table.
The bump 34 can be rotated relative to the slide 33, setting and fixing it perpendicularly to
the cut of the saw blade or angularly (–45° to +45°) to make the beveling cut. Install the
desired cutting angle, rotating the bump 34 and fixing it by the flywheel 36. Pressing the
27
25
32
29 12
37