28
When the drill chuck is removed, install the knife’s end block fencing 65 (Fig. E).
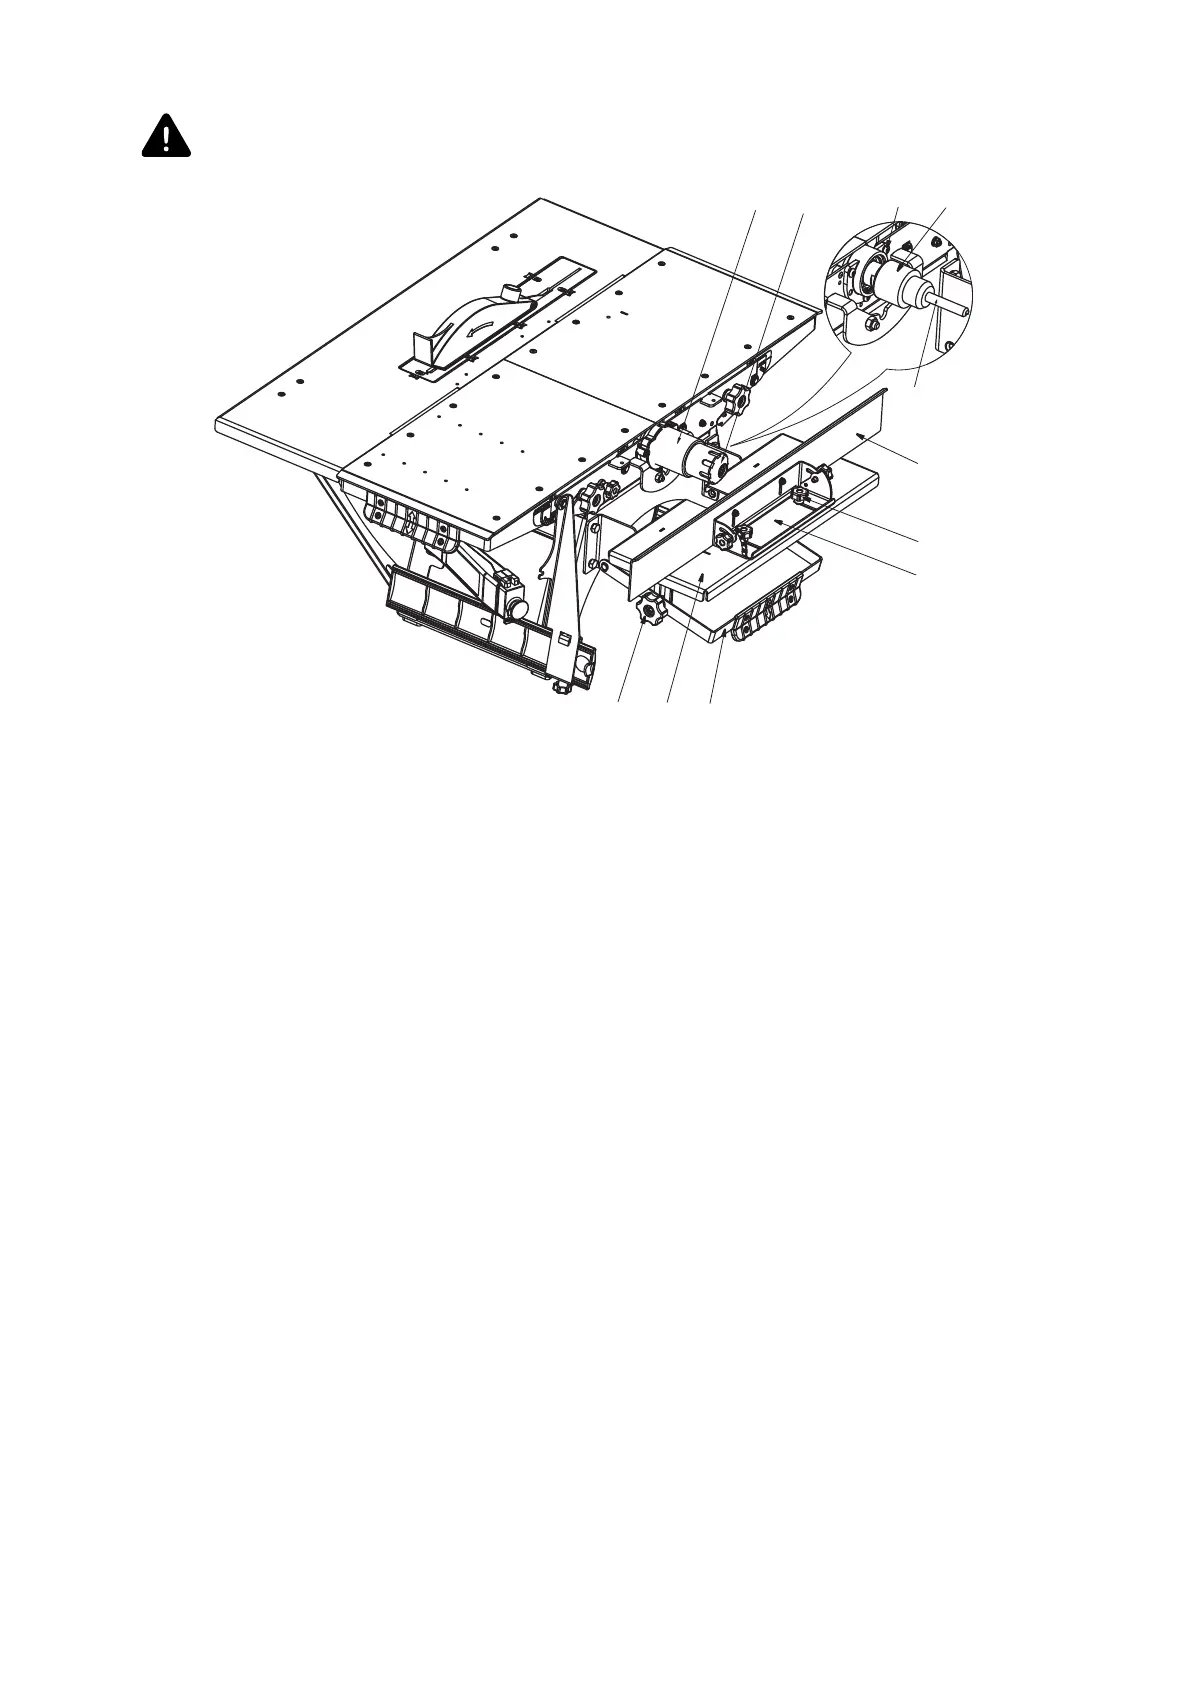
Fig. V
The construction of the machine in the end milling mode
11 – angular bump; 12 – ruler; 16 – flywheel; 46 – milling table; 47 – end mill; 49 – lever-stick for lifting/lowering of
milling table; 50 – flywheels for milling table fixation; 51 – fencing of end milling cutter; 51а – protective cap;
55 – drill chuck; 64 – screws for fixing of end mill fencing
11.5.2 Adjusting the milling table
Adjust the table 46 (Fig. V) for height relative to the cutter 47. To do so, lower the flywheels 50.
Adjust the desired height by switching the lever-stick 49 up/down and tighten the flywheels 50.
11.5.3 Installing the ruler with angular bump
The workpiece feeding is performed manually along the table 46 (Fig. V). For parallel motion
use the ruler 12 with angular bump 11. The angular bump is fixed with the flywheels 16 to the
milling table 46 through the screwed holes in the table.
11.6 Milling with disc cutters
Before starting, it is recommended to make the following adjustments (Fig. W):
Install the disc cutter 40;
Install the fencing 29;
Adjust the milling depth.
12
16
11
50 46 49
64
55
47
51 51a