HD-14T Four Post Lift 48 P/N 5900037 — Rev. F — February 2022
Installing the Pushbutton Air Valve
The Pushbutton Air Valve is used to lower the Runways. It can go on either side of the Power Unit, but
we recommend placing it on the side facing away from the Lift to be out of the way.
For the customer-supplied air pressure, a minimum of 50 to 150 psi / 3 to 25 cfm is required.
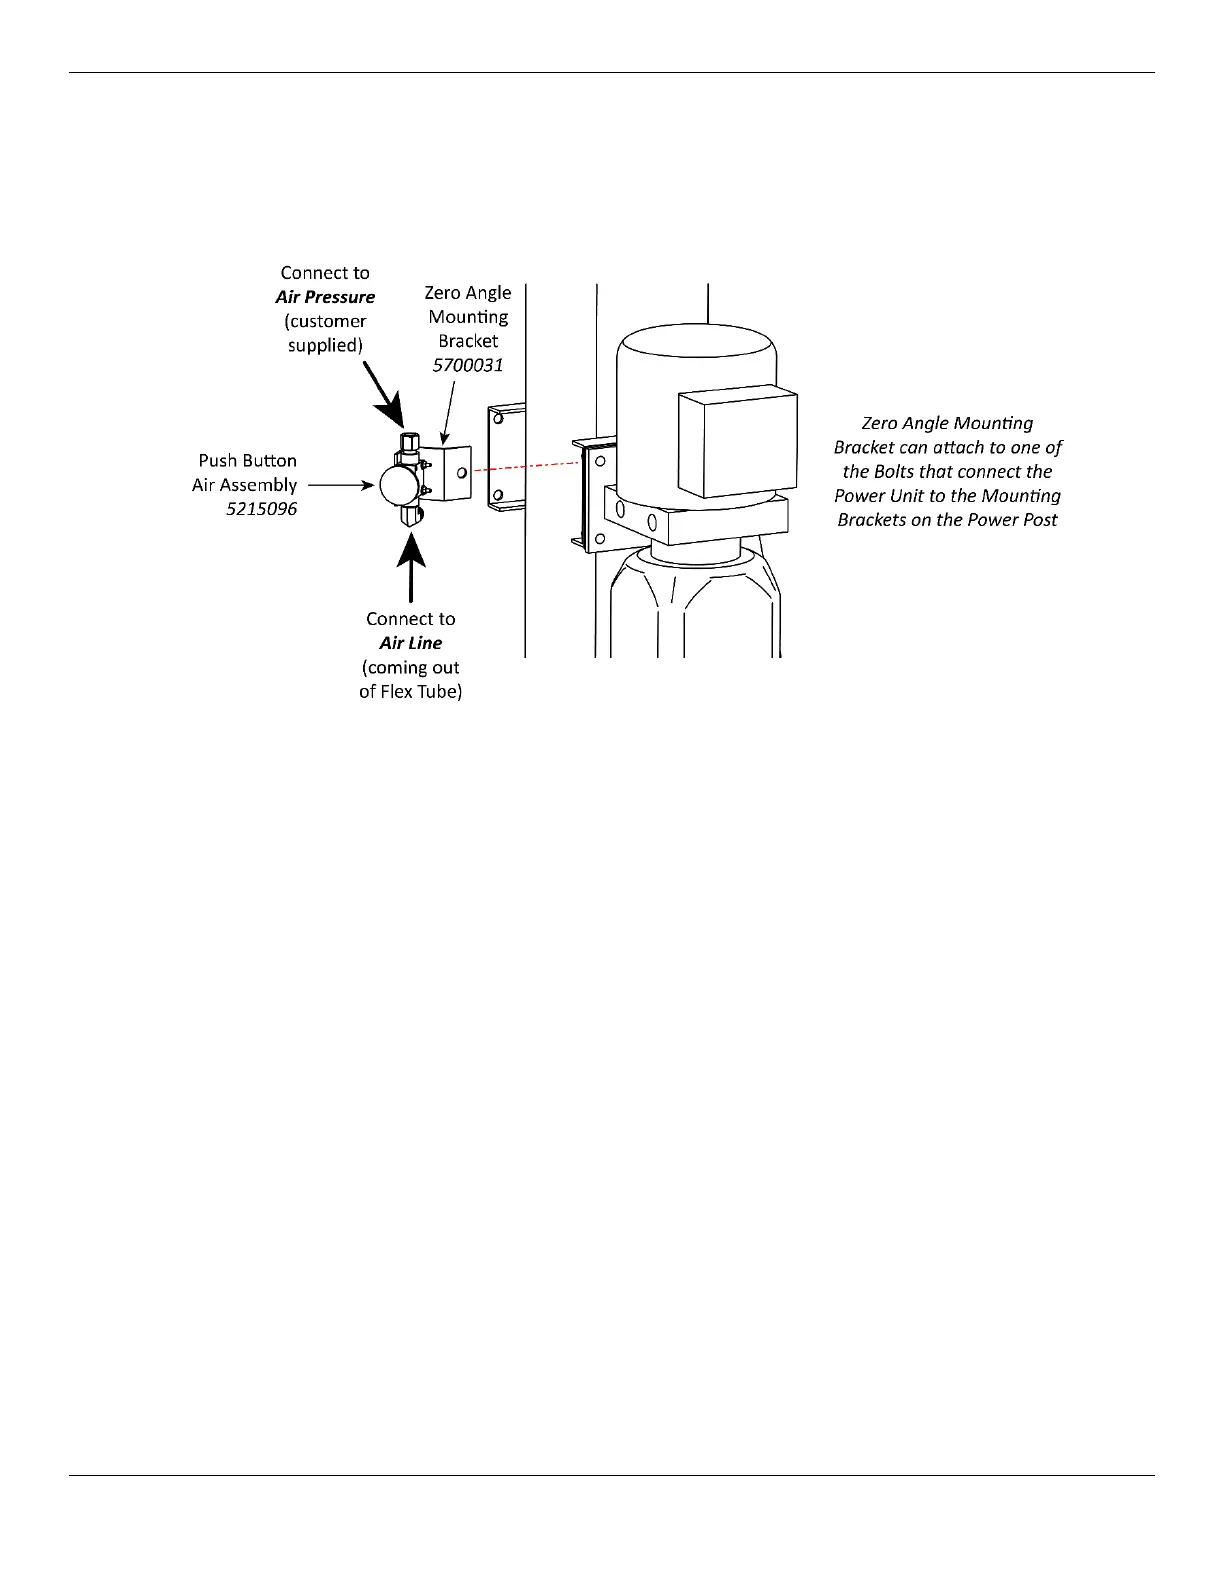
Drawing shows the Pushbutton Air Valve Assembly and its connections to the Mounting Bracket on
the Power Post. Not all components shown. Sample Power Unit shown.
To install the Pushbutton Air Valve:
1. Find the necessary components: Zero Angle Bracket and the Pushbutton Air Valve Assembly.
2. Connect the Zero Angle Bracket at the desired location (if it has not already been connected).
The best location is one that is visible and easily reached by the Lift operator.
3. Connect the Pushbutton Air Valve to the Zero Angle Bracket.
Use the two holes on the Pushbutton Air Valve on the side away from the actual pushbutton. If you
use the holes next to the pushbutton, the Zero Angle Bracket interferes with the pushbutton when
you try to use it.
4. Connect the Air Line Compression Elbow Fitting and the Straight Expander Fitting to the
appropriate locations on the Pushbutton Air Valve.
The Elbow Fitting connects to the opening labelled CYL. The Straight Fitting to the opening
labelled IN. See the drawing above.
5. Attach the Air Line to the Compression Fitting and the customer-supplied air to the Straight Fitting.
NOTICE: The Return Line also comes out of the Flex Tube and is the same kind of tubing as the
Air Line.
Do not attach the Return Line to the Pushbutton Air Valve by
mistake
. Double check to make sure you are attaching the Air Line to the Pushbutton
Air Valve.