HDS-14LSX / HDS-14LSXE Lifts 23 P/N 5900162 — April 2018 — Rev. F3
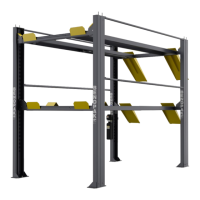
Securing the Ladders
Because it is much easier to secure the Ladders at the bottom of each Post
after
the Crosstubes
have been raised, that procedure is described here.
Note: The following procedure assumes that the Ladders are in place and secured at the top. If this
is not the case, return to Installing the Ladders.
To secure the Ladders:
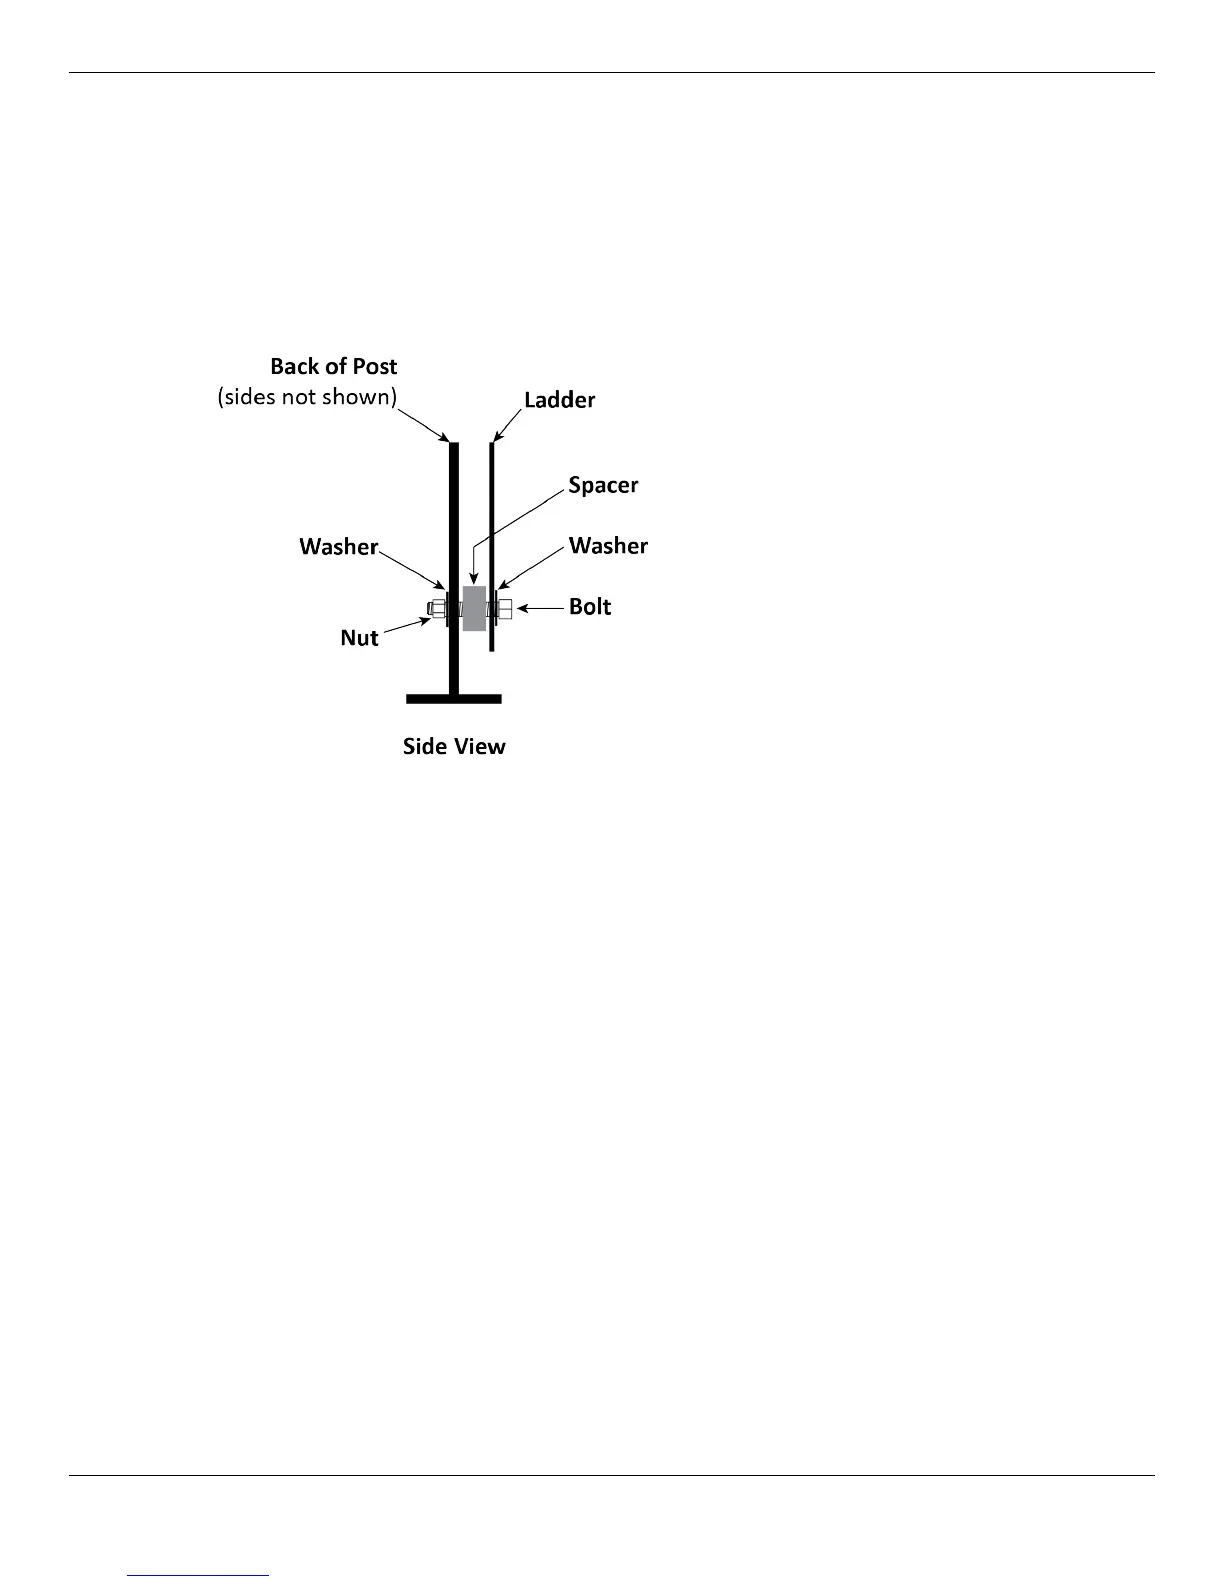
1. Locate a Bolt, Washer, Spacer, second Washer, and Nut.
2. Put a Washer next to the Bolt head, then insert the Bolt just through the elongated hole near the
bottom of the Ladder.
3. Put the Spacer into position between the Ladder and the back of the Post.
4. Push the Bolt through the Spacer and then through the back of the Post.
5. Take the second Washer and the Nut and install them on the end of the Bolt; secure the Nut.
6. Perform the same procedure to secure the other three Ladders on the Lift.
Note: Do not securely tighten the Top Nut at the top of the Top Cap at this point. The Top Nut
and the Stop Nut will be used later to make sure the Lift is level. They can be securely
tightened after you do the final leveling of the Lift; refer to Final Leveling for additional
information.
⚠ WARNING Make sure that all four Ladders are correctly installed and secured. If not, the Lift
may not be able to hold a vehicle, which is a danger to anyone under the vehicle or
around it.