HDS-14LSX / HDS-14LSXE Lifts 37 P/N 5900162 — April 2018 — Rev. F3
Before routing your Cables, make sure the Piston of the Hydraulic Cylinder has been extended, which
is part of the procedure described in Installing the Return Line.
If the Piston has
not
been extended, you will need to do that before routing the Cables: remove the
Elbow Compression Fitting from the Return Line Connector, extend the Piston using air pressure or a
pulling device, then reinstall the Elbow Compression Fitting.
Note: There are separate procedures for routing each Cable.
To route Cable A to the Power Post:
1. Find the four Cables for your Lift model.
Check the labels on each Cable to make sure you have the correct ones.
2. Find the six Cable Sheaves that were taken off earlier.
The Gusset Sheaves come installed and do not need to be removed.
The six Cable Sheaves are identical, but the Cable Sheave
Pins
are different. Be sure to use the
correct Cable Sheave Pin when it is time to reinstall them. The Cable Sheave Pin at the Front of the
Lift, which holds two Sheaves, has two lubrication holes inside it. The Cable Sheave Pin at the
Rear of the Lift, which holds four Sheaves, has four lubrication holes in it.
3. Loosen the Retaining Plate enough so that you can slip the Button end of each Cable into its spot
on the Tie Plate.
Do not take the Retaining Plate off
, just loosen the Nut enough to give you enough room to
slip the Button end of each Cable into place.
4. Find Cable A, unscrew the Nut from the Threaded end (the Nut cannot be on during routing, but
keep it nearby, you will need it again soon), slip the Button end past the Retaining Plate and into its
slot on the Tie Plate, then route the Threaded end of the Cable towards where its Cable Sheave
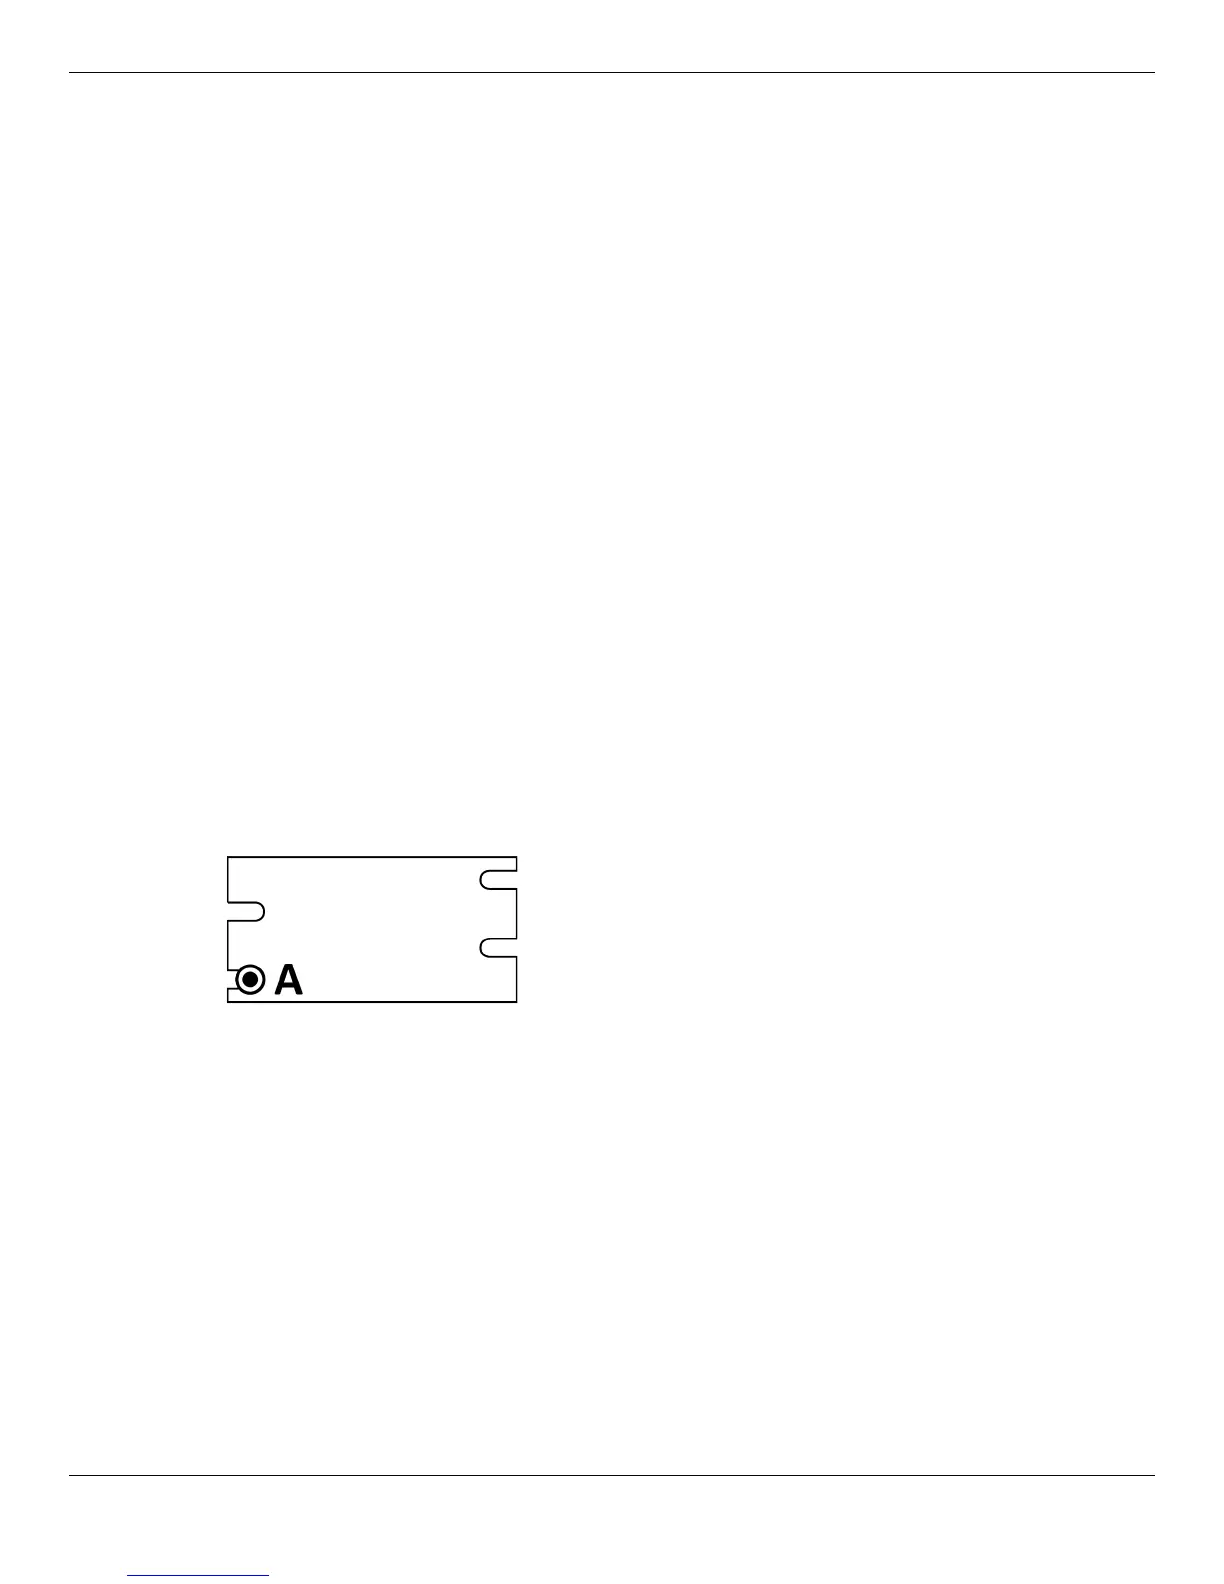
will be at the Rear of the Lift.
Drawing shows Button end of Cable A in its slot on the
Tie Plate.
View is from Front of Lift looking back towards the
Power Post. Not to scale. Not all components shown.
5. Route the Cable into the Window on the Crosstube, push it toward the Power Post, then pull the
Threaded end out of the Crosstube at the bottom of the Gusset. Let the Threaded end hang out of
the Crosstube for now.
6. Put Rear Sheave A in place, at the bottom of what will be the stack of four Sheaves when all four
Cables are in place, then make sure Cable A is seated in Rear Sheave A.
7. Remove the Cable Lock Pin on the bottom of the Gusset on the Power Post.
Keep it handy; you will be putting it back in place soon.
8. Route the Threaded end of Cable A
under
the Gusset Sheave, then up towards the Top Cap at
the top of the Post.
When you start routing the Cable up, it
must
be between the Gusset Sheave and the Slack Safety
Sheave, as shown in the drawing below.